Tamron Blogs
Share the article:
More Photo Tips | Video Gallery | Photo Gallery | Enewsletter sign-up
The Niche Of Architectural Photography
Images and tips by Hernan Rodriguez
Just like any discipline in art, architectural photography is something you arrive at by the desire and appreciation of the craft. Though you might have a fond appreciation, you just don’t arrive there by chance without intent. When I was in art school, there were two things I had a great passion for learning and pursuing as a career. One was design and illustration, which was greatly based on portrait drawing, and the other was architecture. When I made the transition into photography, I naturally gravitated to portraiture, and to a lesser extent, architectural photography. During the two-year Covid shutdown, I revisited this early passion of architecture. I spent time working on expanding my skill set and retraining my eye to see outside of the confines of portrait photography. They are two completely different disciplines. I also came to the realization that no matter what I photograph, I have an innate vision to see things in a specific way. I saw buildings as people. I began to identify the beauty of the structures, which gave me a starting point for my composition and perspective. It also allowed me to envision the lighting qualities I wanted to showcase the structures. Just like in portrait photography, the quality of light will have a huge impact on the outcome of the image. Shooting at different times of the day will influence the shadows and brightness of the architecture. Most great architects methodically considered this in the design of their plans, both for exteriors as well as interiors. Photographing architecture also forces the eye to see beyond the surface, constantly searching for symmetry and balance. Sometimes the opposite applies, in which an asymmetrical approach might bring balance to the final image.

Click image to view larger
You can find a high demand for architectural photography, from high end commercial, editorial, as well as advertising. You might even consider working with property agents and architects in creating collateral material to promote properties. These are the specific standards and considerations I implement when photographing architecture.
PREPARATION
Just like any job I take; I want to gather as much information as I can about the project to determine my approach. Is it for web or print, and if for print, is it for large format? I want to know the history of the architect and the style he intended for the design of the structure. I want to meet my client’s expectations. This also helps me determine my approach to the shoot, regarding time of day, equipment, and lighting style. If possible, I will meet with the client at the property a day before to assess the lighting conditions and the brightness of the existing light. I’ve shot from all-natural light, to mixed lighting scenarios to get the job done. One property I photographed was a beautiful 15-million-dollar estate in Newport Beach California. In my interview with the property owner, I come to find out that the design of the house was by renowned architect Paul McClean who is known as the home designer who defines California luxury living. He has built houses for the elite in Hollywood, including Beyonce and Jay-z, Calvin Klein, and the late Swedish DJ Avicii to name a few. What was important for me to know were the elements that characterizes his design. Smooth staircases, glass walls and waterfalls that build emotions for the owners. McClean told the Orange County Register, “Our houses are all about light and water”. For me as a photographer, this was important to know and not miss capturing this emotion. What was interesting as well was that the house was specifically and completely furnished with furniture and artwork to compliment the style of the house and had to be purchased as such. It made sense when photographing the house, as I found everything to be in perfect balance and harmony throughout the entire space. This was a treat for me.
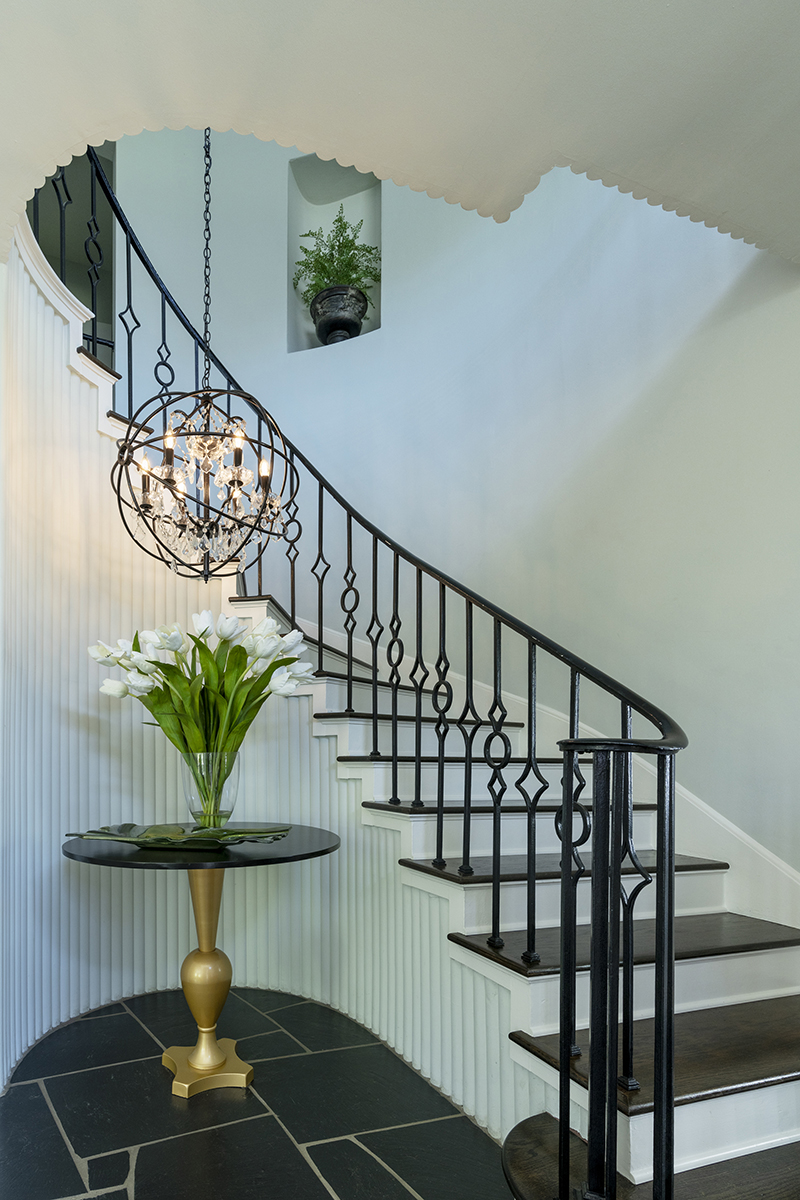
15mm, F6.3, 1/10 sec., ISO 200
Click image to view larger
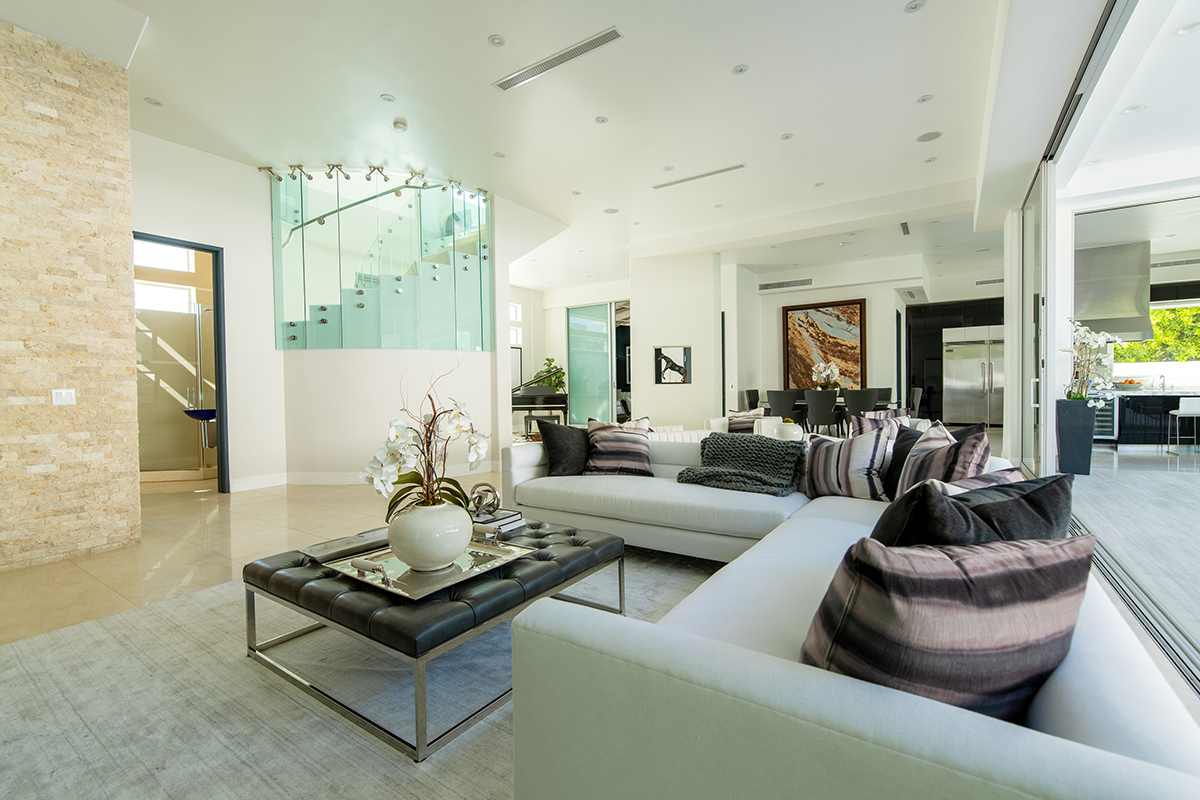
15mm, F7.1, 1/250 sec., ISO 320
Click image to view larger
EQUIPMENT CHECKLIST FOR ARCHITECTURAL PHOTOGRAPHY
For the most part, there really isn’t a need to get too complicated when shooting architecture. A great DSLR, with multiple lenses is your best starting point. The new generation of mirrorless cameras also reproduce amazing high-resolution images. A solid tripod is a must, and a remote shutter release is a great consideration. I use a Manfrotto 055 with a swivel head and the video lever to fine tune my composition. Make certain your tripod includes the bubble level to align your shots perfectly. I am usually stacking exposures, sometimes using speeds as low as 1/10th of a second. This avoids camera shake when releasing the shutter. Very important when you sandwich the images in post-production. I also shoot everything in Raw, which gives me increased latitude adjustment options. A set of Neutral Density (ND) filters are also a great option when shooting buildings outdoor in daylight. You can control overexposing skies for a well-balanced exposure.
LENS SELECTION: My personal lens selection is the Tamron 15-30mm, 24-70mm, and 35mm prime. For artistic shots, I’ve used the 90mm macro, which allows me to focus in on elements with great detail, while blurring out the entire scene. The 15-30 I use quite often. It is not an extreme wide lens, so lens distortion is eliminated. If space permitting, I will use it in the mid-range of 24-28mm. I also shoot loose and re-crop in post. This also keeps all important elements in the middle of the lens optics, maximizing lens clarity and image quality. Because of the amazing lens optics, I’ve shot at the low range of 15mm to accommodate an entire scene in tight spaces, without obvious lens distortion. When shooting a wide perspective, I avoid shooting from extreme camera angles, which will bow your vertical lines. This is one of the biggest errors encountered when starting in architectural photography. Maintaining straight lines. When possible, shooting at a straight angle to a room or architectural structure will maintain straight vertical lines. Sometimes you do not have the option but to shoot from a low angle. In such a case, the best approach is to give yourself plenty of room around the desired crop and realign your verticals in post-production. The second step is to then re-crop to your desired composition. The 24-70mm lens is a great “all around” lens and helps fill the gap of a wide lens. If I have the space in my composition to use it, I will grab this lens for an entire job. It gives me very accurate perspective throughout the entire focal length range. I also use it for tight shots of interesting elements of the architecture, or sometimes for highlighting unique artifacts and furniture pieces in the interiors. The 35mm prime I like to use as a general lens for capturing the entirety of the architecture, most always for exteriors. It also shoots a similar perspective to what the natural eye is accustomed to seeing. The exterior of the Santa Monica property is an example of the perspective this lens shoots.
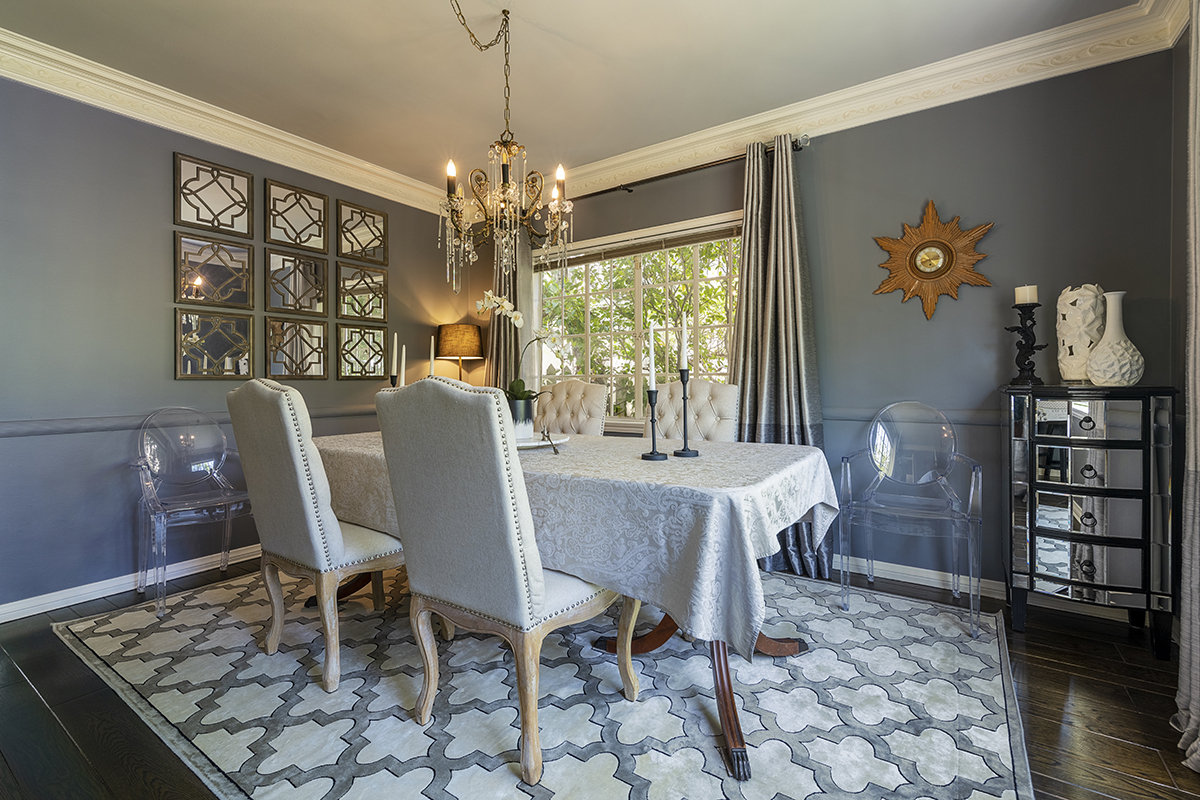
15mm, F6.3, 1/30 sec., ISO 200
Click image to view larger

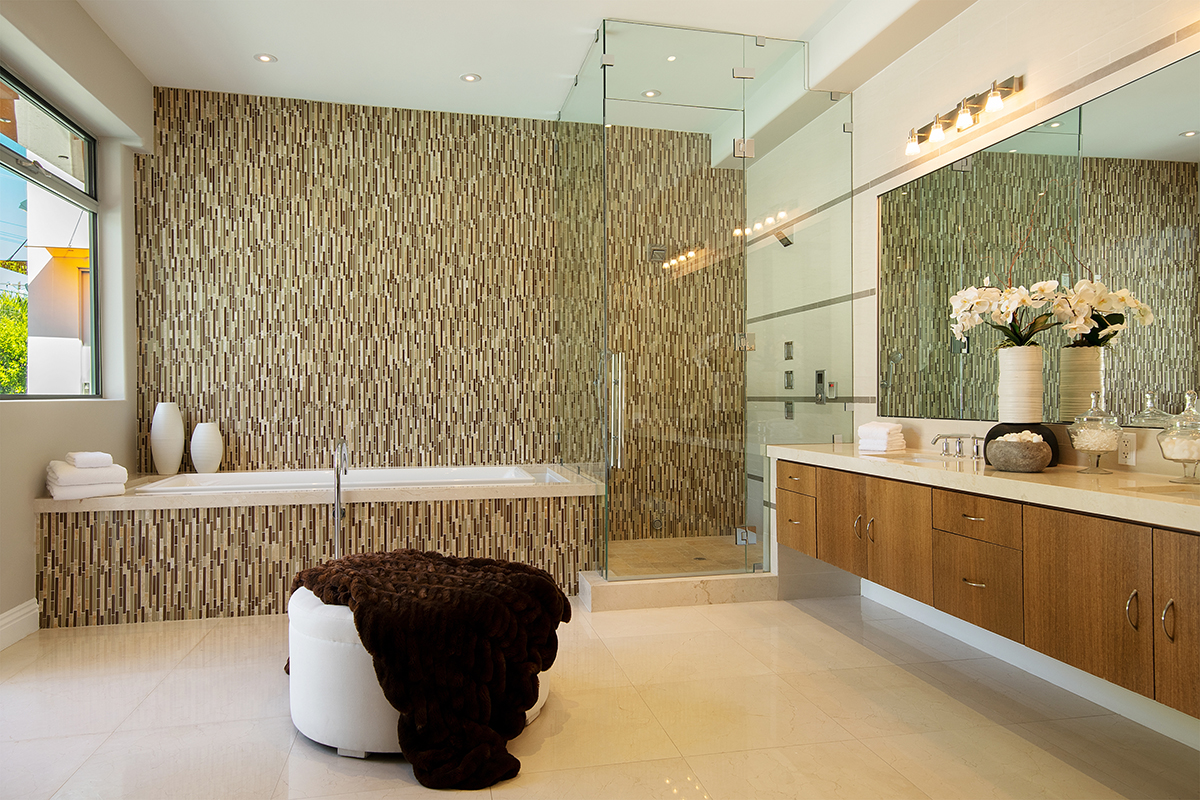
15mm, F7.1, 1/200 sec., ISO 320
Click image to view larger
LIGHTING: For architectural photography, natural light is always the most pleasing and the least complicated. You just need to choose the right time of the day to be successful. Let me start with the most complicated setup. This is usually when shooting commercial spaces or low-lit interiors, where auxiliary lighting is required. In such cases portable strobes or power packs with multiple heads would be required, which will allow you to spread the light evenly throughout the selected location, thus avoiding light falloff. It also will keep sharpness throughout the depth of the entire scene, if that is what is required for the job. When I am lighting such scenarios, I like to use four strobes equipped with pure white satin umbrellas, (shoot – through style). I bring these as high as possible and facing the ceiling and spread throughout the space. My objective is in using the ceiling as a large light source, similar to using a large light bank, thus avoiding hard directional lighting. NOTE: For a broader light spread, make certain the light is not too closely focused on the ceiling. I am also exposing for the ambient exposure, and I balance the power of the strobes as to not overpower the existing natural light. Overpowering your flash units will give the space an unnatural feel, increasing the shadows and contrast of the overall scene.

15mm, F8, 1/320 sec., ISO 200
Click image to view larger
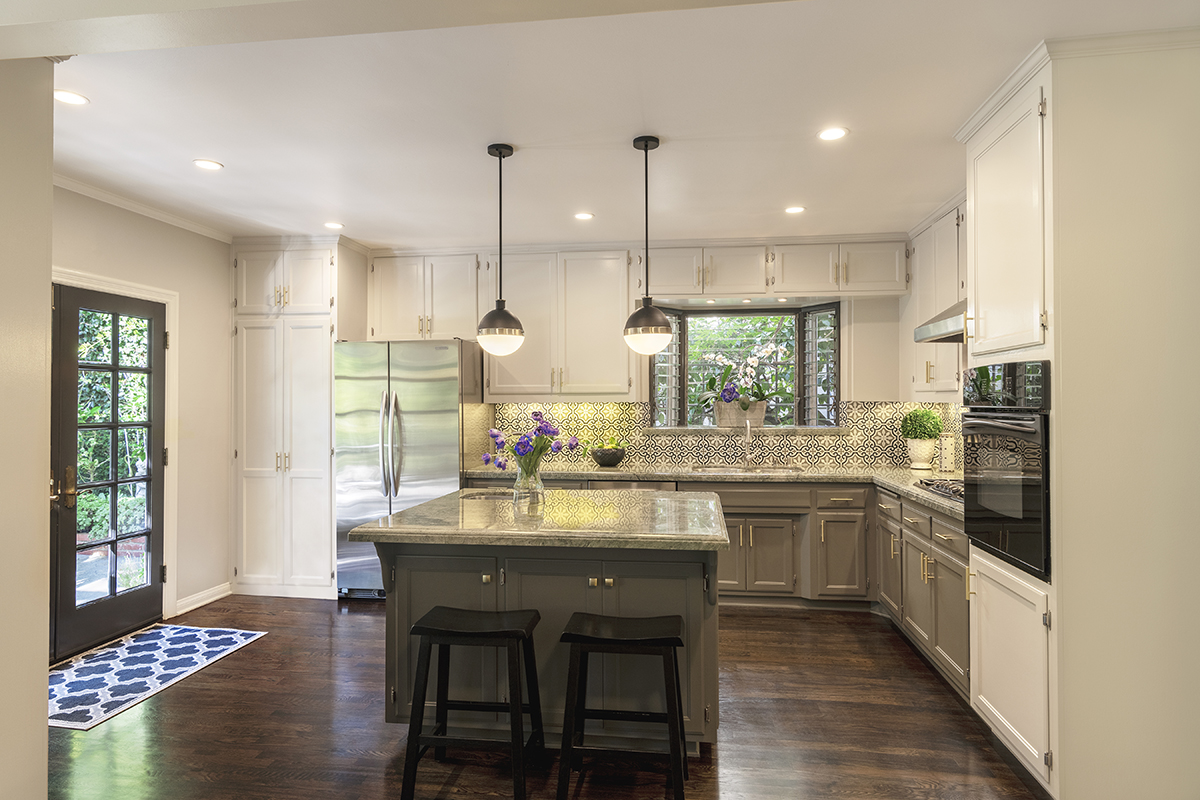
Another great lighting option to have in your camera bag are a set of compact flashes with on-camera remote, which allows you to control power output. I usually have a set of four, and though I don’t use them often, they have been lifesavers on a job or two. These I can easily tuck in behind furniture as a kicker, or sometimes I might use it with a CTO filter to add an extra kick of light to an incandescent lamp, adding that extra accent to an image, while also maintaining proper white balance. I have also used a speedlight set at very low power with a light blue filter to kick extra light on glass items. An important note to keep in mind while lighting glass, is one of the principles of photography; “Angle of incidence is angle of reflection”. Front lighting glass will reflect the small light source from the angle of placement back to the lens at the angle reflected. I usually will backlight or bounce the light on white cards or a white wall. You can see this on the glass swan figurine, which was an important highlight for the property owner of the Newport Estate.
22mm, F7.1, 1/40 sec., ISO 320
Click image to view larger
STAGING AND AVOIDING CLUTTER
The devil is in the details. One important note you can easily miss, which can make or break a shot is clutter, or items in a scene that are not properly placed or misaligned. I remember early on when shooting high end properties, I’d get back home to my computer, and I’d see all these items that would show up out of place. I had to spend tedious hours fixing in post or I was simply not able to use at all. Especially when shooting with a wide-angle lens, you only tend to see what is obvious in front of you, but a wide-angle lens carries great depth of field with a broad angle of view. Funny, but one time I thought I had the most amazing shot of an interior, and once I pulled up the images, I saw a purse with a soda can that was left in the center of the room far back in the scene. Take the adequate time in staging the shot before looking through the narrow viewfinder. Align pillows, vases, artwork, and furniture pieces. If table runners, fabrics or bed sheets are to be used in the shot, make certain they are wrinkle free. Remember, you are there to display architecture and interiors at its best. Don’t be afraid to move furniture around if the property owner allows you, or you can simply remove it from the scene. Remember, less is more. Less clutter also is much more pleasing to the eye, as it does not have to struggle in finding a focal point. When shooting exteriors, you sometimes do not have the option to move things around, so you must move around and find the best possible angle, void of unwanted elements or distracting scenery such as telephone poles, street signs or anything else that can detract from the architecture. I call these items “street furniture”. I can sometimes resolve this problem by switching my lens to a 70-200mm lens and recomposing a tighter shot. Simple solution and sometimes it makes for a more interesting shot.
19mm, F6.3, 1/25 sec., ISO 200
Click image to view larger
CAPTURE AND IMAGE PROCESS
When I am commissioned for a job, my approach might vary, and it’s based on the project and on the budget. If I am shooting for editorial purposes or for a general real estate sale, it becomes less involved. The exception is in the sale of multi-million-dollar properties. For the most part, in editorial or real estate sales, what the client is looking for are properly exposed images, showcasing the style of the architecture with great composition. In editorial though, you might have a little more creative freedom and sometimes a person might be included in the property. I will usually meet with my client at the property and run a few tests ahead of the shoot. This helps me determine the best time of the day to shoot, without the lighting conditions being too extreme. Shooting in Raw, I take multiple exposures of each scene, making certain there is information in the shadows while not overexposing the highlights. This approach makes it very simple for me in post-production.
For high-end properties, images for collateral print or large format printing, a lot more is involved in capture and post-production. While maintaining the camera on a tripod, I start with a base exposure of 125th of a second set at f/7.1, and bracket my shutter speed 3 stops under and 3 stops over. This will later be stacked in post-production. You do not bracket the aperture as this will change your depth of field. The objective here is to capture maximum exposure for the shadows, as sometimes you are shooting in low-lit interiors with dark wood or furniture. Dragging the shutter speed 3 stops allows the ambient light to fill in the shadows in interiors, creating a natural well-balanced look. Bracketing at 3 stops over your set shutter speed will allow you to retain maximum exposure and detail in the highlights, both for the interiors and exteriors, including the skies.
Once I am done with the session, I then open in Camera Raw and select the best four images to stack. I usually will choose an image that is two stops underexposed, and open the shadow value just a hint, and an image three stops over, and recover some highlights, stacking this along with my base exposure of 125th of a second. Once making these adjustments in Camera Raw, I select all the images to be used, and by clicking the shift key, I open as “Open Objects” in the bottom menu. This allows me to double click the adjustment icon in each layer and make further adjustments to the original image. As a quick overview, by capturing multiple exposures and stacking them as layers in Photoshop, I can create layer masks, and isolate specific areas of the image. I will have the base exposure visible, and place the dark exposure over that, and lastly the brightest exposure above that. I then can blend in the best exposure of shadows and highlights of each layer with a brush, gradient tool or blending mode options. I also use a broad selection on specific areas with a feather radius of 45-60, for a seamless transition of tones and values.
FINAL THOUGHTS
If you are ever considering starting a career in architectural photography or want to try it as a hobby, the best option is practice. Just simply get out and shoot. Try shooting at different times of the day, from early morning before the sun is out, to dusk, where you can see some amazing architectural interior lighting. Shoot when the weather changes. I’ve taken some great exteriors where there were some beautiful Cumulus clouds against the vibrant blue California skies, adding a great graphic element to the final shot. Sometimes gray skies work the best for high key architecture. You can see this in the Santa Monica exterior where the skies are almost white, creating a high-key image and allowing the exterior primary colors to command the scene. It probably would not have been as successful if the skies had been bright blue. Study different styles of architecture and periods. Just as important is to study the designs of renown architects. This will help you train your vision in identifying pleasing lines and composition, to the point of becoming instinctive. I also like to be inspired by imagery in architectural books and magazines. You will usually see some amazing compositions and camera angles which you can use on your next project. Take note of perspective and converging lines in a scene. You will almost always find accurate vertical lines in the architectural images. This should help it become second nature to you.
More Photo Tips | Watch Videos | Learn More About Tamron Lenses | Photo Gallery