A Beginner's Guide to Night Sky Photography
More Photo Tips | Video Gallery | Photo Gallery | Enewsletter sign-up
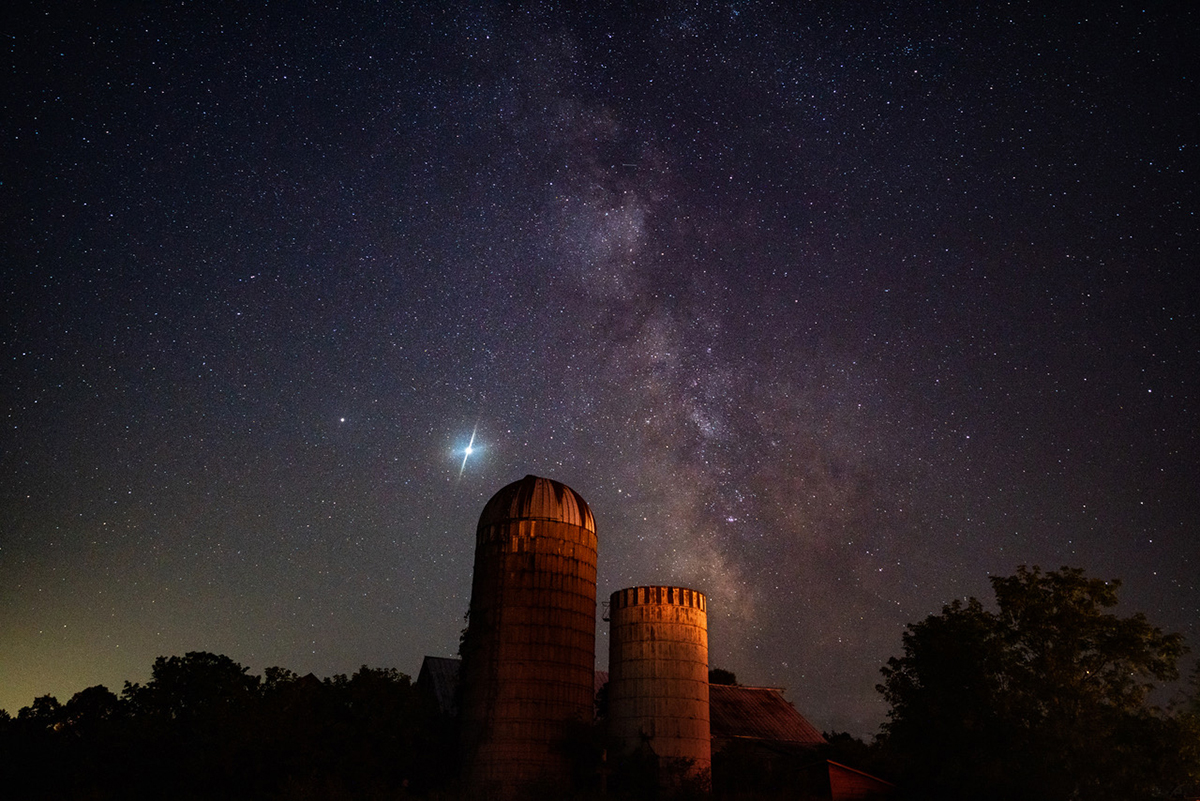
Both amateur and professional photographers love night sky photography, also called astrophotography. Astrophotography is taking pictures of things in space like stars, galaxies, meteors, and planets against the dark night sky.
Capturing the beauty of the night sky with your mirrorless camera and lenses is a rewarding photography experience. However, photographing night skies requires the right gear, careful planning, and execution. Photographing the Milky Way, star trails, or other celestial phenomena may be on your photo bucket list. This beginner's guide to night sky photography gives you the basic setup and tips needed to capture stunning night sky scenes.
Click image to view larger
Equipment
The right camera, lens and other accessories will improve your success of capturing great night sky images.
• A fast wide angle lens with an aperture of f2.8 is recommended to gather as much light as possible. Focal lengths of 17mm or 20mm are ideal. The Tamron 17-28mm F2.8 for full frame cameras or the 11-20mm F2.8 for crop-sensor mirrorless cameras are great choices.
TAMRON 17-28mm F/2.8 Di III RXD for Sony E-mount mirrorless cameras and with mirrorless cameras when using the manufacturer adapter. The lens offers a wide-angle zoom range combined with a large aperture ideal for night skies.
The 17-28mm F2.8 is easy to carry and delivers excellent image quality. The lens is the smallest and lightest weight zoom lens in its class yet offers outstanding optical performance. The 7.5" MOD at the wide end encourages richly expressive and creative photography. This lens has weather sealing and a fluorine coating on the front element for easy cleaning and uses Ø67mm filters.
TAMRON 11-20mm F/2.8 Di III-A RXD is designed for Sony E-mount APS-C mirrorless cameras. It provides an ultra-wide angle zoom range with a large aperture, perfect for capturing night skies. When converted to the full-frame format, this lens delivers a focal length equivalent to 16.5-30mm.
Click image to view larger
The 11-20mm F2.8 may be small and lightweight, but it still delivers top-notch image quality. It is the most compact and lightweight zoom lens in its category, all while maintaining exceptional optical performance. It features weather sealing and a fluorine coating on the front element for easy cleaning and uses Ø67mm filters.
• A sturdy tripod is essential to keep your camera steady in low light. This helps prevent blurriness and ensures clear photos. Tripods come in many styles and you can learn about selecting one by visiting this link.
• Since you will be shooting in the dark, it is a good idea to weigh your tripod down with your camera bag. If you bump into your tripod in the dark, this will help it from falling over.
• To prevent camera shake when releasing the shutter, use a remote control. If you do not have a remote control, use the self-timer function on your camera. You can read about different remote controls here.
• Always use the self-timer with a 5 or more second delay when taking your photo to avoid shaking the camera. Pressing the shutter release button carefully is not enough to prevent this.
• Affixing gaffer's tape over the focus ring can help maintain your focus point throughout your shooting session. You can remove gaffer's tape easily from your lens without leaving behind sticky residue. Do not use electrical tape or duct tape.
• Use a Night Sky App on your smartphone to know exactly the right time to reach your location, set-up and take your images. Apps like Photopills assist in scouting locations during the day. You can preview where celestial features like the Milky Way will appear in the scene at a given date and time.
Click image to view larger
• When taking photos of the night skies, the environment is pitch dark. A headlamp with a red light is a must-have accessory. The red lamp not only prevents light pollution from white light, but also helps your eyes adjust in the dark. The headlamp also allows you to keep your hands free so that you can easily adjust your camera and lens.
Settings
Now that you have your gear ready, follow these guidelines for camera settings for night skies photography. Since you will be in the dark when out in the field for your night of shooting, we recommend you take time beforehand to get to know these settings. Learning how to adjust your camera settings beforehand can prevent you from struggling with your camera. And this will prevent you from missing out on capturing great photos.
• To avoid blurry images, disable the image stabilization on your lens. This feature can mistakenly try to correct for movement that isn't actually there. Turn off the stabilization on both your lens and your camera.
• Manually set your white balance for a temperature of 3400 to 3900 Kelvin. Leaving the white balance in the auto mode may produce unpleasing color shifts in your image.
• Start with an ISO setting of 3200 to increase the sensitivity of your camera’s sensor and capture more light. If your shot is perfectly sharp, try decreasing the ISO until you cannot go any lower. If your images are blurry, you can increase your ISO.
• Most of today’s mirrorless cameras can handle high ISO settings without introducing excessive noise. In post processing, you can eliminate noise with the new AI features in programs like Photoshop and Lightroom. You may also try presets designed for astrophotography images to get the best processed result.
• Next, set the aperture on your lens to its widest opening to gather the most amount of light possible through your lens. Choose a lens with a wide aperture, such as F2.8 or faster. A slower lens will make you use slower shutter speeds and higher ISO settings.
• You will be taking a long exposure image. Begin with a shutter speed of 30 seconds.
• Change the exposure time by gradually adjusting the shutter speed. Use a faster shutter speed such as 20 seconds to darken the image. Or use a slower shutter speed to brighten the image, 10 seconds, for example, depending on your desired outcome.
Click image to view larger
• To take clear pictures of a bright star or planet, change your camera to manual focus mode. Use the live preview on the screen to adjust the focus until the star clusters are sharp. You can affix gaffer's tape to secure the focus ring in place once focused.
Composition
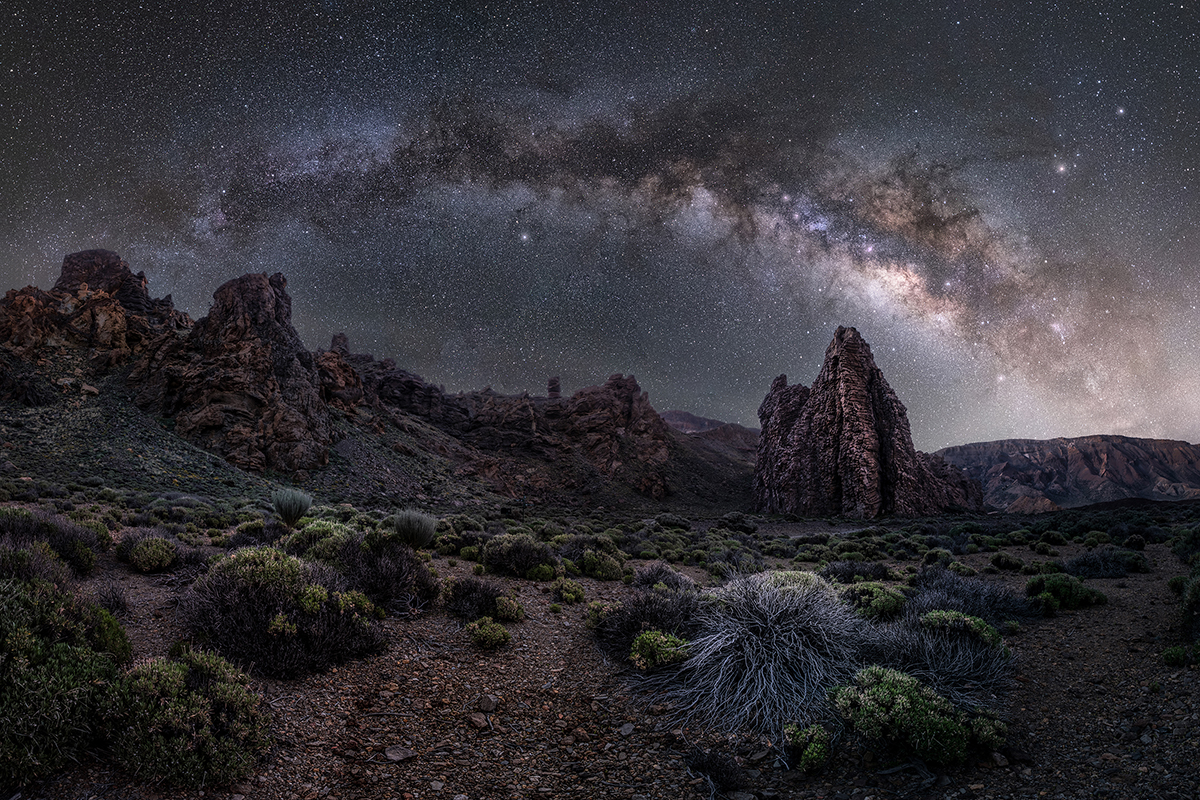
Scout your shooting location during the day with an app like Photopills to help you identify satisfying compositions. Putting mountain ranges, tree, or other objects in your frame grounds the image and provides a sense of scale. The app will tell you exactly where and when the Milky Way will appear over your selected elements. You can then arrive in time to setup and take your photos for as long as you like.
Click image to view larger
If your composition includes a road, wait for cars driving away from you to come into view and then trigger the shutter. The taillights from the car will leave a long trail along the road, giving your image location context.
You can also add lit items into your foreground such as your camping tent for interesting images that tell the story of your trip.
Dark Sky Locations
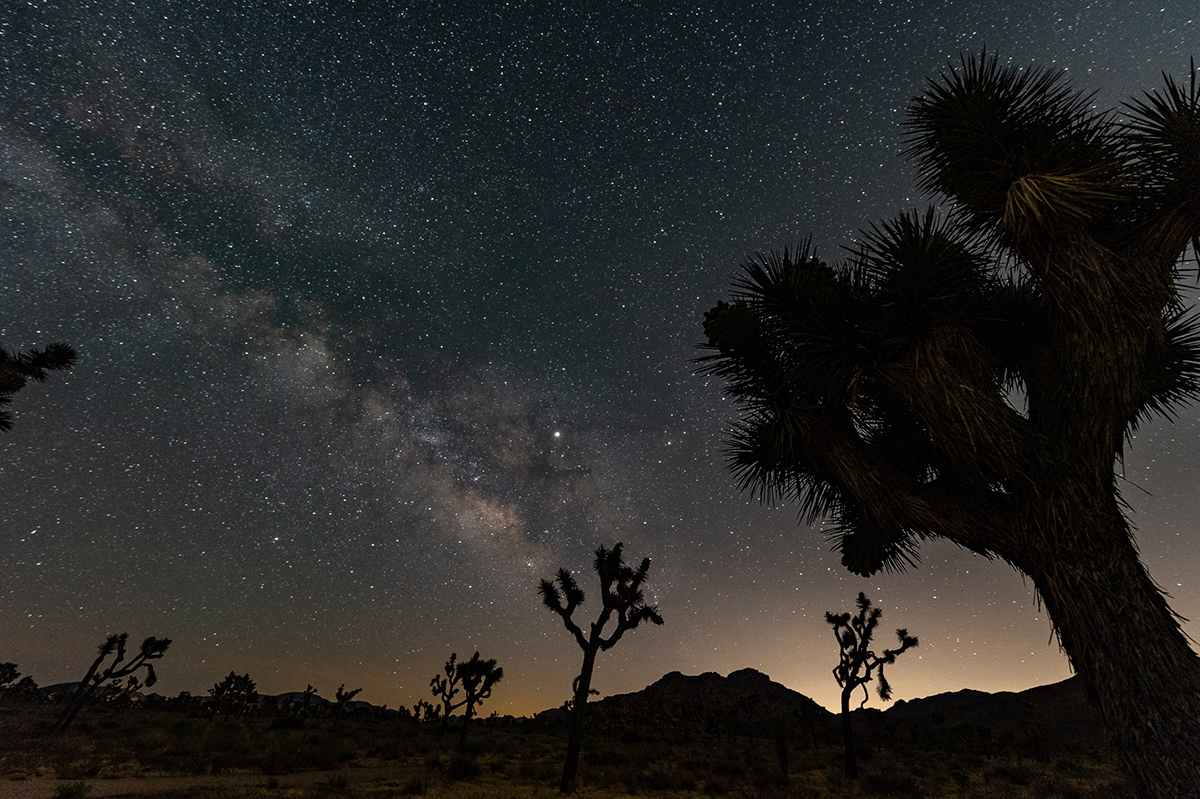
In most cases, you will need to travel to find the right place for night sky photography. Go to a dark sky area without light pollution to take great pictures of the night sky. These places have guaranteed dark skies for great views of the Milky Way, bright stars, and planets, making your night sky photos even better.
Official dark sky cities maintain lighting policies that preserve the night sky darkness. You can find a Dark sky city by visiting darksky.org, the website of the International Dark Sky Places.
Remember that your success is also dependent on the weather. Unfortunately, this is one aspect of your experience that you will not have control over. Plan to spend several days in the area so that you will have more than one opportunity to capture your images.
Moonlight can also impact your images by introducing bright light into your photos. Before your planning your trip, review the moon phases for your location and plan accordingly.
Conclusion
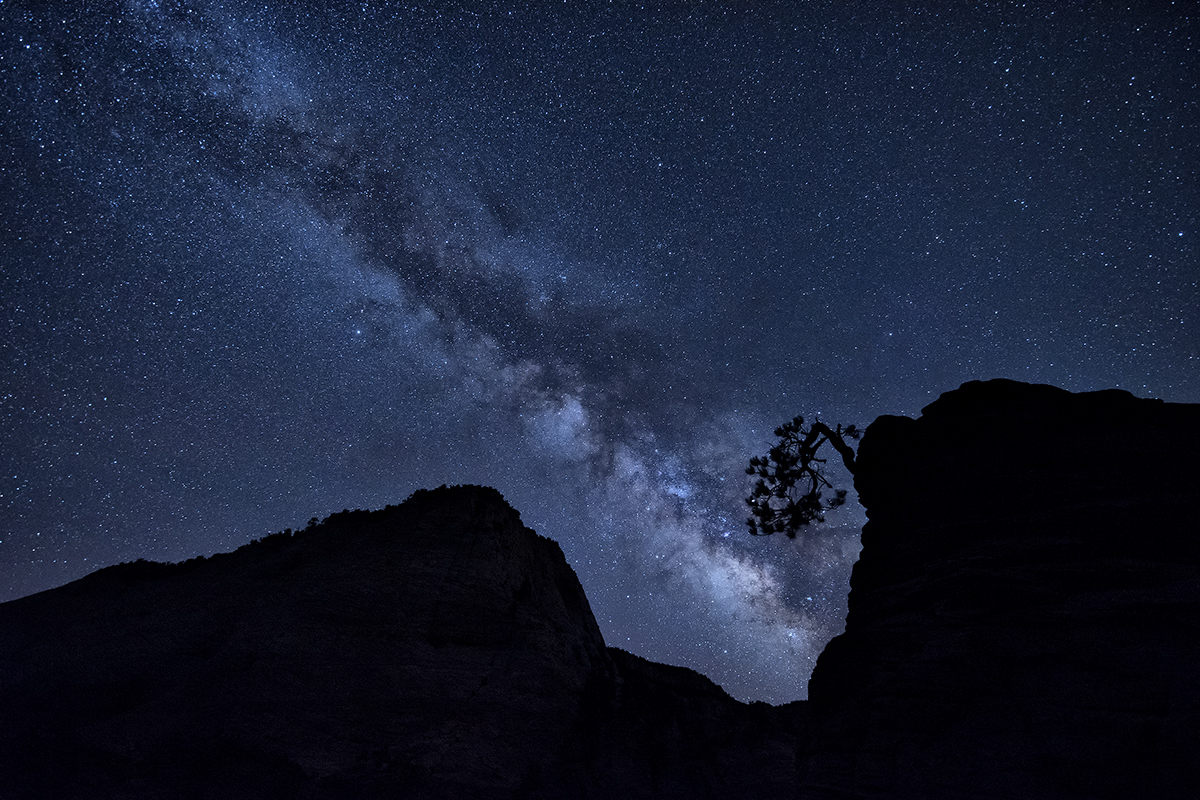
Follow these simple tips and techniques to start taking amazing pictures of the night sky. To get expert night sky shots you will want to display and share, remember that patience, practice, and paying attention to details are key.
Related Articles
Want to learn more about night skies photography?
Download TAMRON Magazine Issue 9 with our cover story “Pro Tips for Night Photography: Special Guide to Night Skies.”
The Rush of Discovery: Astrophotography Version
The Adrenaline Rush of Astrophotography
Lens Tips for Night Sky and Meteor Shower Photography
More Photo Tips | Watch Videos | Learn More About Tamron Lenses | Photo Gallery