Tamron Blogs
More Photo Tips | Video Gallery | Photo Gallery | Enewsletter sign-up
How to: Use Image Stabilization
When I first started in photography, I remember R.T saying to me that if a slide or a negative was not sharp to throw it away because it wasn’t going to get any sharper by just simply sitting there. Photography has certainly come a very long way since I first picked-up a camera and to this day that remains true.
Digital technology continues to yield us higher megapixel cameras and sharper lenses than ever before, so focusing is more critical than ever. I hope that someday this will not be the case and you can fix it in post. For now, there are several factors working against you when it comes to getting a sharp image. Some of those being that your camera’s auto focus system and your lenses need to be in sync or calibrated. If you focus manually, the camera’s diopter needs to be adjusted to your eye and the flange focal distance must remain constant or unchanged.
An image can be out of focus or blurry. An out of focus image is caused by the distance between the subject and the camera changing, while motion blur is caused by either the subject or the camera moving when using a shutter speed that is deemed to be too slow. When photographing a moving subject, you must make sure that the shutter speed is fast enough to freeze it. When shooting handheld with a lens longer than 100mm it is very crucial that you remain as steady as possible. The rule of thumb is that you also select a shutter speed that is equal to or faster than the focal length being used e.g., 500mm = 1/500 sec. and if you are using a camera with a crop sensor remember to multiply by the crop factor to give you the effective focal length.

Image Stabilization off
Image stabilization is a tool designed to aid you with blur that is caused by handholding a lens at slower shutter speeds than recommended. You might know in body or in lens image stabilization by names like IS, VR, OS, SR, or Steady Shot. Tamron’s version of in lens image stabilization or VC (Vibration Compensation) corrects for Horizontal, Vertical and Diagonal movements. There is also an amount of correction that a lens can provide, usually given in stops 3, 4, 4.5, 5 etc., simply put you can use a lens at 3, 4, or 5 shutter speeds slower than the recommended.
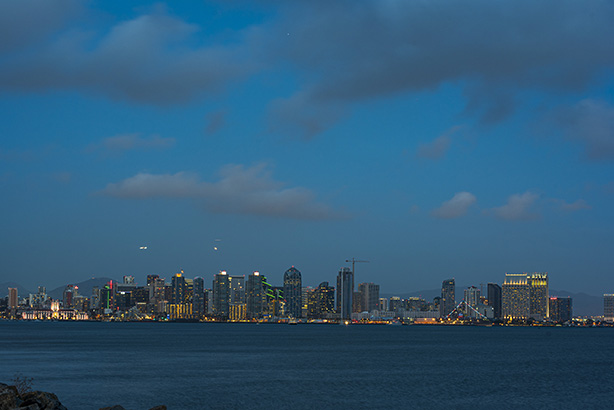
Image Stabilization on
Some Tamron lenses also provide you with a VC selector switch, that allows the user to select between modes 1, 2, or 3. Mode 1 (standard mode) is a balance between the viewfinder image and the stabilization effect. Mode 2 (panning mode) used exclusively for panning. Mode 3 (most stable mode) priority is given to the captured image while forgoing viewfinder image stabilization. Remember to always use the fastest shutter speed possible to prevent motion blur while keeping the ISO as low as possible to retain the best image quality. When mounting a camera on a tripod and using shutter speeds slower than a 1/30 of a second, you’ll need to turn off image stabilization so as not adversely affect image sharpness.
More Photo Tips | Watch Videos | Learn More About Tamron Lenses | Photo Gallery