Long Exposure Photography: A Comprehensive Guide and Best Practices
Share the article:
More Photo Tips | Video Gallery | Photo Gallery | Enewsletter sign-up
• Learn what long exposure photography is and discover its applications, including capturing smooth water, dynamic light trails, and star trails.
• Explore the necessary gear for long exposure photography, including the best cameras, tripods, filters, and Tamron lenses for mirrorless cameras.
• Master key techniques such as adjusting shutter speed, ISO, and aperture; using bulb mode; and avoiding common mistakes to create breathtaking long exposure photos.
• Enhance your compositions with the rule of thirds, leading lines, framing techniques, and creative ideas like light painting and capturing star trails.
• Improve your photos with essential post-processing steps including contrast and exposure adjustments, color correction, sharpening, noise reduction, and final touches.
Long exposure photography is a captivating technique that can transform ordinary scenes into extraordinary images. By using long exposure, photographers can capture the passage of time, creating stunning effects such as smooth water, dynamic light trails, and dreamy landscapes. This technique allows photographers to explore new creative possibilities, making it an essential skill for anyone looking to take their photography to the next level.
Whether you’re a beginner intrigued by the magic of long exposure or an experienced photographer wanting to refine your skills, this guide will provide valuable insights and practical tips. From understanding the basics and selecting the right equipment to mastering advanced techniques and post-processing your images, you’ll find everything you need to create stunning long exposure photos that stand out from the rest.
What Is Long Exposure Photography?
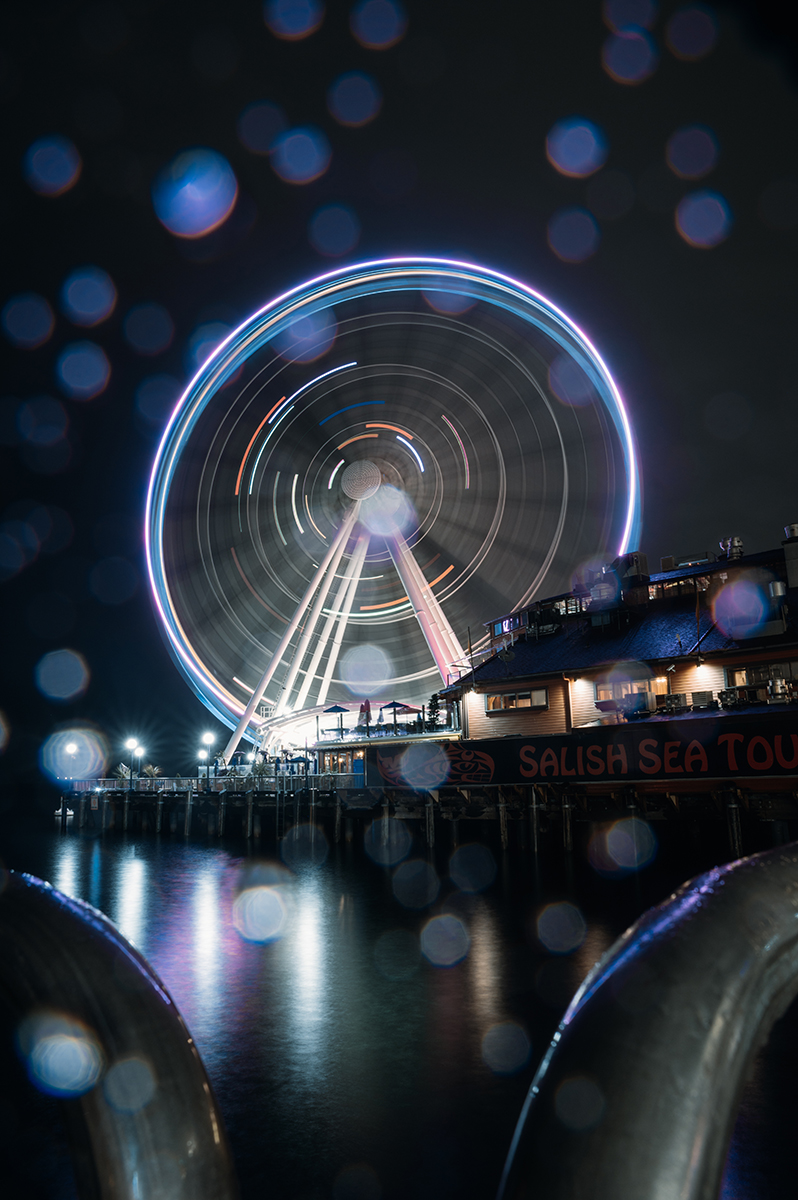
Long exposure photography is a technique that involves using a slow shutter speed to capture a scene over an extended period. Unlike traditional photography, which freezes a moment in time, long exposure captures the movement and flow of elements within the frame. This method can produce mesmerizing effects, such as silky-smooth water, streaks of light from moving vehicles, and star trails in the night sky.
© Itsuka Yakumo
Lens: 20-40mm F/2.8 Di III VXD
Focal Length: 20mm Exposure: 1/5 sec., f/6.3, ISO 1000
Click image to view larger
The concept of long exposure has been around since the early days of photography. Early photographers used long exposure times due to the limitations of their equipment, which often required several minutes to properly expose an image. Today, photographers use this technique creatively to convey motion and add a sense of movement to their images.
Applications of long time exposure photography are diverse. Landscape photographers use it to smooth out water in rivers and oceans, creating a tranquil and ethereal effect. Urban photographers capture light trails from traffic to illustrate the hustle and bustle of city life. Astrophotographers utilize long exposures to reveal the movement of stars and celestial bodies.
By understanding and mastering how to take long exposure photography, you can unlock a new dimension of creativity and produce images that captivate and inspire viewers.
Essential Equipment for Long Exposure Photography
To achieve stunning long exposure photos, having the right equipment is crucial. Here’s a breakdown of the essential gear you’ll need:
1. Camera Types
For long exposure photography, DSLRs and mirrorless cameras are ideal due to their manual settings and interchangeable lenses. These cameras allow precise control over shutter speed, aperture, and ISO, which are vital for long exposures. Mirrorless cameras are highly recommended for their compact size and advanced features.
2. Tripods
A sturdy tripod is essential for long time exposure photography as it stabilizes the camera during the extended exposure time. Any movement can result in blurry images, so investing in a quality tripod is a must. Look for tripods with adjustable legs and a solid head to keep your camera steady on various terrains.
3. Filters
Filters can significantly enhance your long exposure shots. Neutral density (ND) filters are particularly useful as they reduce the amount of light entering the lens, allowing for longer exposure times without overexposing the image. Polarizing filters can also be beneficial for reducing glare and enhancing colors.
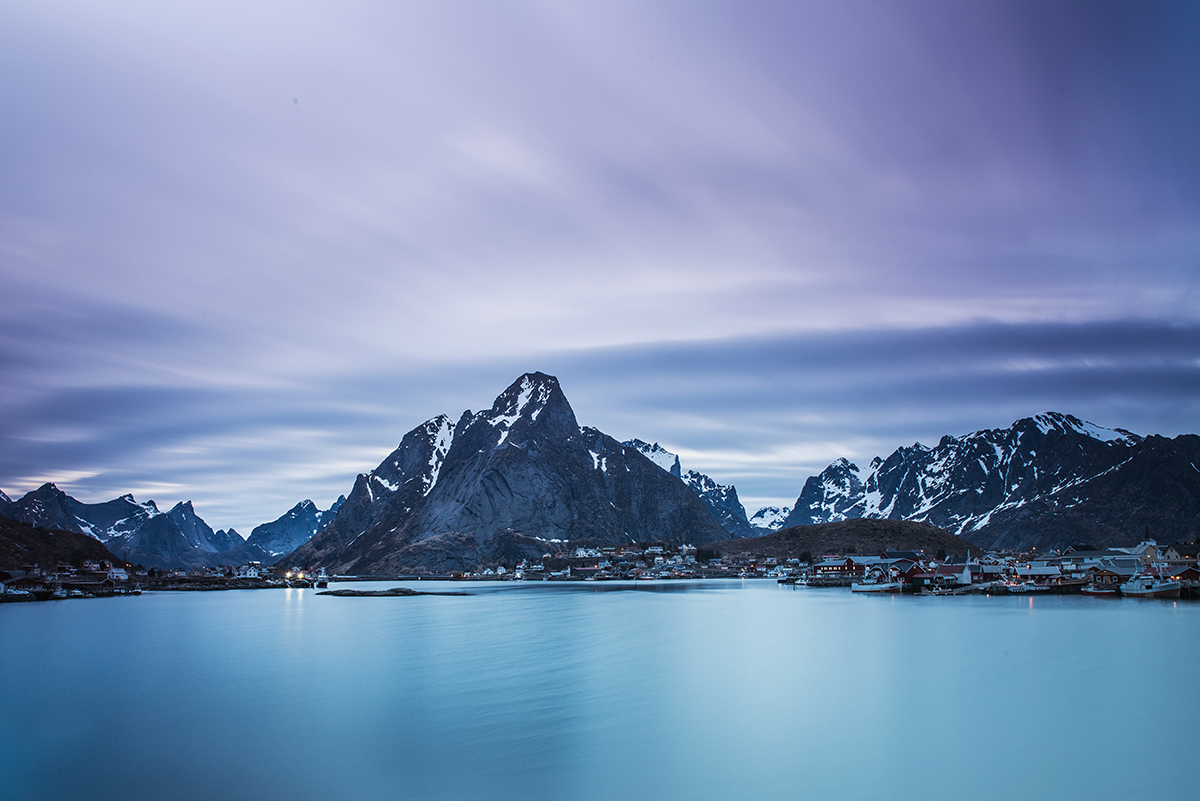
© Philip Ruopp
Lens: SP 24-70mm F2.8 Di VC USD G2
Focal Length: 24mm Exposure: 20 sec., f/22, ISO 31
Click image to view larger
4. Best Tamron Lenses for Long Exposure Photography
Choosing the right lens is key to capturing high-quality long exposure images. Tamron offers a range of lenses perfect for this technique. For mirrorless cameras, lenses like the Tamron 17-28mm f/2.8 Di III RXD and the Tamron 28-75mm f/2.8 Di III VXD G2 are excellent choices. These lenses provide versatility, sharpness, and fast apertures, making them ideal for capturing detailed and dynamic long exposure shots. Additionally, the Tamron 11-20mm f/2.8 Di III-A RXD for APS-C mirrorless cameras is great for wide-angle shots, offering expansive views perfect for landscapes and urban scenes.
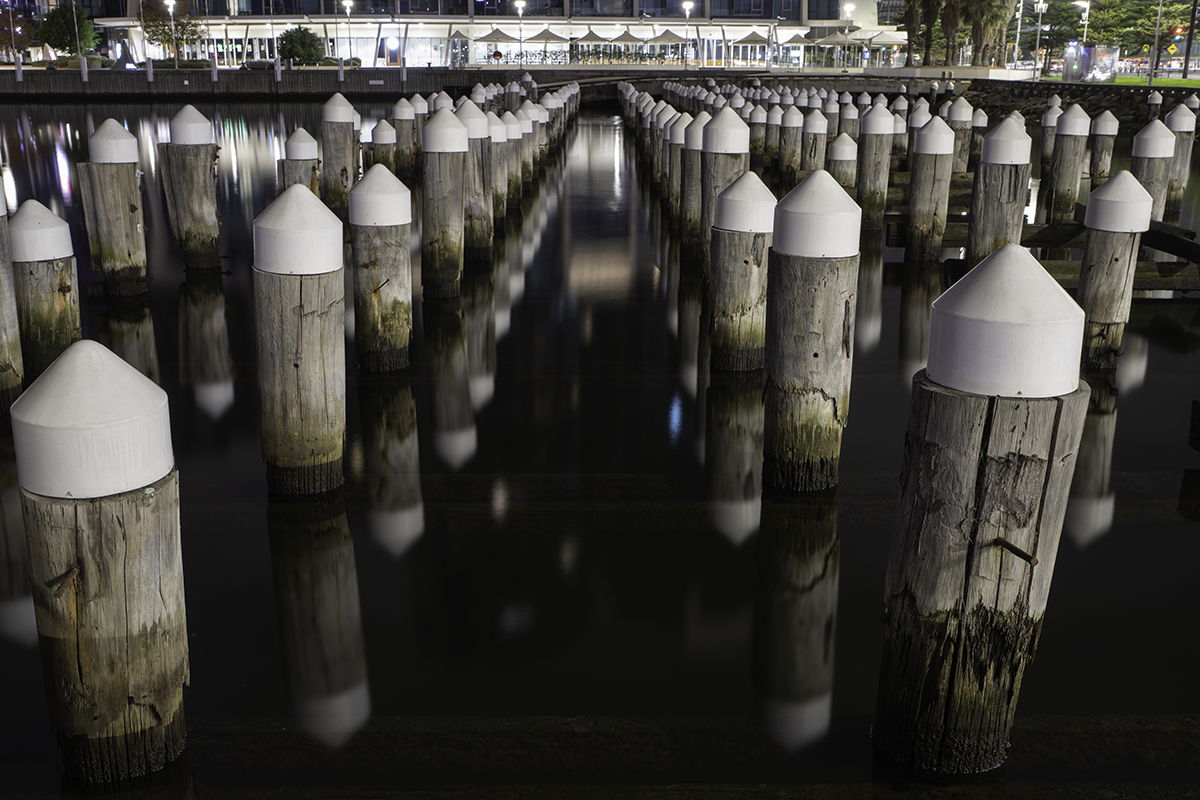
© Itsuka Yakumo
Lens: 28-75mm F/2.8 Di III VXD G2
Focal Length: 60mm Exposure: 30 sec., f/4, ISO 200
Click image to view larger
By equipping yourself with these essential tools, you’ll be well-prepared to explore the creative possibilities of long exposure photography and capture stunning, professional-quality images.
Techniques for Capturing Stunning Long Exposure Images
Capturing stunning long exposure images requires mastering a few essential techniques. Here’s how you can get started:
Adjust Shutter Speed, ISO, and Aperture
The key to long exposure photography lies in balancing shutter speed, ISO, and aperture. Set your camera to manual mode to gain full control over these settings. Start with a slow shutter speed, ranging from a few seconds to several minutes, depending on the desired effect. Use a low ISO (100 or 200) to minimize noise, and a smaller aperture (higher f-number) for greater depth of field and sharpness.
Use a Tripod
A tripod is indispensable for long exposure photography. It keeps your camera steady during long exposures, preventing blur caused by camera shake. Ensure your tripod is on a stable surface and use a remote shutter release or your camera’s self-timer to eliminate movement when pressing the shutter button.
Try Bulb Mode for Extended Exposures
For exposures longer than 30 seconds, switch to bulb mode. This setting allows you to manually control the exposure length. Use a remote shutter release to start and stop the exposure, keeping the camera steady throughout the process.
Prevent Common Mistakes
Avoid overexposure by using neutral density filters to reduce light entering the lens. These filters are especially useful in bright conditions. Check your composition and focus before starting your exposure. Use your camera’s live view and zoom in to guarantee sharpness.
Include Creative Effects
Experiment with different settings and techniques to create unique effects. Light painting, where you use a light source to add artistic elements to your scene, can produce striking images, such as spelling out words or drawing shapes with a flashlight. Capturing star trails or cloud movement can introduce dynamic elements, showcasing the passage of time.
© Kyle Garay
Lens: SP 24-70mm F2.8 Di VC USD G2
Focal Length: 24mm Exposure: 15 sec., f/13, ISO 125
Click image to view larger
By mastering these techniques, you’ll be able to create stunning long exposure images that capture the beauty and movement of your surroundings.
Composition Tips for Long Exposure Photography
Creating compelling long exposure images isn't just about mastering the technical aspects; composition plays a crucial role, too. Here are some tips to enhance your long time exposure photography:
Rule of Thirds: Use the rule of thirds to create balanced compositions. Imagine your frame divided into nine equal parts by two horizontal and two vertical lines. Place key elements along these lines or at their intersections. For example, position a waterfall or horizon line along these points.
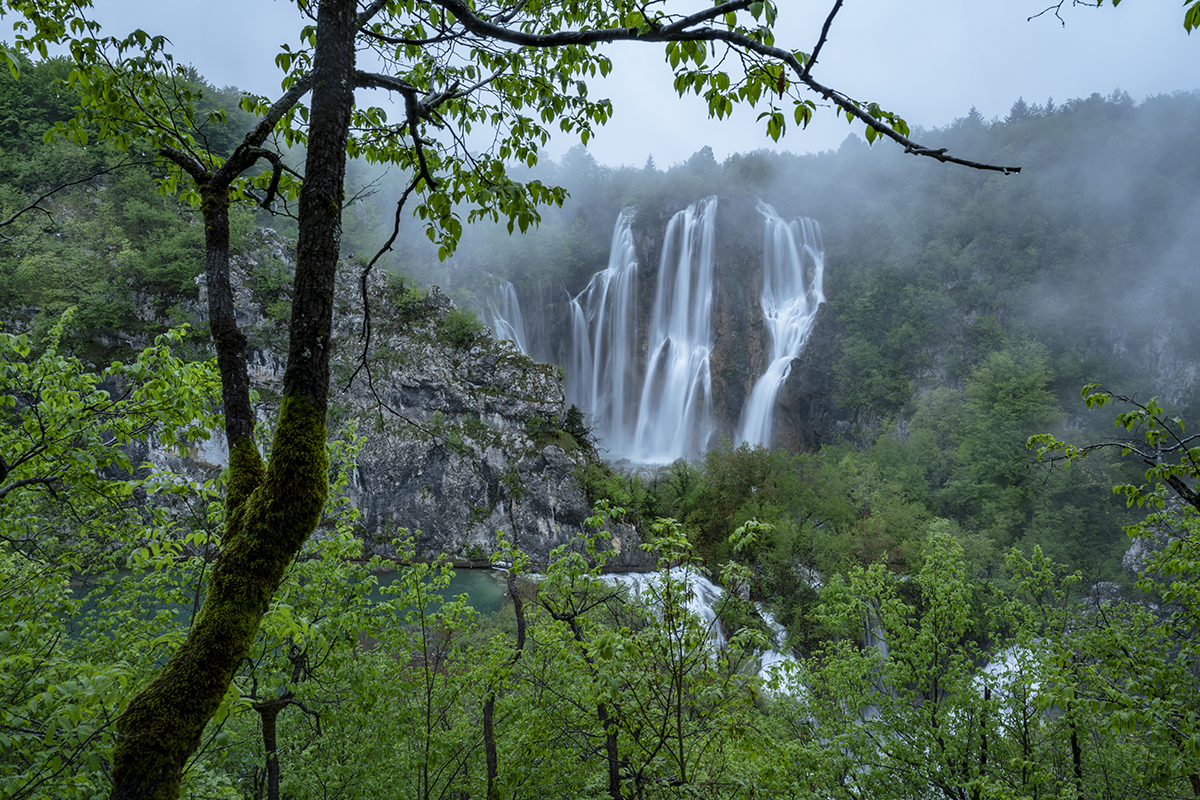
© Philip Ruopp
Lens: SP 24-70mm F2.8 Di VC USD G2
Focal Length: 24mm Exposure: 175 sec., f/14, ISO 100
Click image to view larger
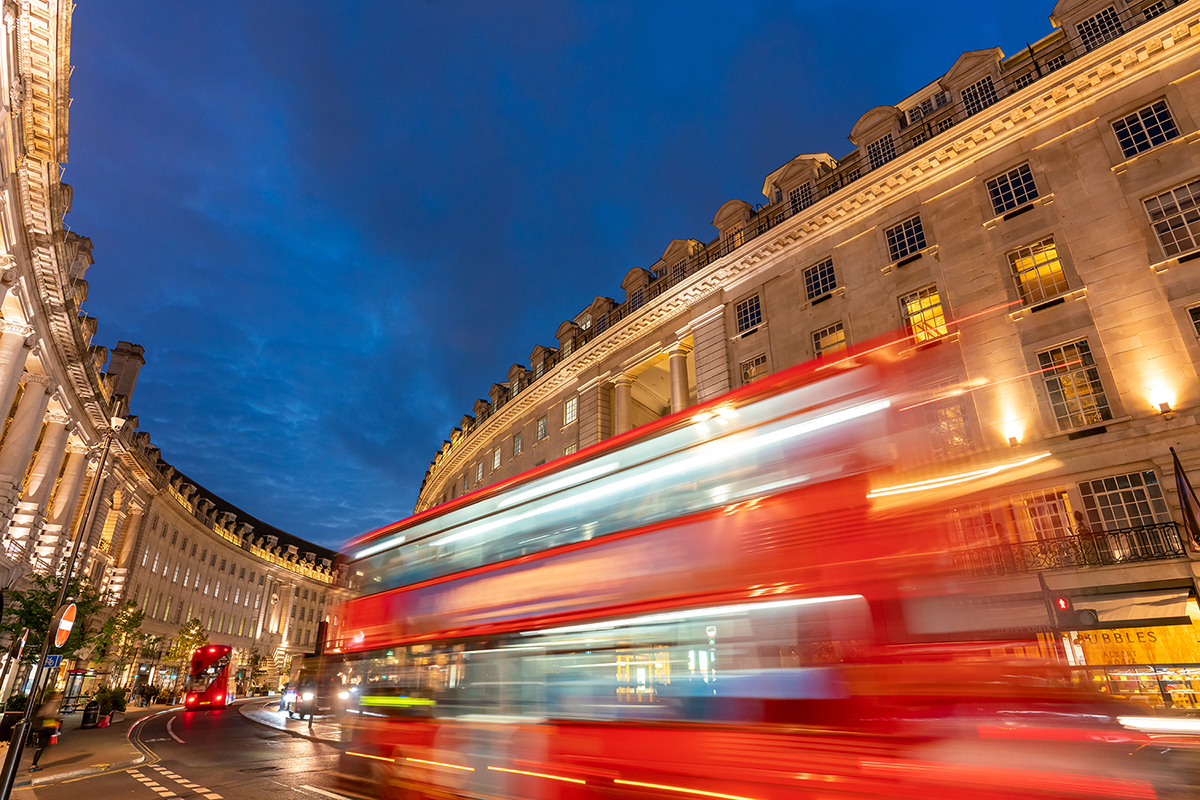
Leading Lines: Incorporate leading lines to guide the viewer’s eye through the image. Roads, rivers, or trails of light can add depth and direction. Capturing the light trails of moving cars can create a dynamic pathway from the foreground to the background.
© Glynn Lavender
Lens: 17-50mm F4 Di III VXD
Focal Length: 36mm Exposure: 30 sec., f/8, ISO 100
Click image to view larger
Framing Techniques: Use natural or architectural elements to frame your subject. This adds context and directs attention to the focus of your image. Trees, arches, and windows can serve as effective frames, creating a sense of depth and perspective. Frame a distant cityscape with overhanging branches to create a natural vignette.
© Frantisek Zvardon
Lens: 17-28mm F/2.8 Di III RXD
Focal Length: 28mm Exposure: 0.6 sec., f/14, ISO 100
Click image to view larger
Use of Light: Pay attention to both natural and artificial light sources. Light and shadows can add drama and interest. Golden hour and blue hour provide soft, diffused lighting ideal for long exposure photography. Capture the smooth flow of water illuminated by the warm hues of the setting sun.

© Daisuke Fujimura
Lens: 28-75mm F/2.8 Di III VXD G2
Focal Length: 48mm Exposure: 10 sec., f/22, ISO 64
Click image to view larger
By incorporating these composition techniques, you can elevate your long exposure photography and create visually striking images that captivate your audience.
Post-Processing Tips for Long Exposure Photography
Post-processing is an essential part of how to take long exposure photography. It allows you to enhance your images and bring out their full potential. Here are some tips to help you get the best results:
1. Software Recommendations
Using powerful editing software is crucial. Adobe Lightroom and Photoshop are industry standards, offering a range of tools to adjust and refine your photos. Other options include Affinity Photo and Capture One.
2. Adjusting Contrast and Exposure
Long exposure images often benefit from contrast and exposure adjustments. Increase the contrast to add depth and make your image pop. Fine-tune the exposure to balance highlights and shadows using the curves or levels tool.
3. Color Correction
Correcting colors can significantly enhance your photo. Adjust the white balance for natural colors and use HSL (Hue, Saturation, and Luminance) sliders to fine-tune individual tones, making them vibrant yet natural.
4. Sharpening and Noise Reduction
Long exposures can result in soft images. Use the sharpening tool to enhance details but avoid overdoing it to prevent artifacts. Apply noise reduction to minimize noise, especially in high ISO settings. Noise refers to the grainy or speckled appearance in photos, particularly in darker areas or high ISO settings. Reducing noise helps create cleaner, smoother images.
5. Removing Unwanted Elements
Use the clone stamp or healing brush to remove distracting elements from your photo, such as stray light trails or dust spots.
6. Final Touches
Add final touches, like a subtle vignette to draw attention to the center, or a slight crop to improve composition. Experiment with adjustments to see what works best for your photo.
Long exposure photography is a fascinating technique that opens up a world of creative possibilities. By mastering the concepts and techniques covered in this guide, you can transform ordinary scenes into extraordinary images that capture the essence of time and motion.
Investing in the right equipment, such as a sturdy tripod, quality filters, and versatile Tamron lenses, is essential to achieving the best results. Understanding how to adjust your camera settings and compose your shots effectively will further enhance your ability to capture stunning images. Additionally, post-processing plays a crucial role in refining and perfecting your photos, bringing out their full potential.
Don't be afraid to experiment and push the boundaries of your creativity. Every long exposure shot offers a new opportunity to learn and grow as a photographer. By combining technical skills with artistic vision, you can create visually striking images that captivate and inspire viewers.
For more tips, tutorials, and information on the latest Tamron lenses, visit the Tamron Americas website. Happy shooting!
More Photo Tips | Watch Videos | Learn More About Tamron Lenses | Photo Gallery