Tamron Blogs
More Photo Tips | Video Gallery | Photo Gallery | Enewsletter sign-up
Pro Tips for Photography in U.S. National Parks this Summer: Embracing the Beauty of Nature Through Photography
The allure of U.S. National Parks is undeniable. Their vast landscapes, diverse wildlife, and unique features make them a photographer's paradise.
Yet, capturing their beauty is not as simple as pressing a shutter button. It requires knowledge, preparation, and respect for nature.
In this guide, we'll share pro tips for photography in U.S. National Parks this summer. From understanding park regulations to choosing the right equipment, we've got you covered.
Whether you're an amateur photographer or a seasoned pro, you'll find valuable insights here. We'll help you make the most of your park visits and capture stunning images.
Tip 1: Understanding National Parks Photography Regulations
Before you start capturing the beauty of U.S. National Parks, familiarize yourself with the specific rules and regulations of each national park you visit. Each park has its own set of regulations that photographers must adhere to.
These rules are in place to protect the parks' natural and cultural resources. They also ensure the safety and enjoyment of all visitors. Here are a few examples:
• Tripods: Some parks prohibit the use of tripods on designated trails to avoid obstructing other hikers.
• Drones: Some parks restrict the use of drones.
• Light Sources: Certain parks do not allow light sources for night photography to prevent disruption to wildlife and other visitors.
• Wildlife Distance: Always maintain a minimum distance of 25 yards from wildlife. Each year, numerous injuries occur because people get too close to animals like bears and bison.
Always check the specific regulations of the park you're visiting. Respect the rules and remember that preserving these natural wonders is our shared responsibility.
Tip 2: Choosing the Best Camera Lenses for National Parks Photography
Click image to view larger
Bringing the right lenses can make a significant difference in capturing the diverse beauty of national parks. Here are three must-have lenses for your kit.
A Wide Angle Zoom like the Tamron 17-28mm F/2.8 Di III RXD Model A046 for full-frame mirrorless cameras or the 11-20mm F/2.8 Di III-A RXD Model B060 for crop sensor mirrorless cameras is ideal for capturing expansive landscape vistas and dramatic skies as well as tight canyons, providing a sense of scale and grandeur.
A Standard Zoom like the Tamron 28-75mm F/2.8 Di III VXD G2 Model A063 for full-frame mirrorless cameras or the 17-70mm F/2.8 Di III-A VC RXD Model B070 for crop sensor mirrorless cameras is a versatile choice and will be your go-to for most shots, from wide angle to normal focal lengths, making a standard zoom lens perfect for a variety of compositions.
An Ultra Telephoto Zoom like the Tamron 150-500mm F/5-6.3 Di III VC VXD Model A057 is essential for photographing wildlife and distant subjects, allowing you to get close-up shots without disturbing the natural environment and maintain a safe distance. This lens can be used effectively on both full-frame and crop-sensor mirrorless cameras.
Tip 3: Must-Have Gear for Photographers
Click image to view larger
Apart from your camera and lenses, there are other pieces of equipment that can enhance your national parks photography experience. Here are some must-haves:
• A sturdy tripod for stability, long-exposure shots, and low-light conditions, such as pre-dawn and post-sunset. A good tripod is essential to ensure sharp images without camera shake.
• Circular Polarizer filter to enhance the saturation of the blue sky , reduce glare, and add contrast to clouds, making your images more dynamic.
• A well-designed, comfortable camera bag is crucial for carrying your gear, especially during long hikes.
• Extra batteries and memory cards
• A cleaning kit to maintain your equipment in dusty conditions
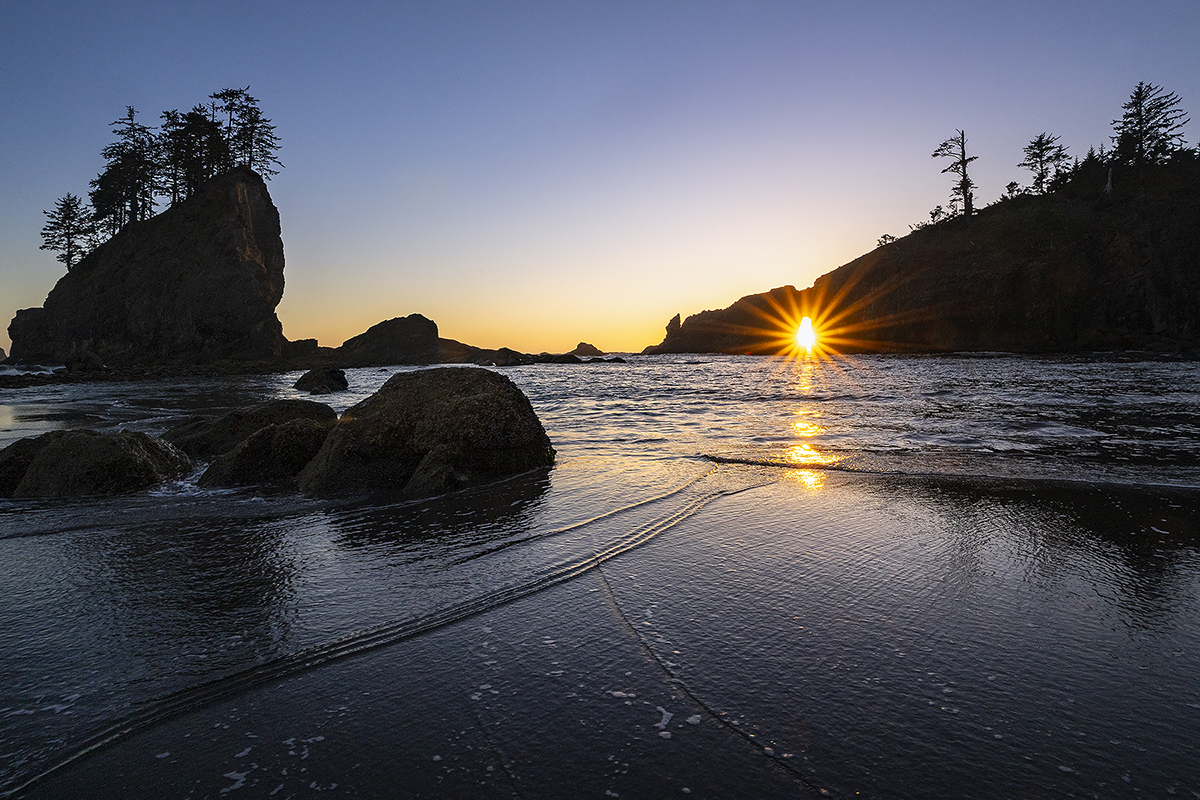
Tip 4: Timing Your Shots: When to Capture the Best Light
In photography, timing is everything. The time of day can dramatically affect the quality of your photos. Understanding when to shoot is one of the most important national parks photography tips. Here’s how to make the most of natural light:
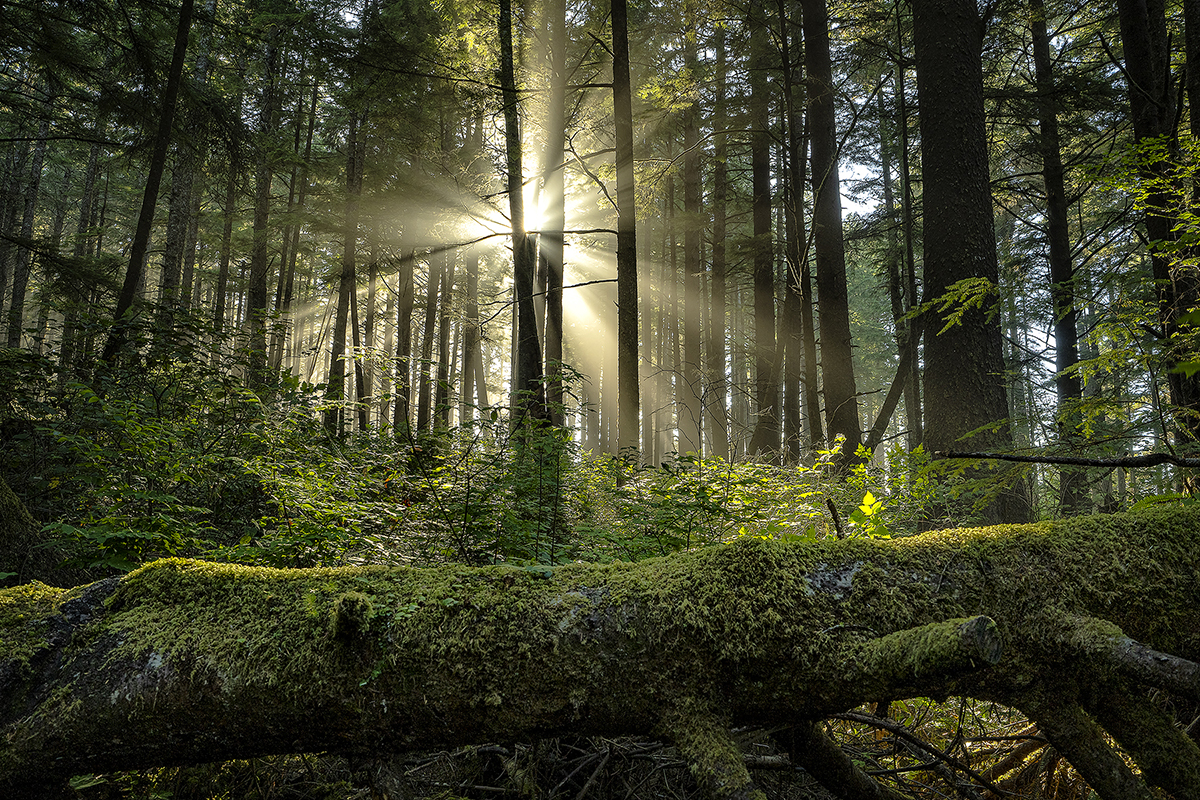
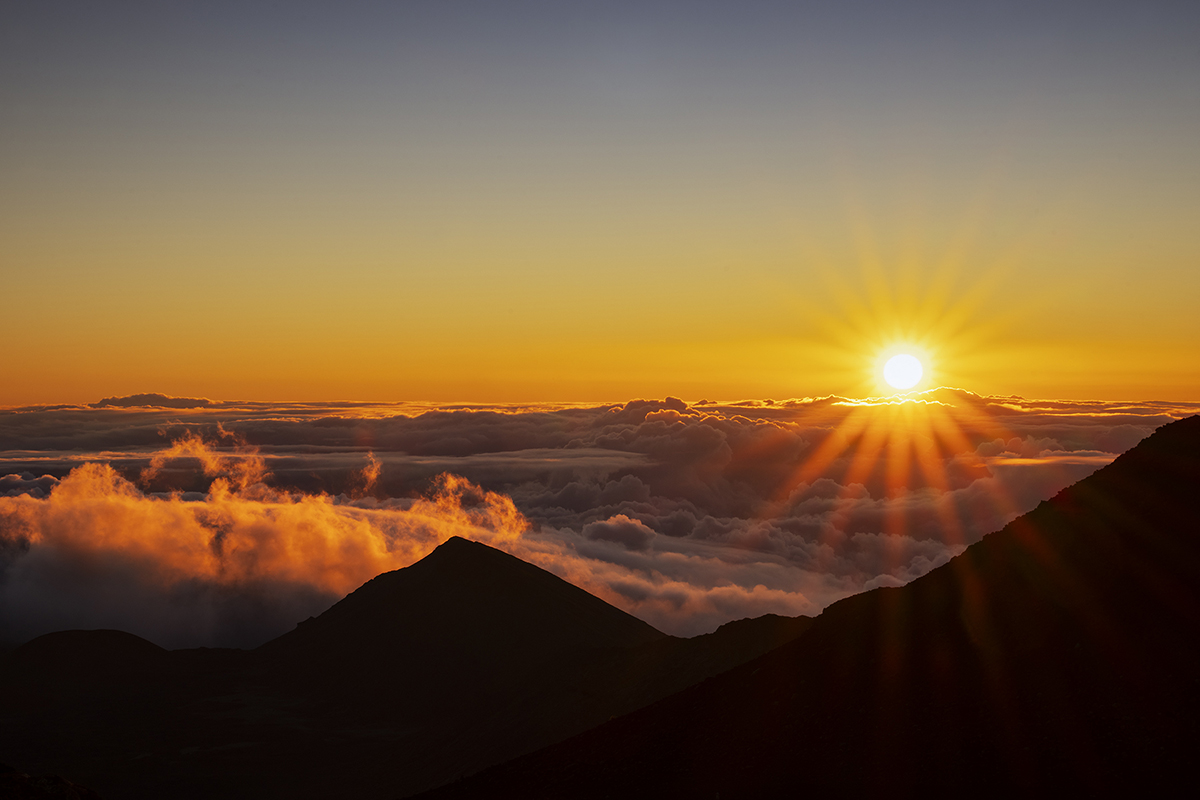
Early Morning and Later Afternoon: The golden hour, which occurs shortly after sunrise and before sunset, is often considered the best time for photography. During these periods, the light is soft and warm, casting long shadows and adding depth to your images. Arrive at least an hour before sunrise and stay past sunset to capture the best light and avoid crowds.
Click image to view larger
However, don't overlook the blue hour, which happens just before sunrise and after sunset. The sky takes on a deep blue hue, providing a beautiful backdrop for landscapes and silhouettes.
Midday: Light during midday can be harsh and unflattering, washing out colors and creating high contrast.
Remember, the exact timing of these periods can vary depending on the time of year and your location. There are various mobile apps available that can help you track the sun's position and plan your shoots around the golden hours for the best results.
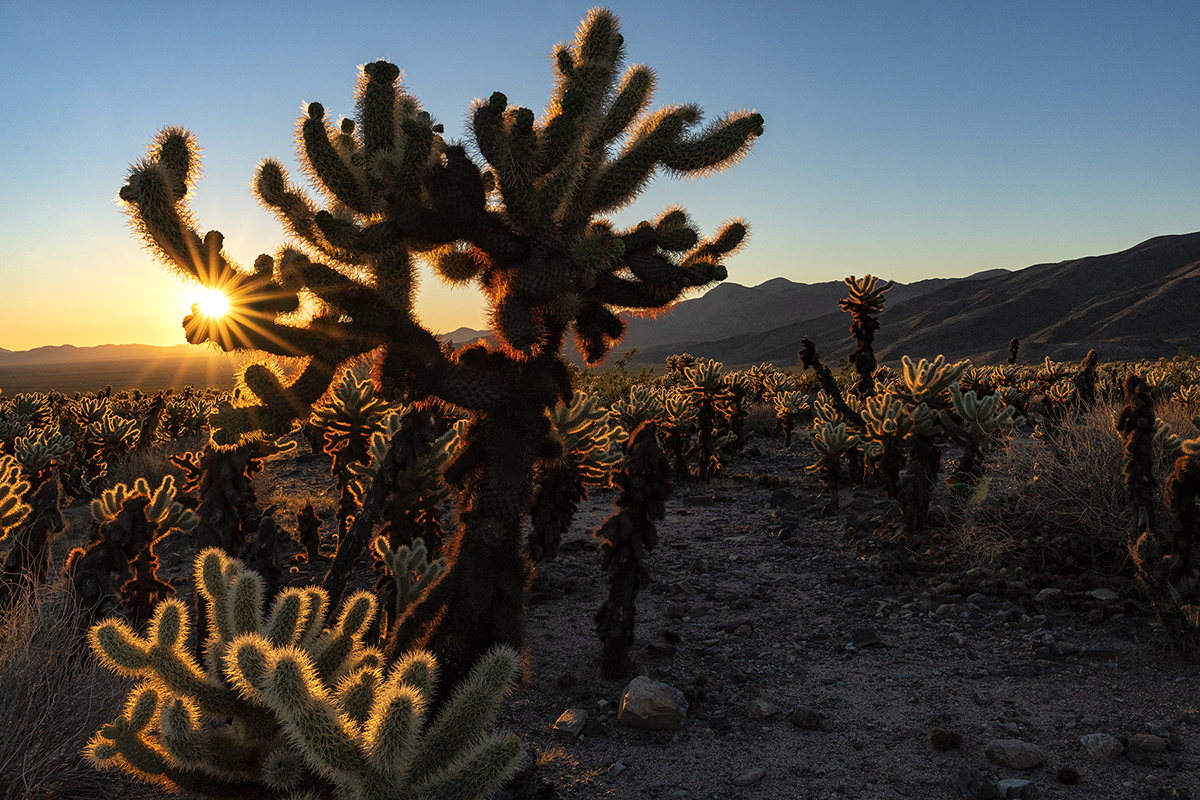
Tip 5: Composition Techniques for Stunning Landscapes
Composition is the foundation of a great photograph. It's not just about what you shoot, but how you frame it. Here are some techniques to help you capture stunning landscapes in national parks. Keep these principles in mind.
Click image to view larger
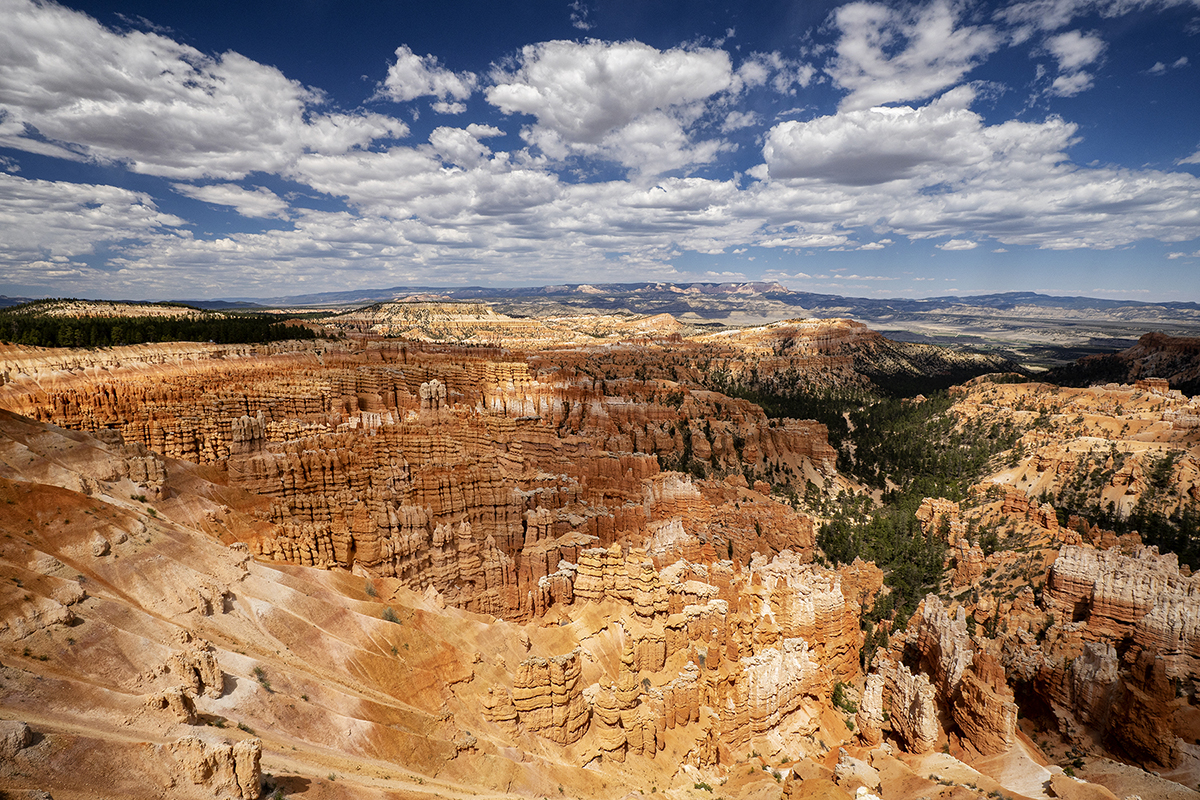
Rule of Thirds: The rule of thirds is a basic yet powerful tool. Imagine your frame divided into nine equal parts by two horizontal and two vertical lines. Placing your subject along these lines or at their intersections can create a balanced and engaging composition. Position your main subject and horizon away from the center of the frame to create a more dynamic image.
Foreground, Midground, Background: Ensure your composition includes elements at different depths to add interest and guide the viewer’s eye through the scene.
Eliminate Distractions: Remove any distracting elements from your frame to keep the focus on your main subject.
Leading Lines: Leading lines can also guide the viewer's eye through the image. These could be natural elements like rivers or man-made features like trails. Use them to lead towards your main subject or into the distance to create a sense of depth.
Remember, these are just guidelines, not hard rules. Feel free to experiment and break them if it serves your creative vision. The most important thing is to create an image that resonates with you and your audience.
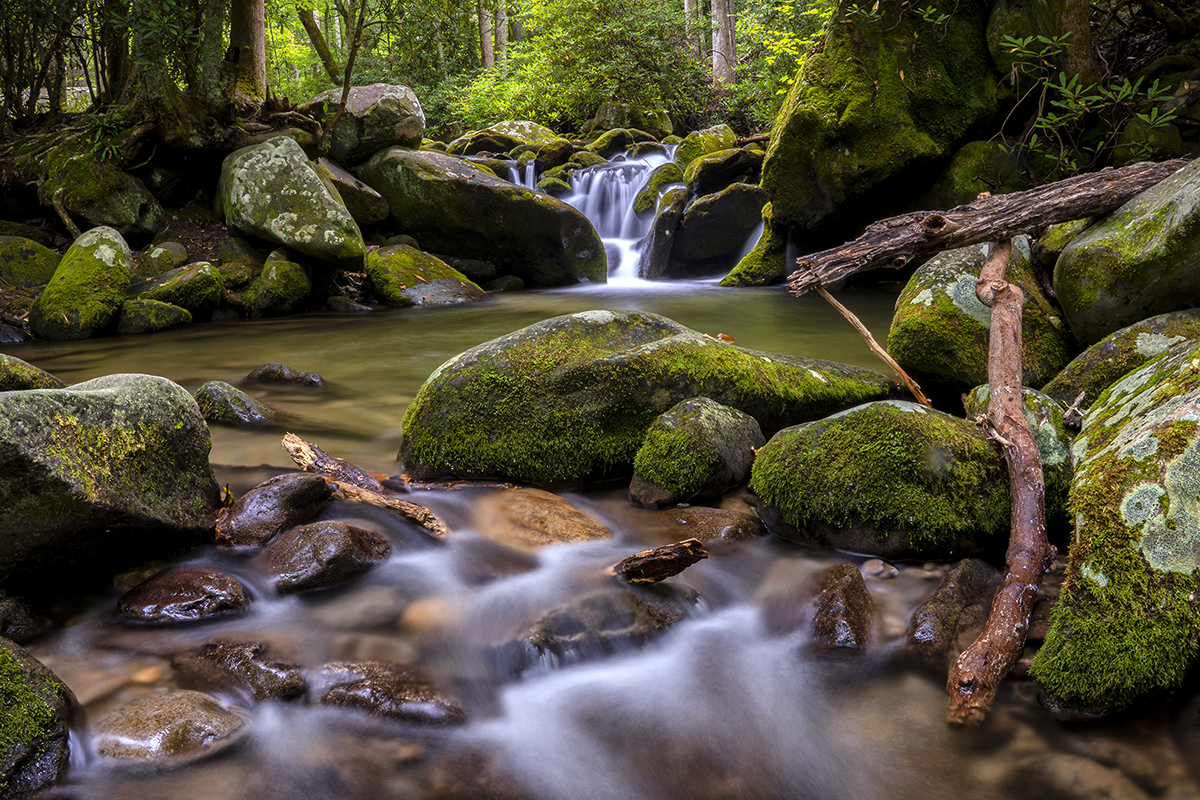
Tip 6: Camera Settings
Adjusting your camera settings based on the scene and lighting conditions is key to capturing stunning photos:
Click image to view larger
Aperture: Controls depth of field. Use a wide aperture for a shallow depth of field to isolate subjects, and a narrow aperture for a larger depth of field to keep everything in focus.
Shutter Speed: Use fast shutter speeds to freeze action and slow speeds to create a sense of movement, such as with waterfalls or flowing rivers.
ISO: Balances aperture and shutter speed. Lower ISO settings are ideal for bright conditions, while higher settings are necessary for low light. Adjust ISO to achieve proper exposure without introducing noise.
Tip 7: Wildlife Photography in National Parks
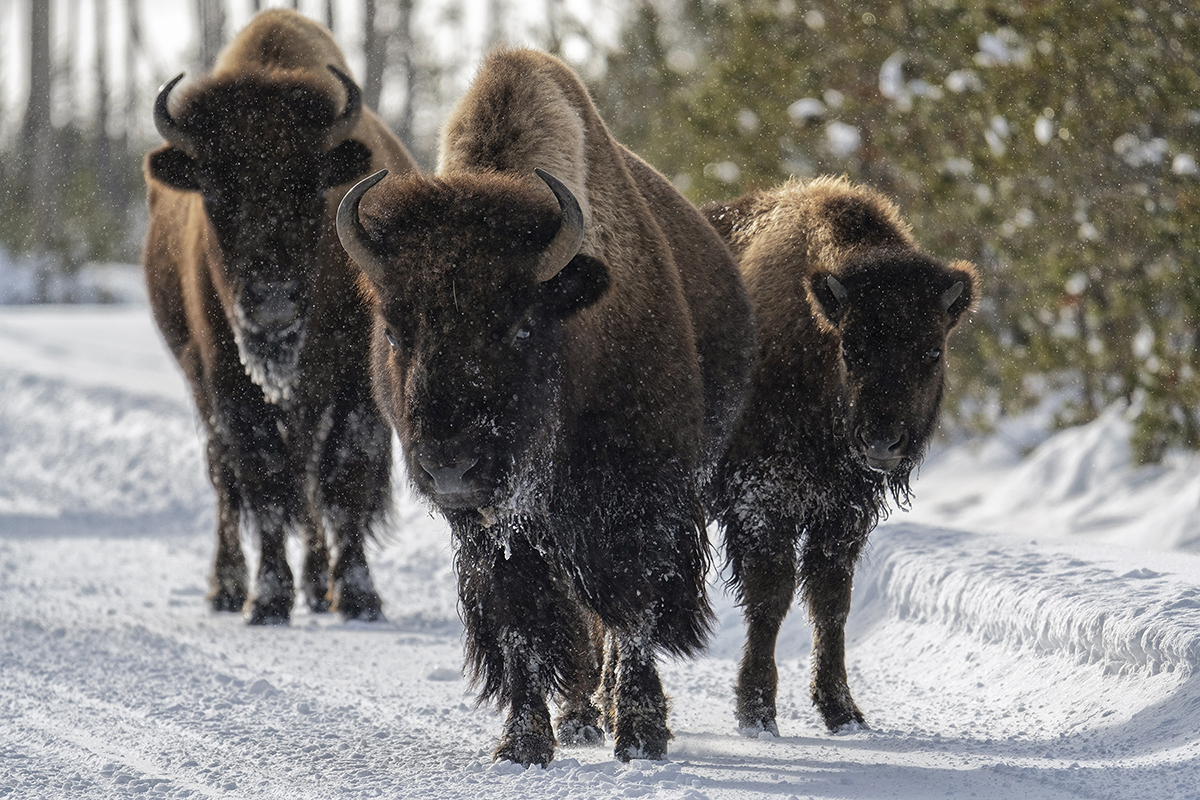
Wildlife photography is a thrilling aspect of park photography. It allows us to capture the essence of animals in their natural habitat. However, it's crucial to respect the wildlife and their environment while doing so.
Click image to view larger
Never approach or disturb animals to get a better shot. Always maintain a safe and respectful distance. Use a telephoto lens to capture close-up shots without intruding on their space. Remember, your safety and the animal's well-being are more important than any photograph.
Avoid feeding animals or altering their behavior in any way. It's not only unethical but also illegal in many national parks. Always adhere to the park's rules and regulations regarding wildlife photography.
Lastly, be patient. Wildlife photography often involves waiting for the right moment. It's about capturing animals behaving naturally in their environment. So, take your time, observe, and let the perfect shot come to you.
Tip 8: Weather, Clothing, and Safety Considerations
Weather plays a significant role in park photography. It can dramatically affect the lighting, colors, and overall mood of your photographs. Therefore, it's essential to check the weather forecast before heading out and be prepared for sudden changes.
Dressing appropriately for the weather is also crucial. Wear layers so you can adjust to changing temperatures. Don't forget a waterproof jacket and sturdy, comfortable shoes. Remember, you might be standing or walking for extended periods.
Safety should always be your top priority. Carry a map and compass and let someone know your plans. Stay on marked trails and be aware of your surroundings. Also, carry enough water and snacks to keep you hydrated and energized. Your well-being is key to a successful and enjoyable photography trip.
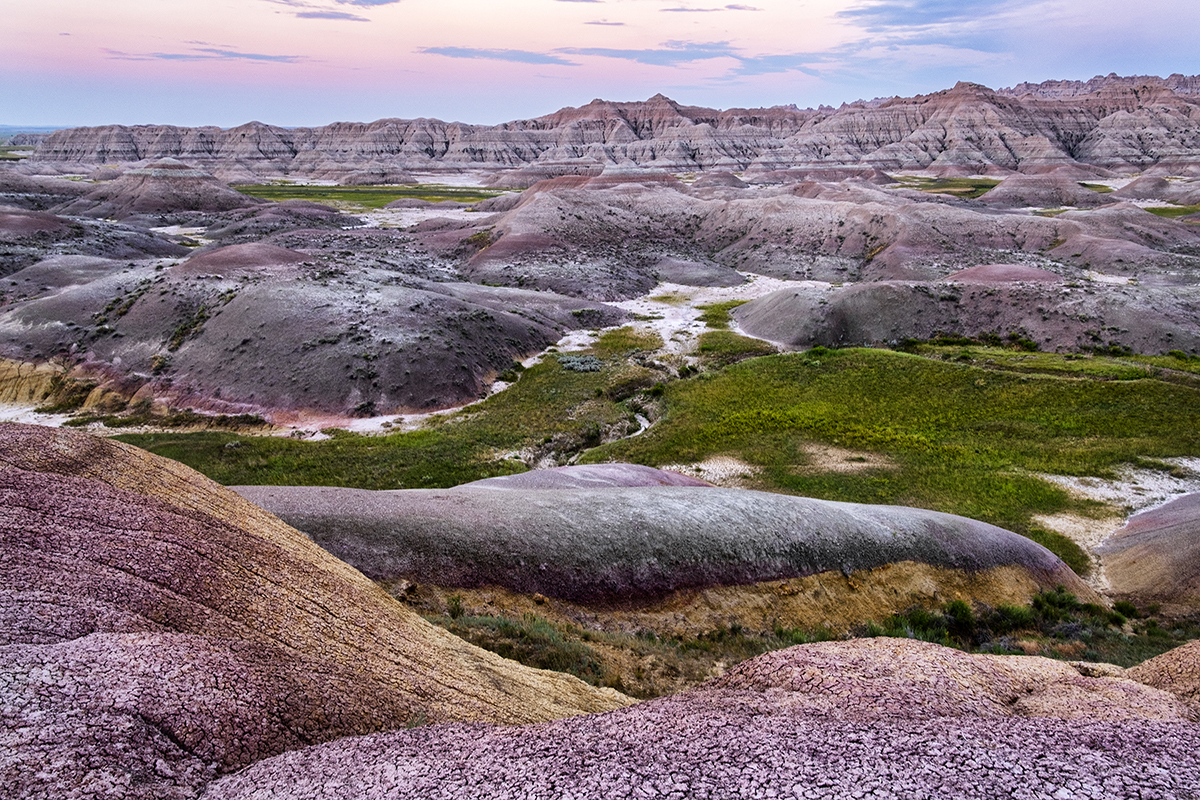
Tip 9: The Art of Patience: Waiting for the Perfect Moment
Patience is a virtue in photography, especially in national parks. The perfect shot often requires waiting for the right light, the right weather, or the right moment. It's not uncommon for photographers to wait hours for a cloud to move, an animal to appear, or the sun to set just right.
Click image to view larger
Remember, nature operates on its own schedule. You can't rush a sunrise or a blooming flower. Embrace the waiting time as an opportunity to observe and connect with the natural world around you. It's part of the joy of being a nature photographer.
In the end, your patience will pay off. The satisfaction of capturing that perfect shot after a long wait is one of the most rewarding experiences in photography.
Tip 10: Photography Etiquette and Conservation Ethics
When photographing in national parks, it's crucial to respect the environment and wildlife. This means staying on designated trails, not disturbing plants or animals, and leaving no trace of your visit. Remember, you are a guest in their home.
It's also important to respect other visitors. Don't block trails or viewpoints with your equipment and be mindful of noise levels. Everyone is there to enjoy the beauty of the park.
Lastly, always follow the park's rules and regulations. These are in place to protect the park and its inhabitants. By practicing ethical photography, you help ensure that these incredible places will be preserved for future generations to enjoy.
Tip 11: Advanced Techniques for Different Photography Scenarios
National parks offer a wide range of photography scenarios. From vast landscapes to intimate wildlife encounters, each situation requires a different approach. Mastering a variety of techniques will help you capture the best possible images.
Click image to view larger
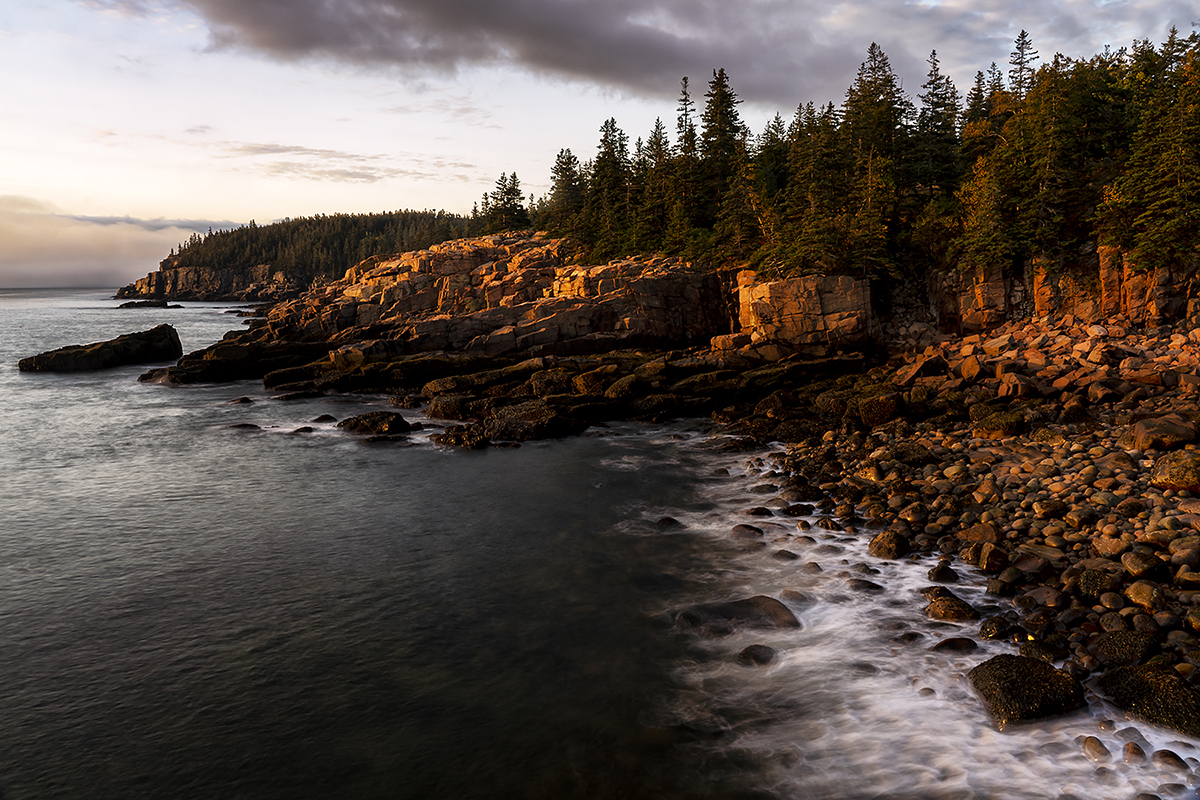
Long exposure and HDR (High Dynamic Range) photography can be particularly effective in national parks. These techniques allow you to capture a greater range of light and detail, resulting in more dramatic and visually striking images.
Night sky and astro photography are also popular in national parks. With little to no light pollution, these locations offer a unique opportunity to capture stunning images of the stars and Milky Way.
Long Exposure and HDR Photography
Long exposure photography involves using a slow shutter speed to blur moving elements, such as water or clouds. This can create a dreamy, ethereal effect that adds a unique touch to your national park photos.
HDR photography, on the other hand, involves taking multiple shots at different exposures and combining them in post-processing. This technique can help you capture detail in both the brightest and darkest parts of your scene, which is particularly useful in high-contrast situations.
Night Sky and Astro Photography Tips

Click image to view larger
National parks are often far from city lights, making them ideal for night sky and astro photography. To capture the stars, you'll need a tripod, a wide-angle lens, and a camera with good low-light performance.
Remember to check the moon phase and weather conditions before heading out. A new moon and clear skies will provide the best conditions for capturing the stars. Also, consider using a star tracker or mobile app to help you plan your shots.
Tip 12: Post-Processing: Enhancing Your National Parks Photos
Click image to view larger
Post-processing is an essential part of digital photography. It allows you to fine-tune your images, correct any imperfections, and bring your creative vision to life.
Software like Adobe Lightroom and Photoshop offer a wide range of tools for editing your photos. You can adjust exposure, contrast, and color balance, crop and straighten your images, and apply filters and effects to enhance the mood and atmosphere.
Remember, the goal of post-processing is to enhance your photos, not to 'fix' them. It's always best to get as much right in-camera as possible. Use editing software to refine and polish your images but avoid relying on it to correct major issues.
Tip 13: Creating a Narrative — Storytelling Through Your Photos
Photography is not just about capturing beautiful scenes. It's also about telling a story. When photographing national parks, think about the narrative you want to convey with your images.
Perhaps you want to document the journey of a day, from the soft light of dawn to the vibrant colors of sunset. Or maybe you want to capture the changing seasons, showing the park in its many different guises. You could also focus on the wildlife, telling a story of survival and adaptation in the wild.
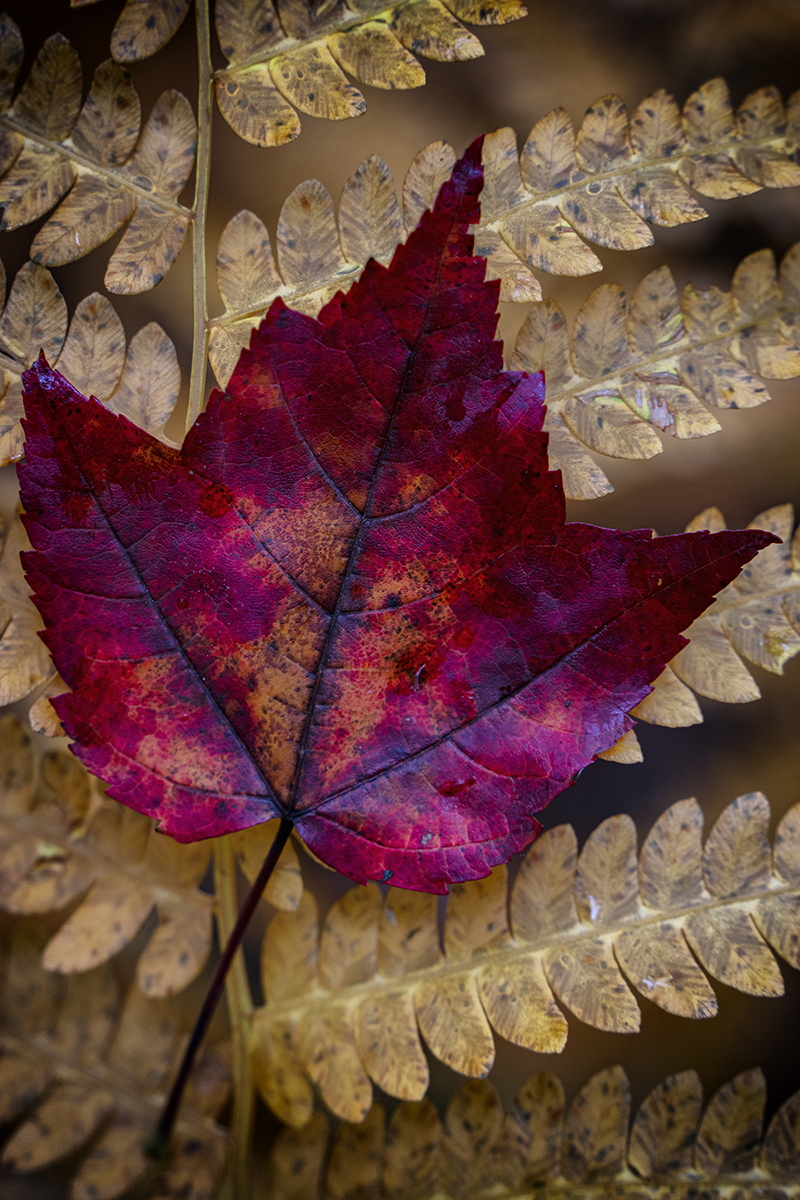
Click image to view larger
Whatever your narrative, be intentional with your shots. Think about how each photo contributes to the overall story. And remember, sometimes the most powerful stories are the ones that are left for the viewer to interpret.
Tip 14: Final Checklist Before Heading Out
Before you head out to capture the beauty of U.S. National Parks, it's crucial to ensure you have everything you need. This not only includes your photography gear but also essentials for your comfort and safety.
Here's a quick checklist to help you prepare:
• Camera and lenses
• Tripod
• Extra batteries and memory cards
• Filters (polarizing, ND, graduated ND)
• Cleaning kit
• Comfortable and durable backpack
• Weather-appropriate clothing
• Proper footwear
• Water and snacks
• Map and compass/GPS
• First aid kit
• Sunscreen and bug spray
Remember, preparation is key to a successful photography trip. With everything in place, you can focus on capturing stunning images and creating unforgettable memories.
Conclusion
Photographing U.S. National Parks is a rewarding experience that combines the thrill of exploration with the joy of creative expression. It's about capturing the grandeur of landscapes, the subtlety of light, and the spirit of wildlife in their natural habitat.
Remember, the journey is as important as the destination. So, take your time, respect the environment, and let your passion for photography guide you. With patience, practice, and the tips shared in this guide, you'll be well on your way to creating stunning images that celebrate the beauty of our national parks.
By following these tips, you'll be well-equipped to capture the stunning landscapes and wildlife of U.S. National Parks this summer. Happy shooting!
More Photo Tips | Watch Videos | Learn More About Tamron Lenses | Photo Gallery