How to Shoot: Vegan Desserts
Merging her ethics with her eats, Michaela Vais uses her Tamron SP 90mm F/2.8 VC Macro lens to photograph scrumptious, animal-free treats.
More Photo Tips | Video Gallery | Photo Gallery | Enewsletter sign-up
By Jenn Gidman
Images By Michaela Vais
When I was 6 years old, my sister (who's four years older than I am) watched a documentary about a slaughterhouse. She told me what happens to farm animals, and from that moment on I stopped eating meat.
In 2011, I jumped fully into veganism. The animals were, and are, still the most important reason for me in making this transition; if it was just about my own personal health, I don't think I'd be as passionate about it. Knowing that I can actually make an impact and help save animals by going vegan and spreading the message keeps me going.
I started taking food photos more than three years ago. I always loved taking landscape photos and never thought I'd end up shooting the food I was making. Back then, I had an online friend who also happened to be a vegan, and she was very into baking and often sent me pictures of the food she made via email. Soon I started photographing the breads and desserts I was making, and I'd send those pictures along to her.
At the time I didn't have a smartphone, but my sister soon gave me one. She told me I could use it for Instagram, so I signed up and uploaded my first food photo on June 12, 2015. It was awesome to connect with like-minded people and talk about veganism and photography. That spurred me to keep taking photos of my food, and I eventually got better at my craft.
I recently started using the Tamron SP 90mm F/2.8 VC Macro lens, and I'm impressed with it for a variety of reasons. I especially love shooting close-ups of my food, and the 90mm offers me terrific depth-of-field. I especially appreciate the bokeh I'm able to achieve. My photos always turn out sharp and crisp and look so much more professional since I've come into that lens.
My goal for all of my food photos, as I imagine it must be for most food photographers, is that they must look appetizing at first sight. Followers on my food blog (https://elavegan.com/) often comment and message me that my food always looks real and very tasty, which, of course, makes me happy.
I do everything myself for a food photography session. That includes the cooking, styling, shooting, and editing of my photos. To be honest, though, I'm not really too much into the styling, so I try to keep it simple. Most of the time I'll just place a spoon in the background, or maybe a napkin or some cake crumbs. Too much styling can be distracting. I want my food to stand out in the shot, not the props.
How I set up the food depends on what I'm shooting. For example, when I take pictures of savory food, especially comfort food, I'll use my wooden boards. They're rustic and make my food instantly look more "cozy" and delicious. When I shoot desserts, I often use various tiles, including light ones (marble tiles), very dark ones, and gray ones. In the past, I shot all of my food on the same toned tiles, but that's since changed. When you think about it, for example, shooting brownies on a brown tile isn't the best idea. It's desirable to switch things up, depending on the circumstances and the particular food you're shooting, to make your subject pop.
I prefer to shoot with all ambient light. I've tried shooting a few times with artificial light, but I just don't like it. I prefer the natural shadows. I usually shoot outside on my terrace when the sun is about to set—the so-called golden hour. I try to be consistent and take pictures at the same time every day, typically between 5:30 p.m. and 6:15 p.m. The light comes in from the left, and I sometimes use a white foam board to fill in the shadows. It depends on the setup, though; I often use nothing at all.
I used to shoot solely in "auto white balance," but lately I've been trying out different settings to see what looks the most natural. When it starts raining while I shoot (which I hate), my light becomes instantly blueish, so I have to change the white balance.
The angles I choose and the perspective I shoot from depends on the food I'm photographing. I love shooting straight on for, say, a tower of crepes. When I take pictures of a cake, I often take 100 (or more) shots, from various angles—I'll sometimes spend up to an hour to shoot a cake, which sounds pretty insane, but I enjoy the process. Plus, it's important to have photos from different angles on my food blog. When I shoot a "feast" or meal prep, however, I typically shoot from above and only do a couple of shots.
I shoot in manual mode only and always select the most appetizing part of the food to focus on. For example, when I shoot brownies and bite into one, my focus will be on that bite in the brownie.
I love getting close and showing the texture of the food. For this purpose, the Tamron 90mm Macro lens works wonders. It wasn't possible to do that with my other lens. Wide shots can be a bit more difficult, since I usually have to stand on a chair to achieve them, but I like to get those types of shots on my blog, too. I'm sure my neighbors often wonder what's going on when they pass by my window and see me up on the chair like that.
When I shoot raw or no-bake desserts right out of the freezer, I don't have much time to shoot. Sometimes it can be as little as five or 10 minutes, which is challenging. Other dishes that can pose a problem include curry with rice: I need to be fast here, too, because the rice quickly absorbs all the sauce from the curry, making the dish look dry. Sliced avocado, which appears often in vegan recipes, also needs to be shot quickly because it turns brown fast, even when I rub it with lime juice.
My least favorite foods to photograph are the ones that soften in the heat. It's very hot where I live in the Dominican Republic, so everything melts within a few minutes, sometimes even within seconds. That's why shooting ice cream is something I don't particularly like doing. And I gave up shooting smoothie bowls altogether a long time ago—all the fruit sinks fast, which drives me crazy!
Check out some of my recent concoctions, and the pictures I took of them, here:
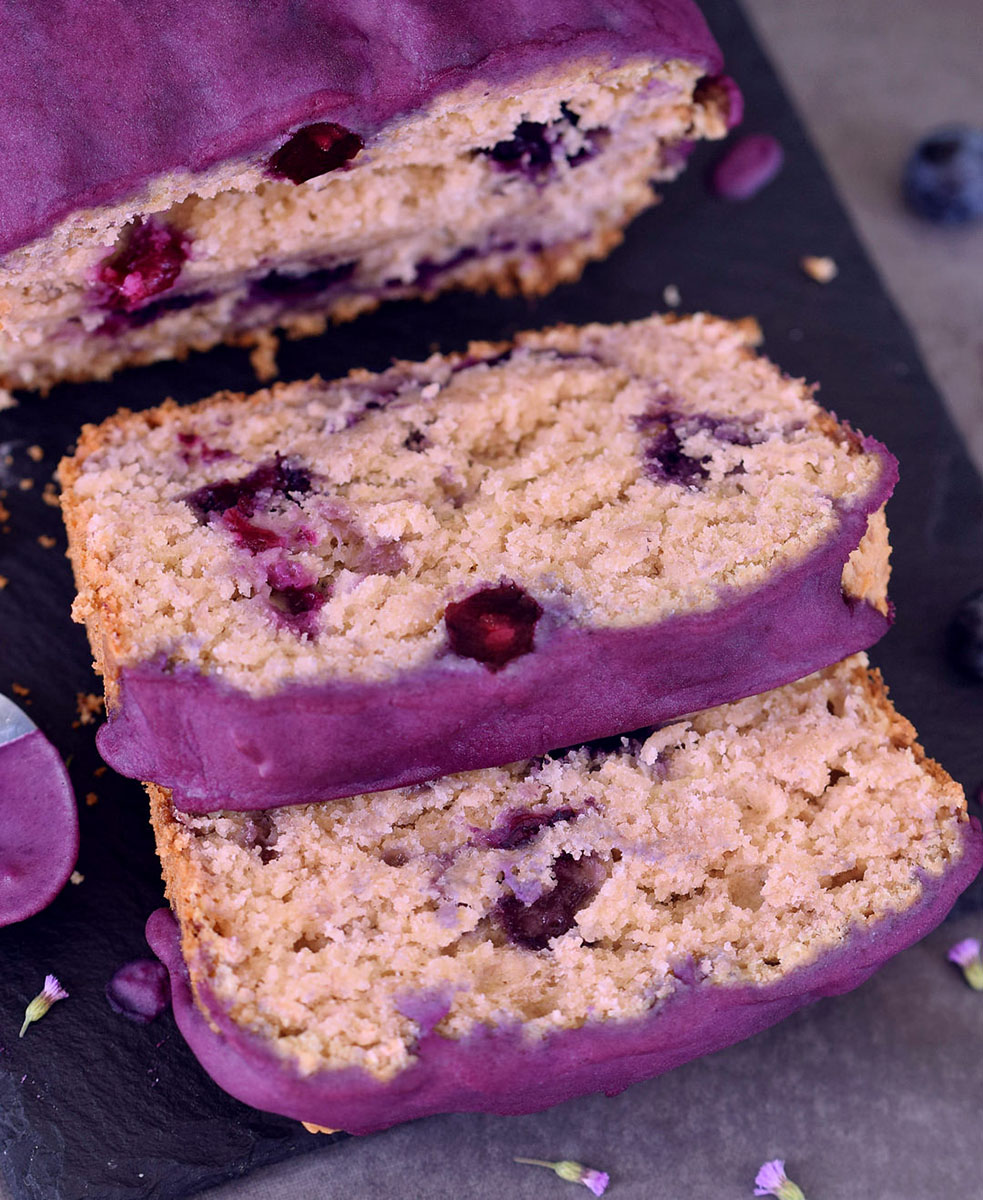
F/5, 1/100th sec., ISO 250
For this dessert, I wanted to show a close-up of its beautiful, cakey texture.
Click image to view larger
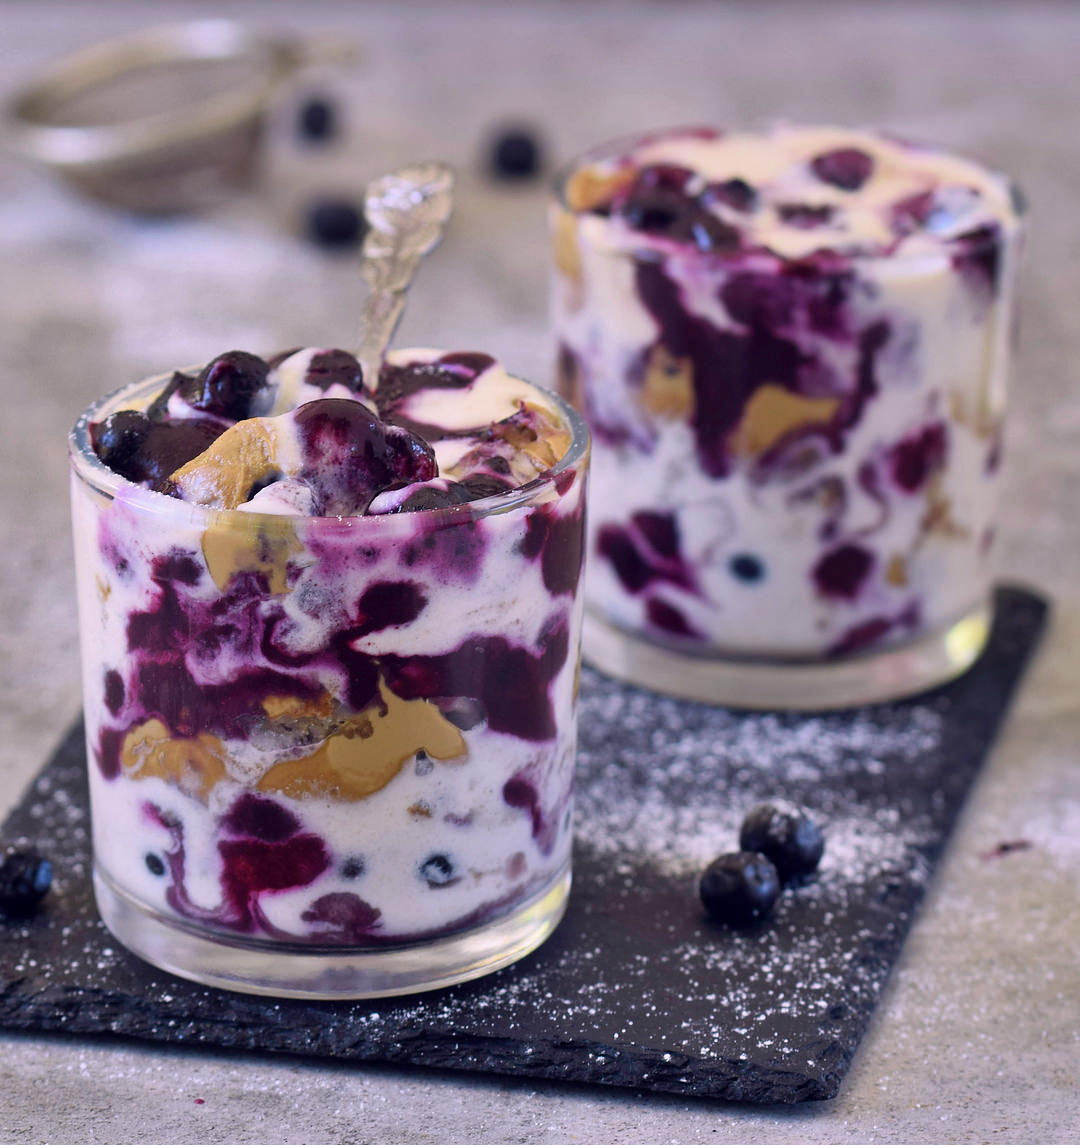
F/5, 1/60th sec., ISO 200)
My goal here was to focus just on the front jar while having the other one blurred in the background.
Click image to view larger
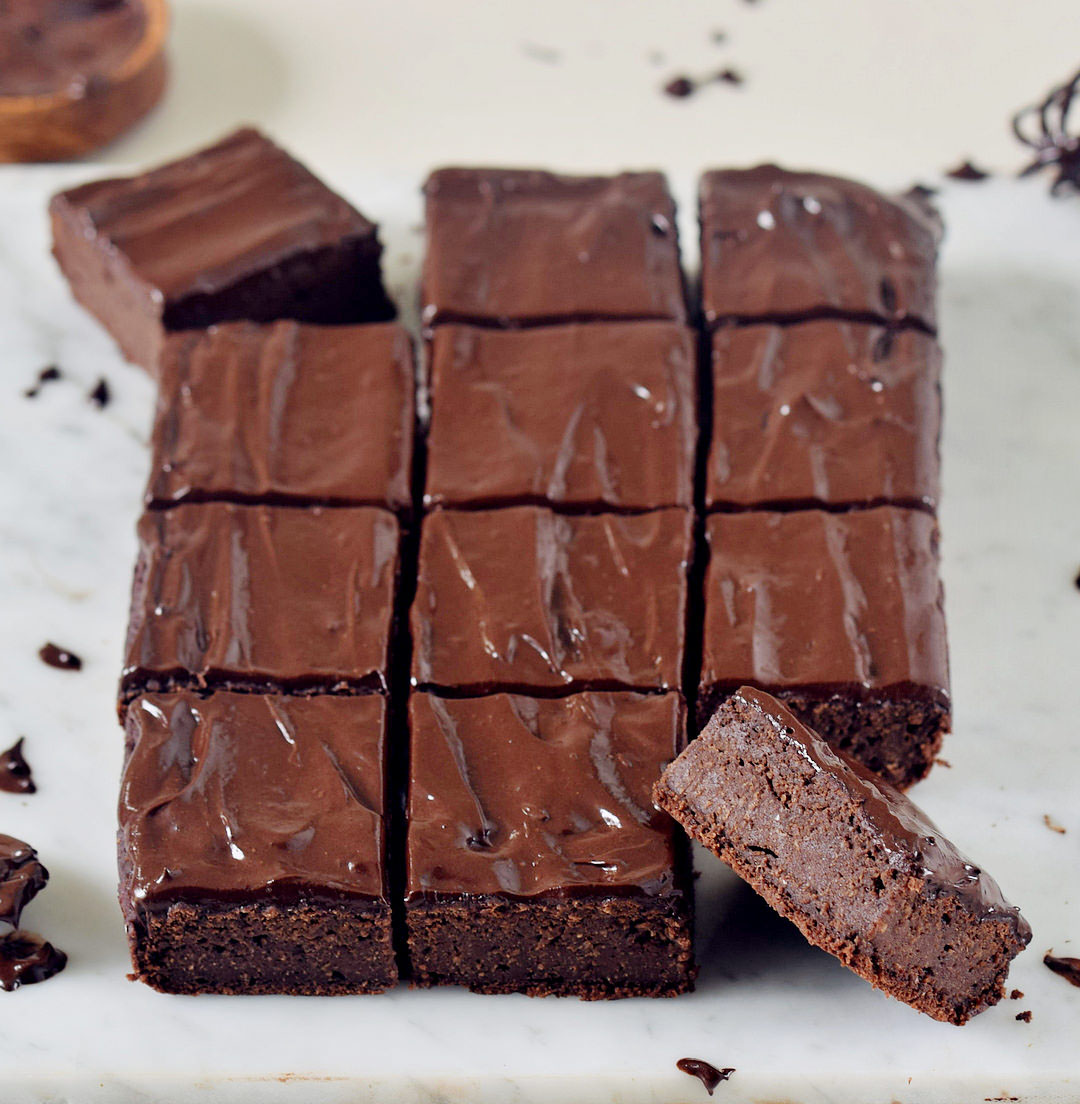
F/4.5, 1/6th sec., ISO 200
The focus here was on the brownie (and the shiny glaze) on the right side, which is pointing to the light coming from the left. The lighting was pretty bad that day, so I had to use a shutter speed of 1/6th of a second.
Click image to view larger
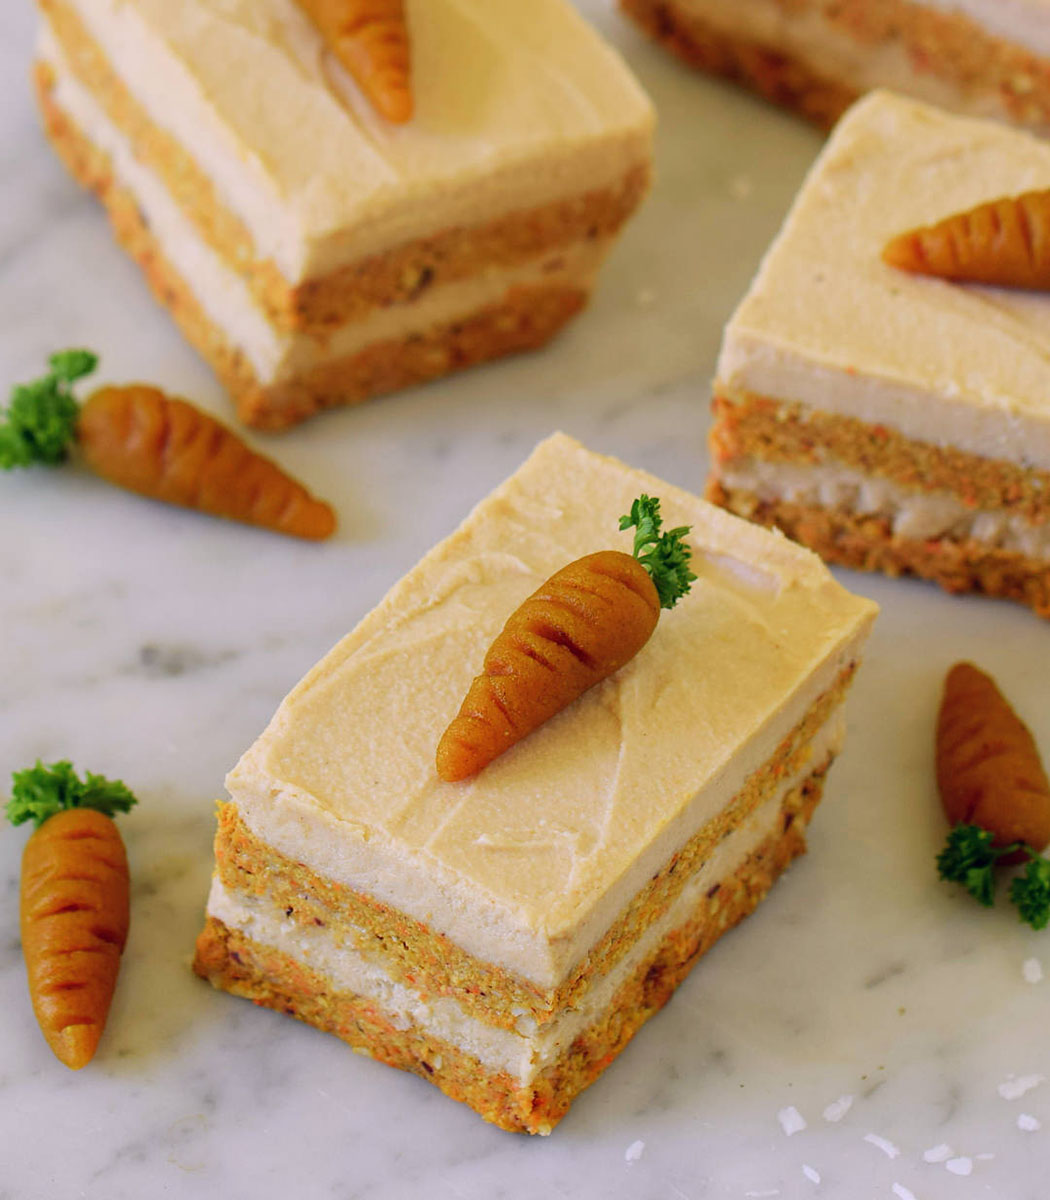
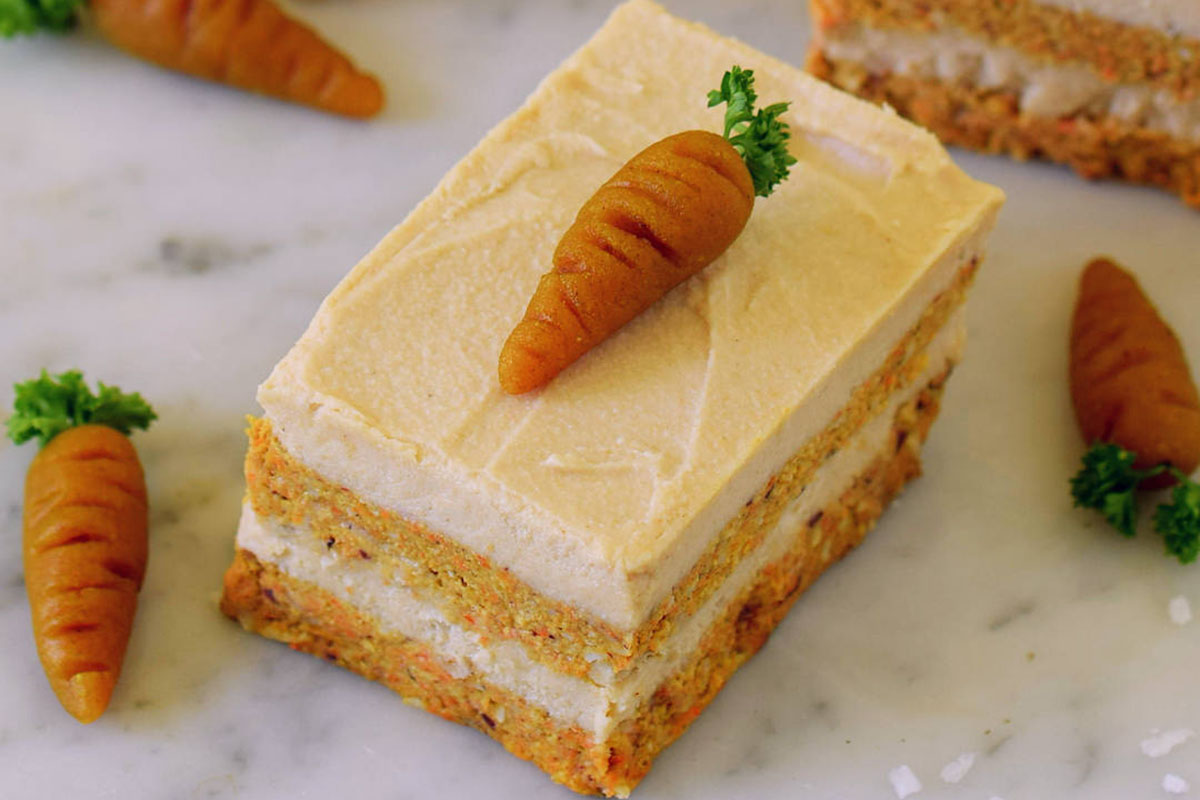
F/5, 1/80th sec., ISO 160)
Here I wanted a close-up of the front bar only, with a focus on the homemade mini-marzipan carrot.
Click image to view larger
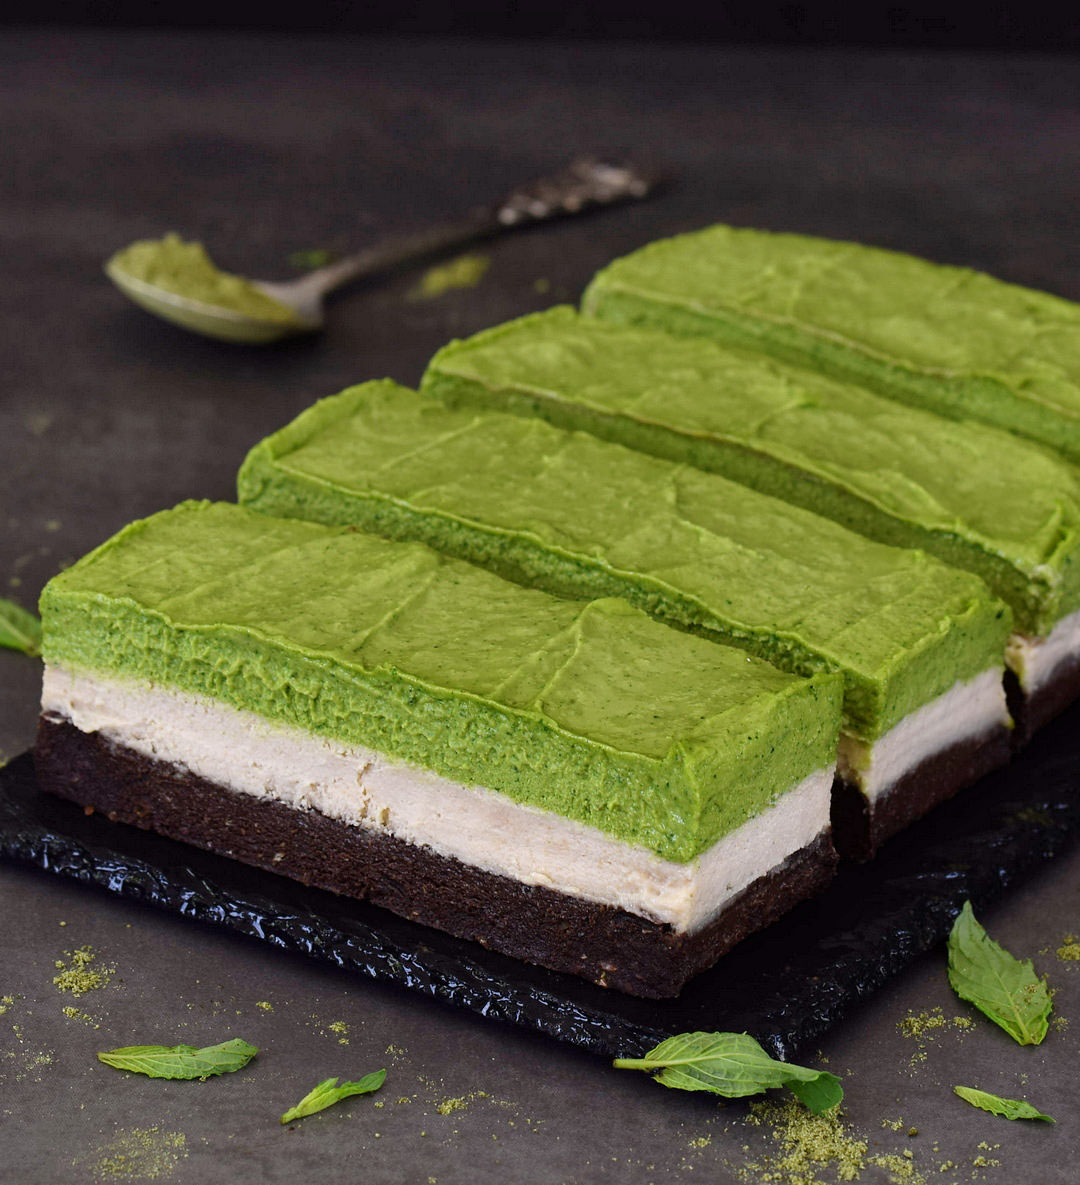
F/8, 1/80th sec., ISO 160)
I used a higher f-stop to have the first bar completely in focus. The challenge here was that this no-bake dessert melted quite fast, so I had to be quick.
Click image to view larger
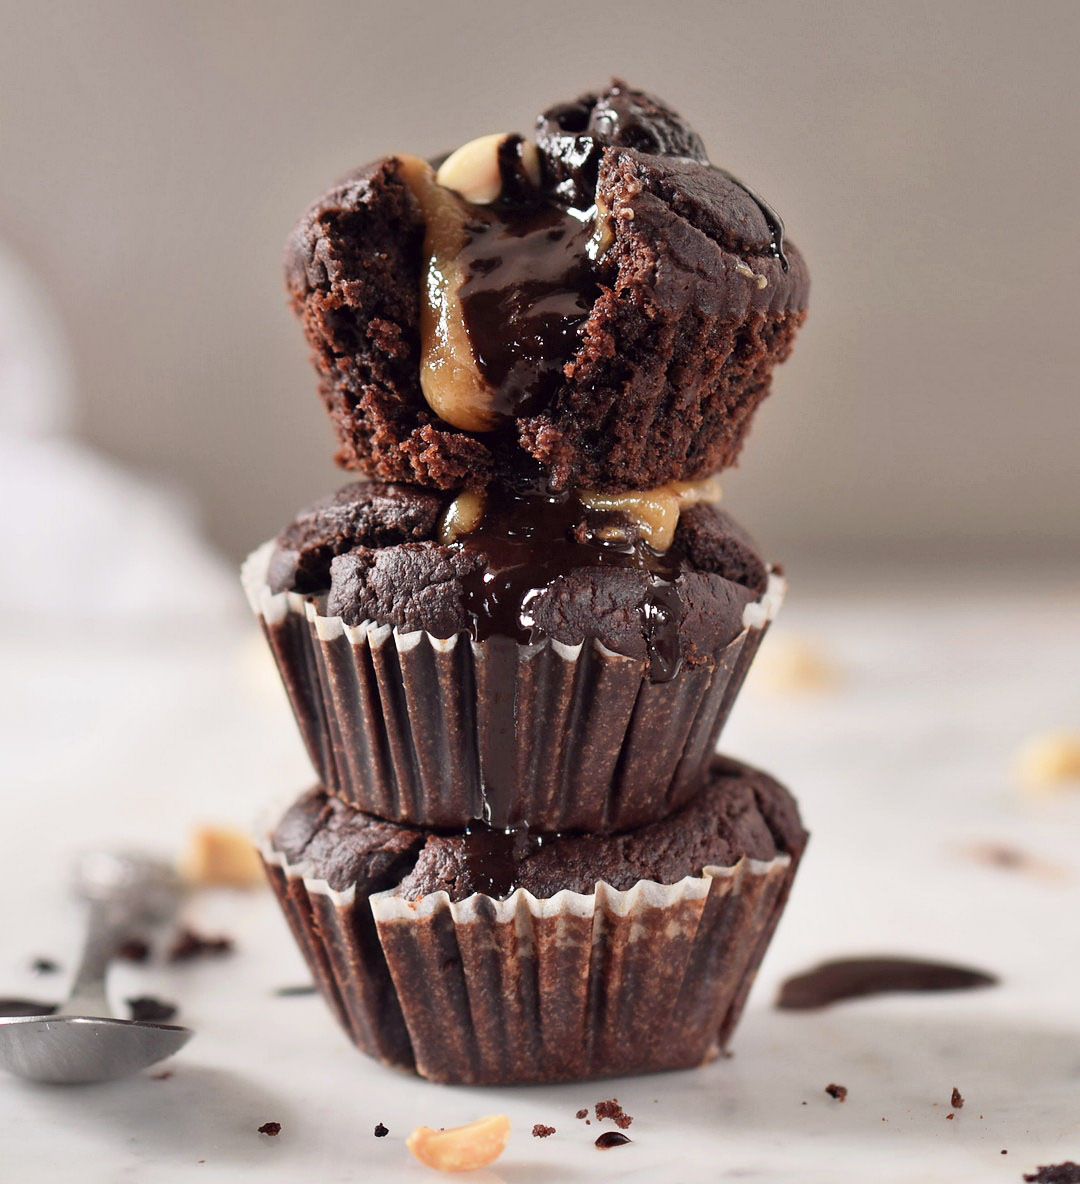
F/3.2, 1/60th sec., ISO 160)
My focus was on the caramel chocolate drizzle, which was a little bit runny (so again, I had to shoot fast).
Click image to view larger
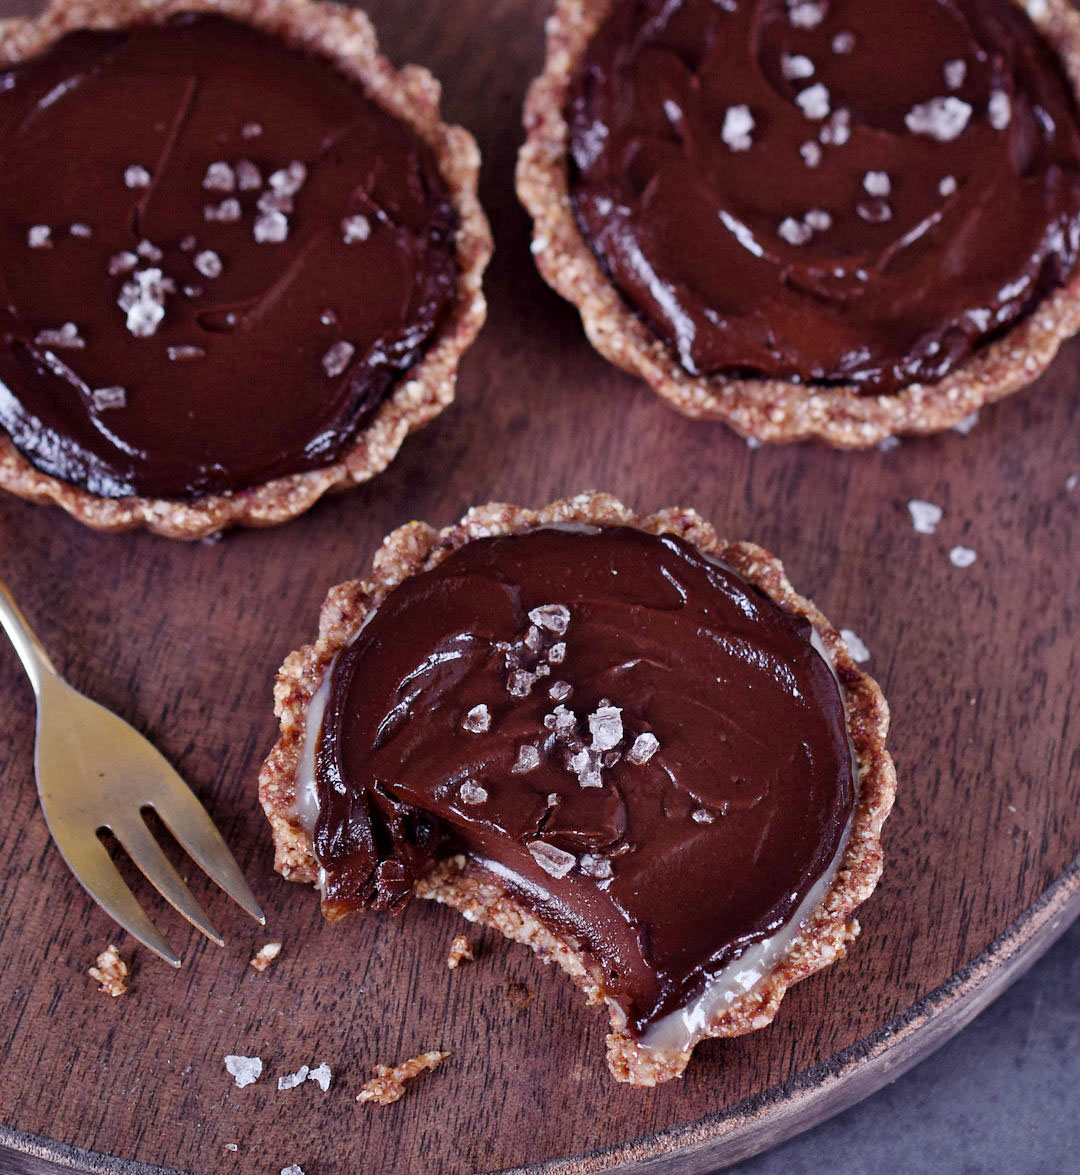
F/3.2, 1/10th sec., ISO 320)
I placed my focus on the front tart only, especially on the shiny bite. The lighting was once again less than ideal that day, so I used a shutter speed of 1/10th of a second.
Click image to view larger
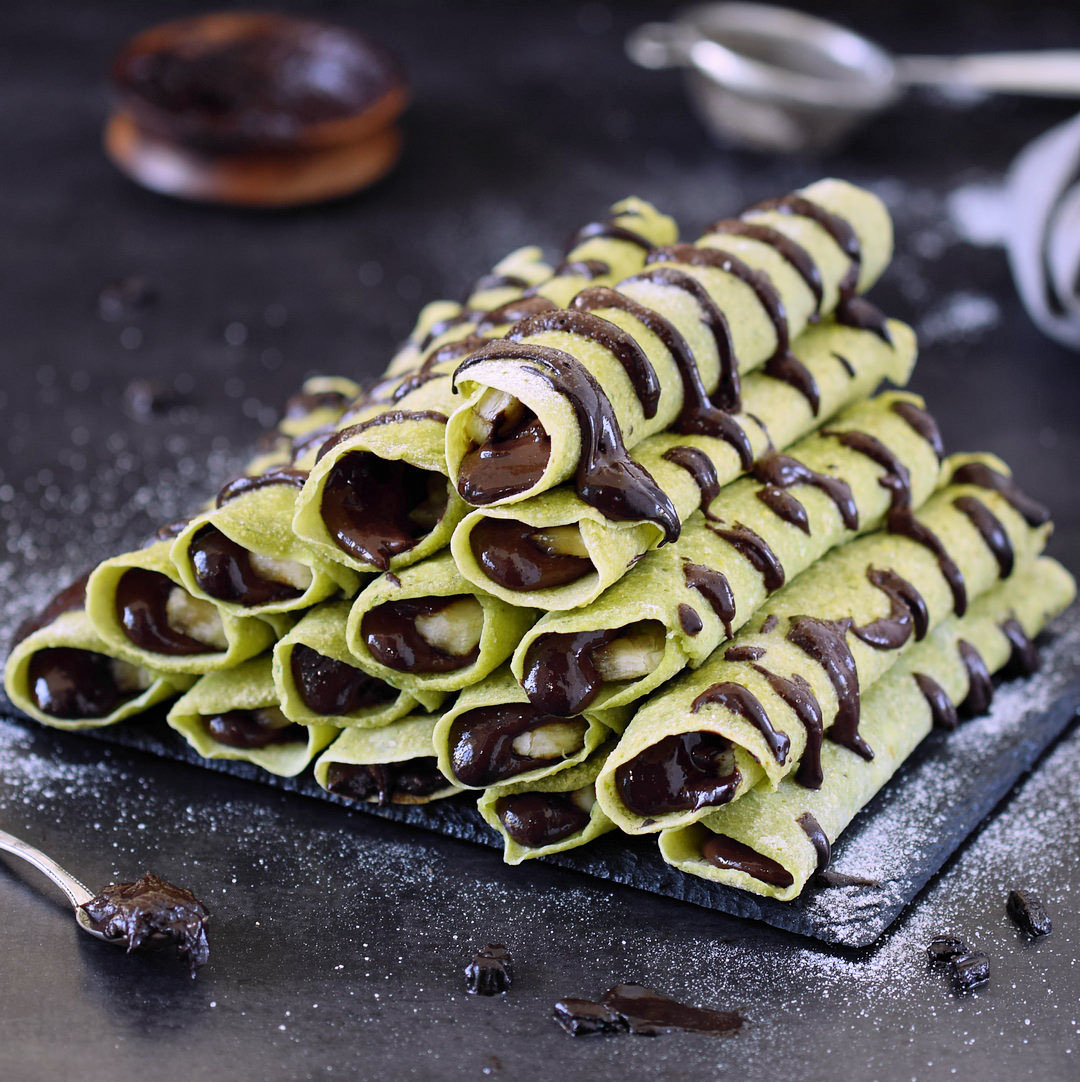
F/3, 1/50th sec., ISO 200)
My focus here was on the chocolate filling of the crepe on top. The filling looked a bit dry after a while, so I had to shoot fast.
Click image to view larger
Check out more of Michaela Vais' work at https://elavegan.com/ or on her Instagram.
More Photo Tips | Watch Videos | Learn More About Tamron Lenses | Photo Gallery