How to Shoot: Sports Photography
Bill Howard uses the Tamron SP 70-200mm VC, SP 150-600mm VC G2, and SP 15-30mm VC G2 lenses to capture the action, from the high school level all the way up to the pros.
More Photo Tips | Video Gallery | Photo Gallery | Enewsletter sign-up
By Jenn Gidman
Images By Bill Howard
Bill Howard has been taking pictures as a hobby going all the way back to film. He became a stringer for a local newspaper about 20 years ago and started covering regional sporting events, including Carolina Panthers football games. But nearly four years ago, he decided to start shooting even more for supplemental income, and six weeks after his first paid assignment, he decided to quit his day job and pursue photography full time.
Since then, Bill has built up an ample portfolio of commercial, corporate, landscape, and wedding and event images, but his real passion has remained under the bright lights of the sports arena. "I went back to that same paper I started out as a stringer for and began photographing high school games; about a year after that, I got accepted by the Icon Sportswire and Cal Sport Media Agencies," he says. Bill sells his work—which now includes everything from high school and college sports to pro football, baseball, golf, and tennis—to AP and Getty through his agencies. A one-time gig shooting a basketball game at NC State, his alma mater, also led to a permanent job as the photographer for the school's Wolfpack men's basketball team.
To zoom in on every basket, base hit, and bogey, Bill relies on his Tamron SP 70-200mm VC (he's also used the G2 version on loan), the SP 150-600mm VC G2, and the SP 15-30mm VC G2 lenses. "My 70-200 is phenomenal and is pretty much my go-to lens," he says. "Meanwhile, I was absolutely stunned when I got my hands on the 150-600 and saw how fast it focuses—it's become vital to how I now shoot sports. As for the 15-30, that's always been my moneymaker for much of my corporate and commercial photography, but I've been using it more for my sports work lately. Recently, for example, I photographed a basketball game at Wake Forest and set up a floor remote with the 15-30. I captured several shots using that lens that were definite keepers."
Read on for Bill's tips on capturing all of the action, plus those special details that round out the thrill of the game.
Prep as much as possible.
Finding out ahead of time what kind of lighting an arena, gym, or field has can help immensely. For example, I shot a college game earlier this season and discovered the lights there flickered horribly. I actually took five minutes' worth of pictures before I realized my images were going from deep orange to bright blue, with about a stop difference between some of the photos.
You also want to get an idea on where you're going to be situated during the game, so you know which lenses you'll need. In general, though, a lens like the 70-200 is usually perfect for basketball, whether you're in the stands or on the baseline or sideline. The same for golf if you're going to be near the green. The 150-600 offers even more reach for capturing details and facial expressions for players who might be tens of yards away from you; the same goes for tennis. However, always find out the rules of the venue you're going to. If you're going to be in the stands at a pro or Division 1 football game or MLB stadium game, for example, they often don't let lenses in that are beyond a certain length.
Finally, make sure your batteries are all fully charged—and I say "batteries" plural, because you should always have extras in case your main one dies. It would be terrible to miss key moments in the game because you ran out of juice.
Settle on your settings.
I usually don't go below 1/1000th of a second for any sport, and for some fast-action sports like hockey and tennis, I'm more typically at 1/1600th of a second; I even go faster than that on occasion. When I'm using the 150-600, I'm shooting up to F/6.3, which means I have to bring my shutter speed down somewhat. My f-stop for low-light situations is usually F/2.8 or F/3.2 with the 70-200 and 15-30. If you're having trouble getting the player in focus, you can go up to F/3.5 to get a bit more depth-of-field.
When you're dealing with lighting that's less than ideal, to keep from using a super-high ISO like 10000, which can make images too grainy, drop below that 1/1000th sec. shutter speed, maybe to 1/640th, which then drops your ISO to 5000—a lot more manageable. In post-processing, use noise reduction to get rid of some of that grain. You can also bring your contrast down to brighten your subject, though that flattens things. Bring some of the depth back to the photo by increasing the blacks just a bit.
Get a handle on focusing.
I typically use single-point focus for most sports, except baseball and tennis, where there usually aren't multiple players in one spot (in those cases, I'll use a group focal-point setting). In the beginning, I had that single focal point dead center, but I've since moved it up one spot from the center. I also look for the highest contrast to help the camera focus faster, which is usually the numbers on a player's chest, or the eyes and nose on a face.
I'll most often prefocus when I use a floor remote camera, so it won't go into an autofocus mode that I can't control. What I'll do in basketball, for instance, is have someone stand before the game in the small circle just below the basket so I can focus on them in manual, making that my prefocus setting. That way, when the real action starts, the camera is ready to go.
For my primary camera, which I'm usually handholding, I don't prefocus, except in certain instances in baseball and golf. For example, at a baseball game, I'll line up on the first base side and prefocus about 2 feet from the bag. If there's a throw to first and a player has to slide into the base, his face will usually be about 2 feet away from the bag if his arms are extended. If I've prefocused, I'll get his face nice and sharp. I'll also prefocus in golf when the player is addressing the ball: I'll focus on the player's face while he's doing that, then lock the focus and wait for the swing to come.
Use the power of your zoom lens to capture emotion.
When I was growing up in the '80s and '90s, I remember being drawn in by the Sports Illustrated magazines of that era, and not just the pictures of, say, basketball players dunking. The images that drew me in were the ones where they were dunking and yet the photographer focused in on their gritted teeth and the sweat flying off their faces. Now that I'm a sports photographer myself, I often choose to make the expression on the player's face the focal point of my image, then build the rest of the composition around that.
Because it's very easy to have a great play but a not-so-great composition—maybe you can't get the player's face, or you end up with too much space to the player's left or right—I advise sports photographers to work up to the expression shot by progressively zooming in tighter and tighter. So maybe start out taking pictures of the wider overall scene, then move up to zooming in to capture just one player, and then, finally, zoom in even further to capture his expression, such as a ball handler's face as it's pressed up against a defender's chest. The eventual goal is to get as much of that done in-camera so you don't have to crop later.
Develop your toolbox on the courts and in the field.
One of the best ways to grow as a photographer is to slowly build up your skill sets by dedicating time to certain types of photos until you feel comfortable. For instance, if you often take pictures at basketball games, spend time initially learning how to capture the free throw shots at just the right moment—and that "moment" could vary, from the player launching the ball, to zooming in to show his eyes intently staring at the basket before he takes the shot. You've now developed the skill to take that type of photo at every game. Next maybe work on capturing a player's expression as he does a dribble drive down the court (and for this type of image, work on capturing the ball when it's palmed in the player's hand, not when it's on the floor). Once you develop the dribble drive, start working on mastering the jump shots at the beginning of each game, and so on. Soon you'll have an entire toolbox to draw on, with a variety of different photos you can capture at each game without even thinking too hard about it.
Don't be afraid to experiment with artistic effects.
Go beyond the typical action shot. For instance, I occasionally like to use motion blur while photographing a baseball batter. There's not a whole lot of movement in the head and facial area, and just a little in the trunk of the body as the batter swings, so you can keep the image sharp enough there while still capturing the blur of him swinging—you just have to slow your shutter speed down and keep the camera steady. Because we can't have tripods on the baseball field, I'll rest my camera on a fence or the top of the dugout to keep it stable. I've also done multiple-exposure work in baseball, where I'll take three to five images of the pitcher throwing the ball to home plate.
Put together a portfolio that offers a complete narrative of the event.
When I help people build portfolios, I tell them to create three different sets of images. In the first set, you'll want to include 20 of the best sports images you've ever taken; those can be a mix of anything. The next two galleries, however, should each showcase a complete game or match so that whoever's viewing your photos can see how you're able to put together a story.
The first 15 photos in that kind of gallery will be made up of both action shots and what I call game time shots: those photos that aren't necessarily images of the players playing the game, but the parts of the game going on peripherally—for instance, a coach patting one of the players on the back or, alternatively, going hard on a player because he made a mistake. Or a player giving the ref hell. In film we'd call that the B-roll shots, but here they become part of the main attraction.
Then you want to round out each of these game galleries with about five images of other elements that tell the story of the game. That could include everything from cheerleader or mascot interactions with the fans, spectators singing the national anthem, or a photo of the basketball in the rack before the game starts. I especially like to get the refs into my images when I can. I have one referee trained to roll the basketball on his hip until the logo on the ball is facing me. That way I can zoom in on him and capture just a part of his backside, along with his arm and the ball with its logo. It adds an extra sense of place so you get a real feel for the atmosphere of the game.
To see more of Bill Howard's work, go to https://wjhowardphotography.myportfolio.com/sports-photography.
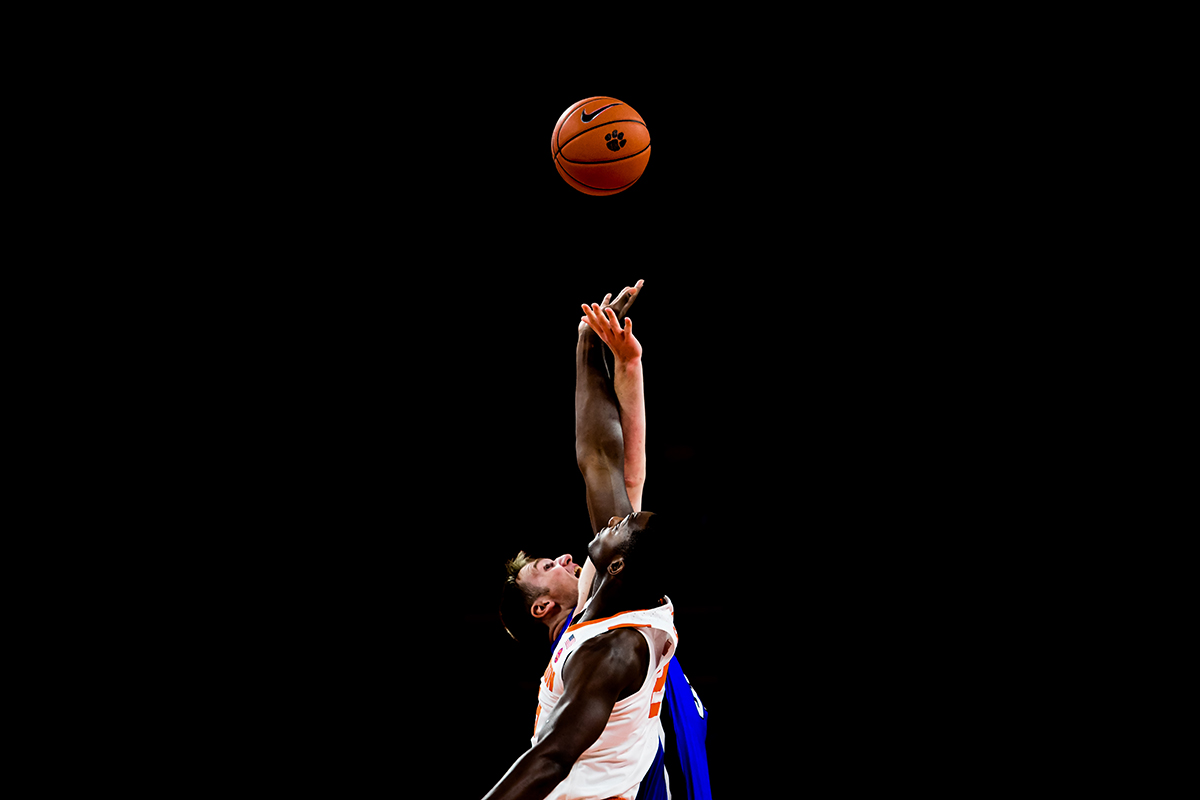
70-200mm (200mm), F/2.8, 1/1250th sec., ISO 3200
NCAA Div II Barton College vs Clemson Tigers (exhibition)
Click image to view larger
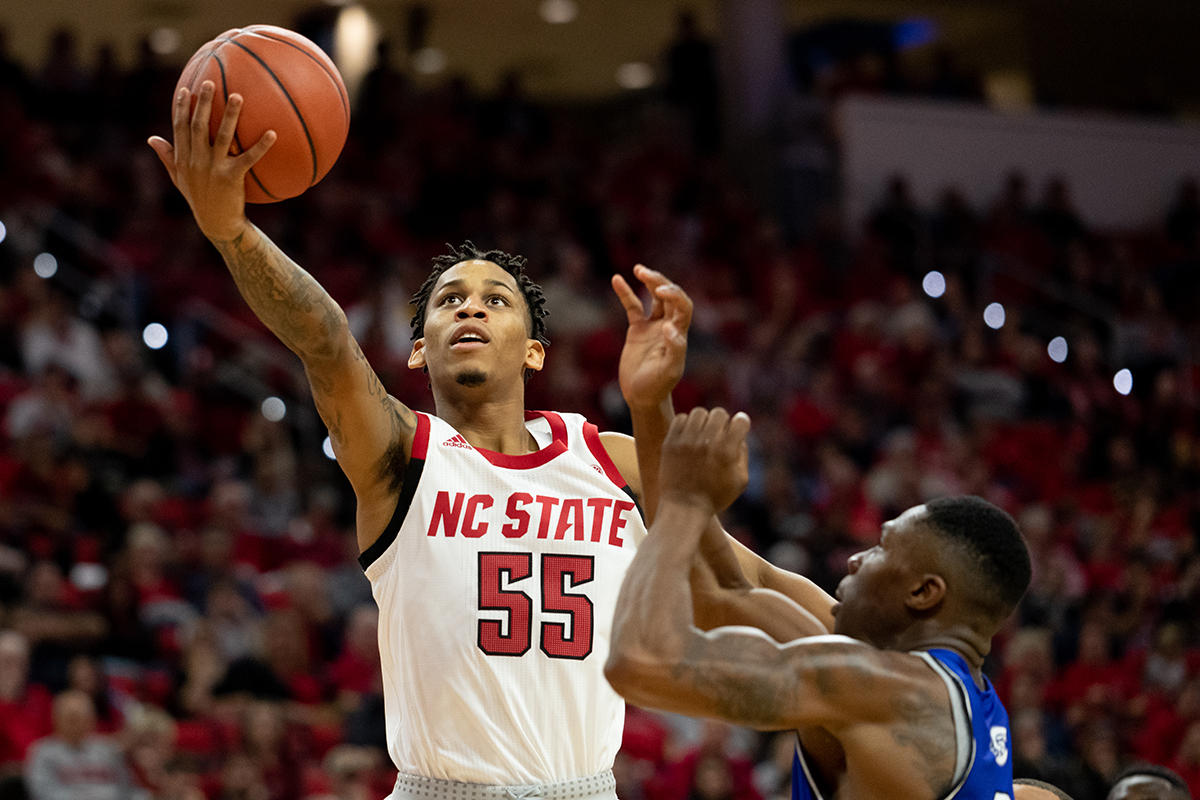
70-200mm (130mm), F/2.8, 1/1600th sec., ISO 4000
NC State Wolfpack guard Blake Harris drives to the basket in an exhibition against Chowan.
Click image to view larger
70-200mm (145mm), F/2.8, 1/2000th sec., ISO 1600
Click image to view larger
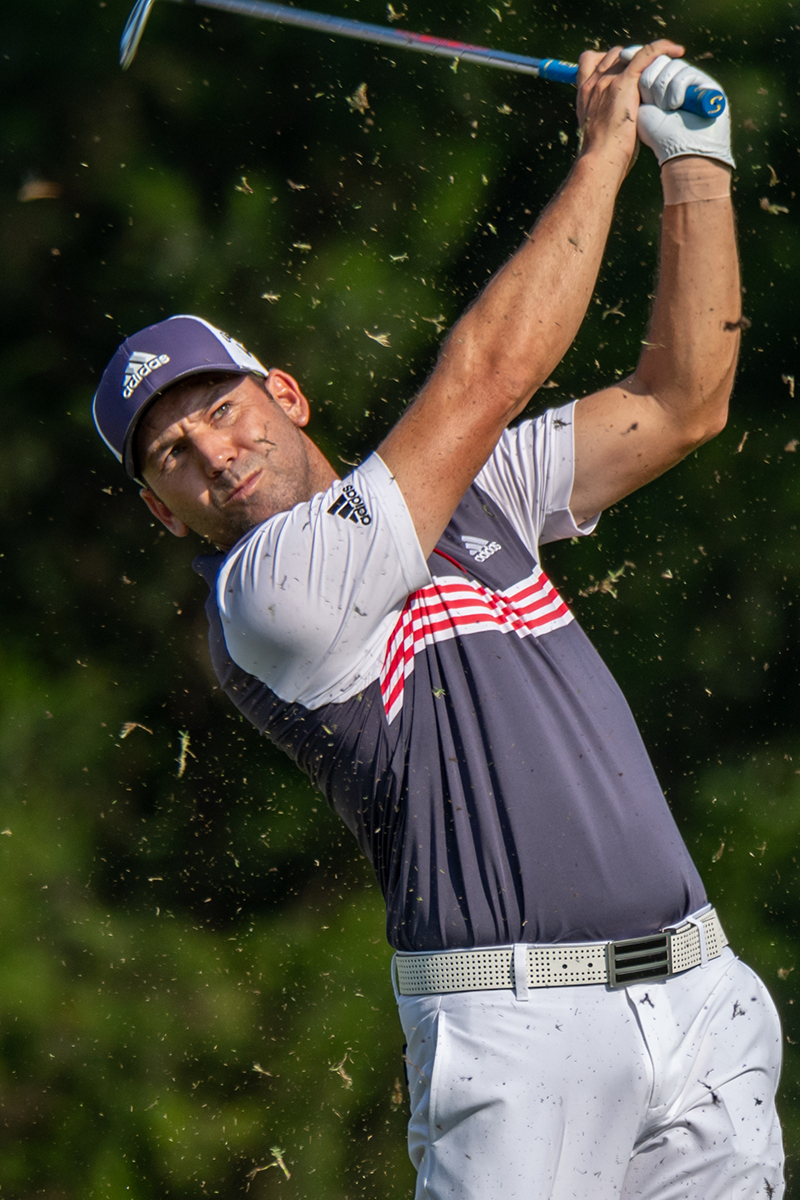
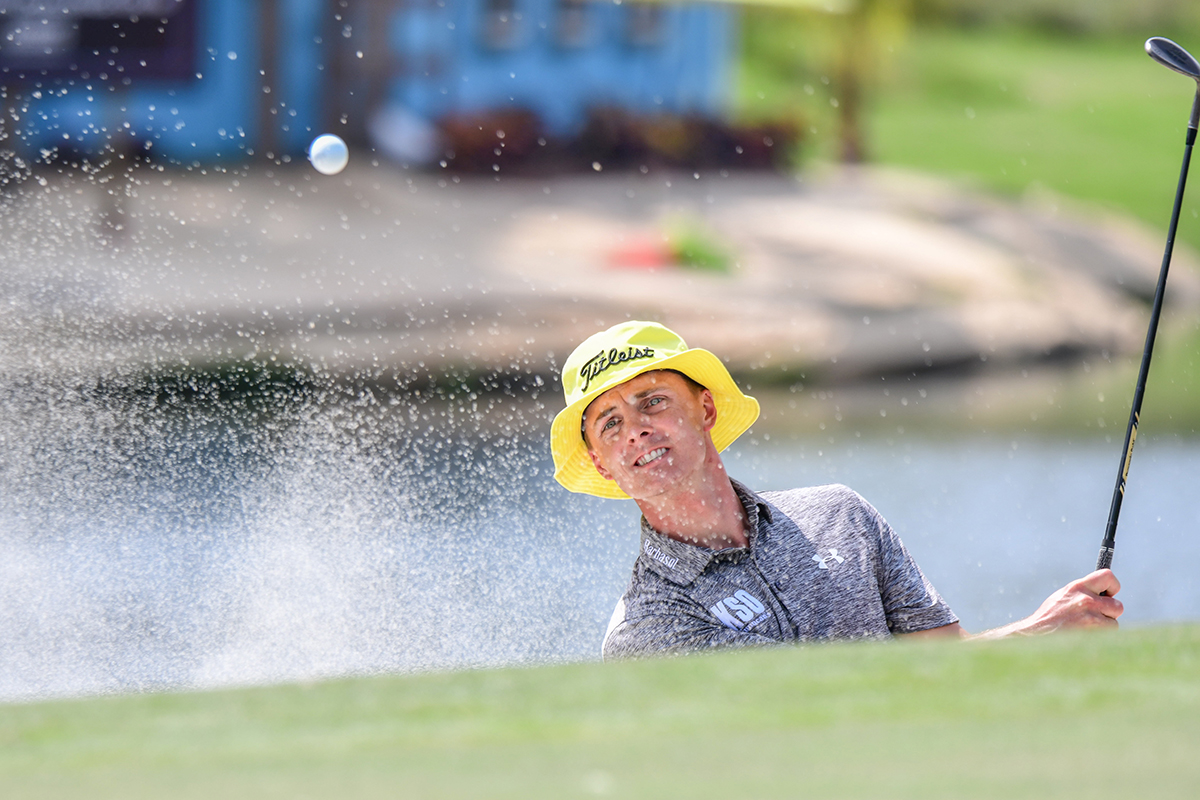
150-600mm (420mm), F/6, 1/1000th sec., ISO 200
Click image to view larger
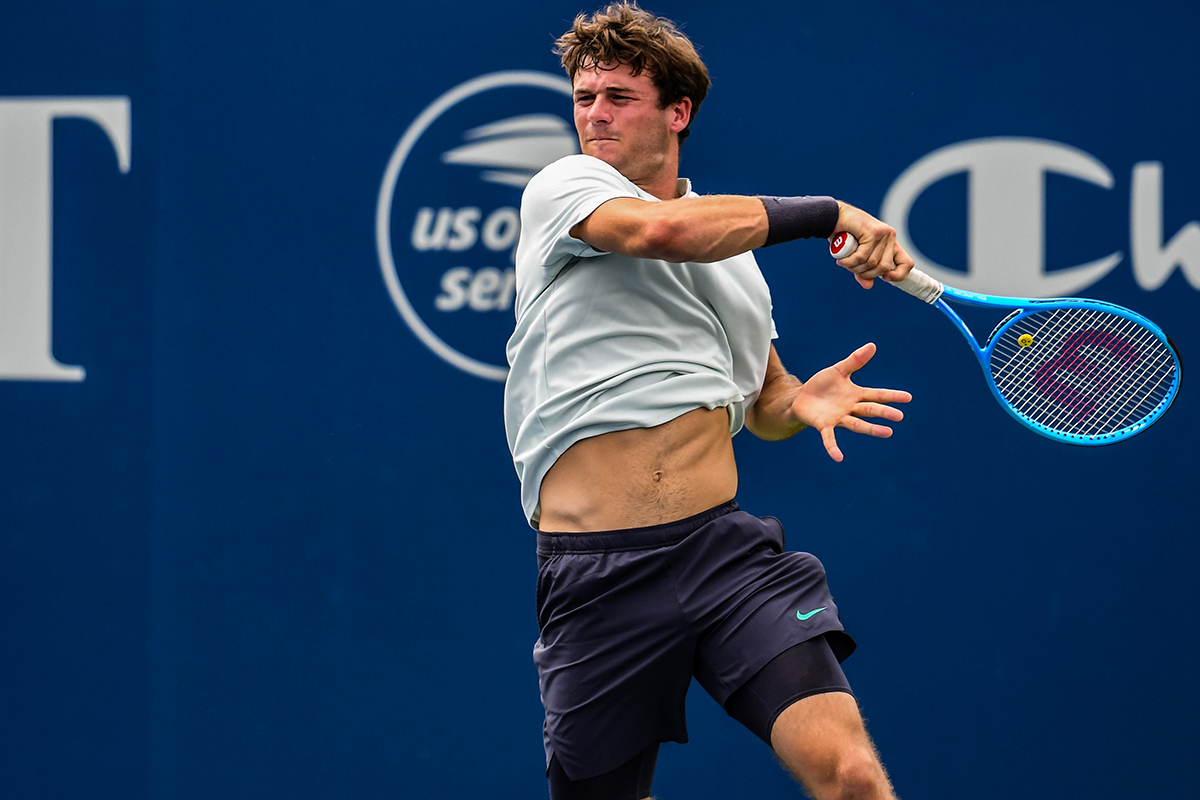
70-200mm (165mm), F/2.8, 1/5000th sec., ISO 640
Tommy Paul returns a volley in the Winston-Salem Open.
Click image to view larger
150-600mm (450mm), F/6, 1/1000th sec., ISO 400
Click image to view larger
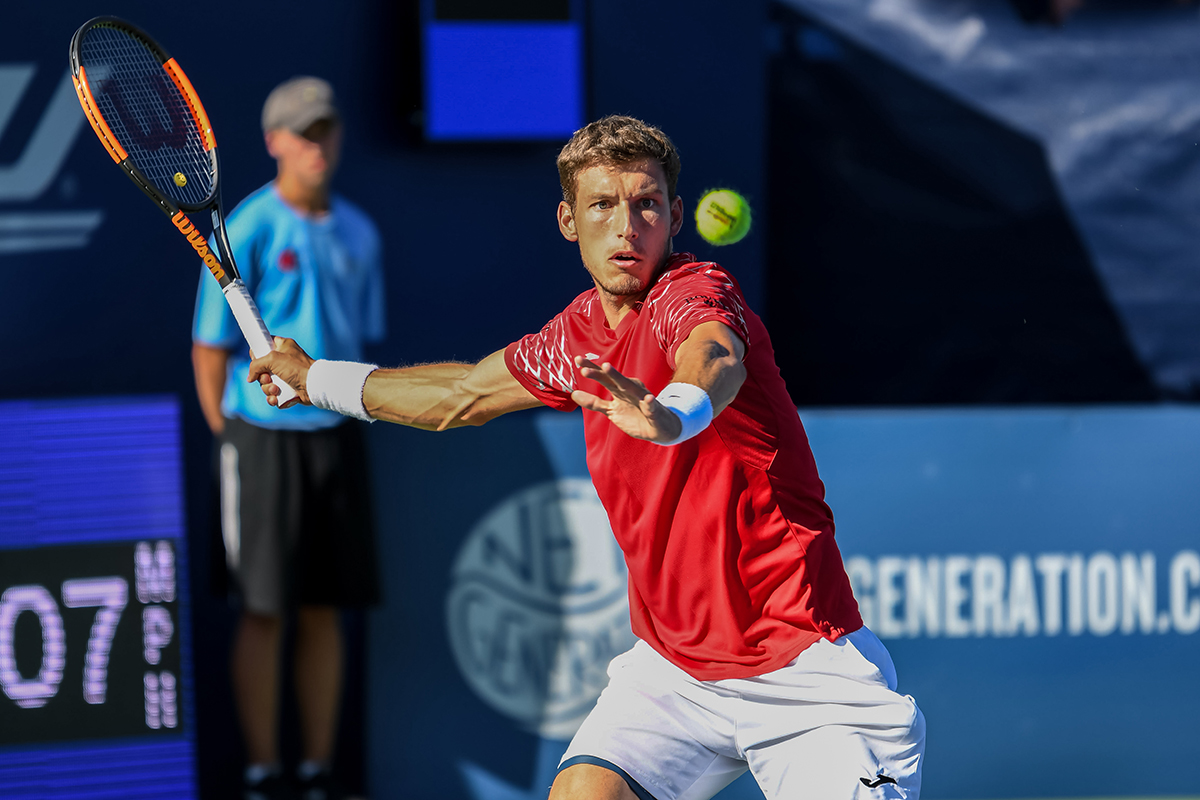
70-200mm (200mm), F/2.8, 1/2000th sec., ISO 200
Pablo Carreno Busta returns a volley in the Winston-Salem Open.
Click image to view larger
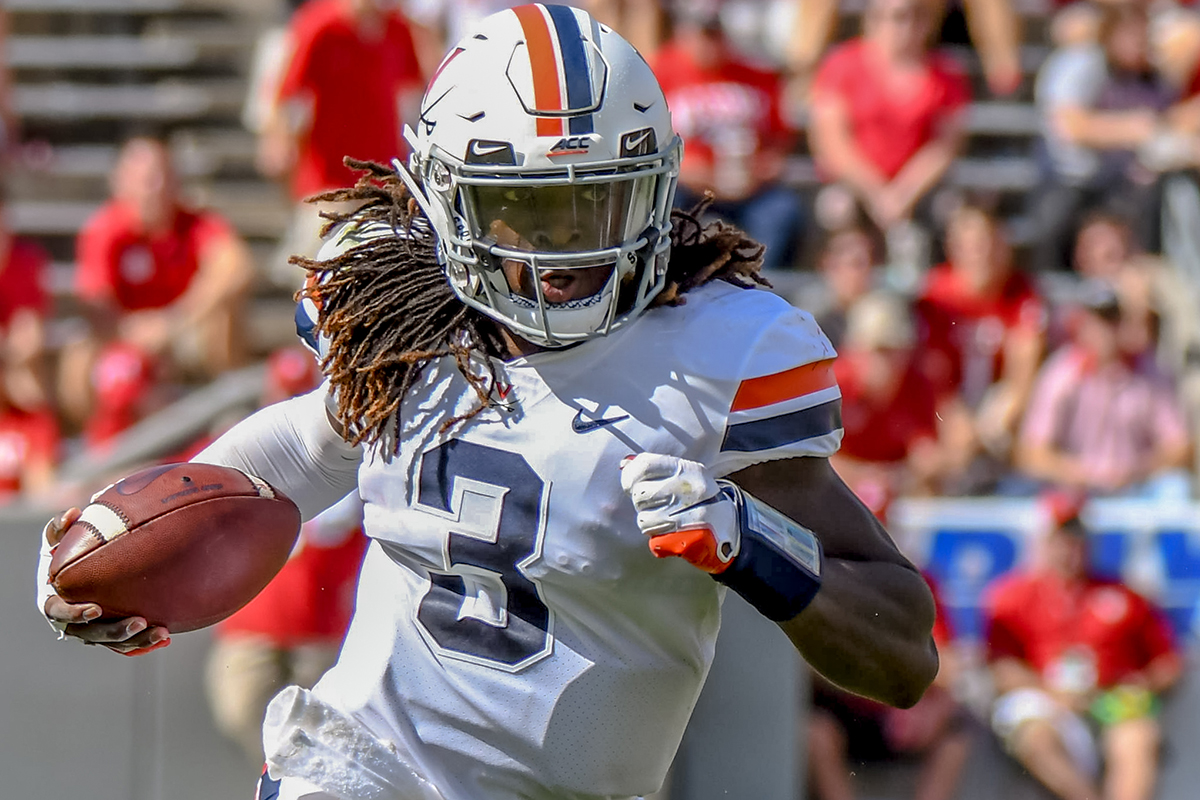
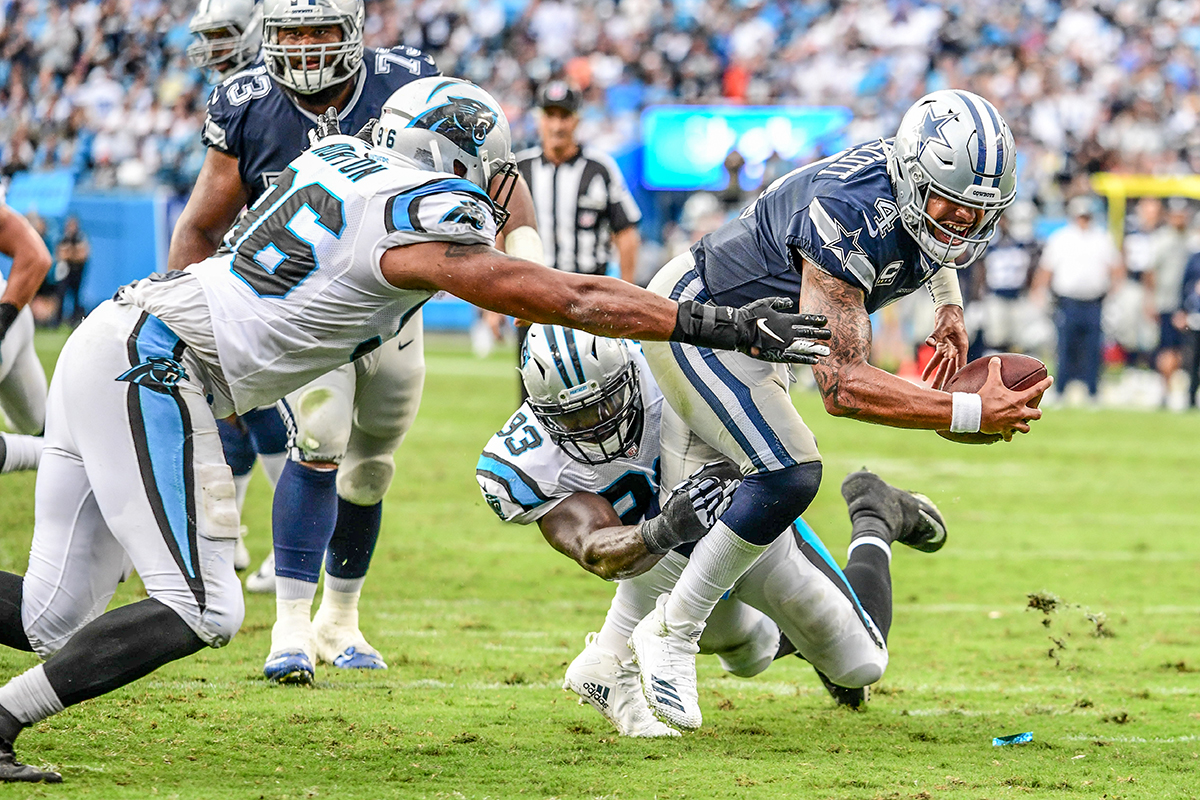
150-600mm (260mm), F/5.6, 1/1600th sec., ISO 400
Virginia Cavaliers quarterback Bryce Perkins runs the ball during the game against the North Carolina State Wolfpack.
Click image to view larger
More Photo Tips | Watch Videos | Learn More About Tamron Lenses | Photo Gallery