How to Shoot Panoramic Landscapes
Paul Winner takes his Tamron SP 24-70mm VC G2 lens to capture the wide view of Colorado’s sand dunes.
More Photo Tips | Video Gallery | Photo Gallery | Enewsletter sign-up
By Jenn Gidman
Images by Paul Winner
The outdoors has always been a sanctuary for Paul Winner, and living in the state of Colorado offers him plenty of photographic access to the landscapes he craves. Within three hours’ driving distance of his home in Denver is Great Sand Dunes National Park, where Paul creates panoramic images of North America’s tallest sand landforms.
“It’s a phenomenal environment for this kind of photography, set against the backdrop of the Sangre de Cristo mountain peaks,” he says. “I couldn’t wait to take my Tamron SP 24-70mm VC G2 high-speed zoom out there to see how it captured this unique landscape.”
This was the first trip Paul’s 24-70 got a significant amount of use, and he was impressed with its performance. “It’s an incredibly sharp, fast lens, and very versatile for this type of shooting,” he says. “In addition, there’s a lot of exertion involved in hiking in this area, especially if you go during the warmer months, so you want to travel as light as possible. This one lens offered me the entire field of view I was hoping for.”
Paul headed out to the dunes in mid-June, before it got too hot, and when there were a good number of wildflowers still blooming after a wet spring. “Normally, I like to be out on the dunes when the sun is coming up, when you’re able to watch the entire environment come alive,” he says. “The sun lights up every curve, every texture. But I took these photos midday, and what panoramic photography allows for is creating a bit more drama during a part of the day when you’re not getting that more dramatic lighting.”
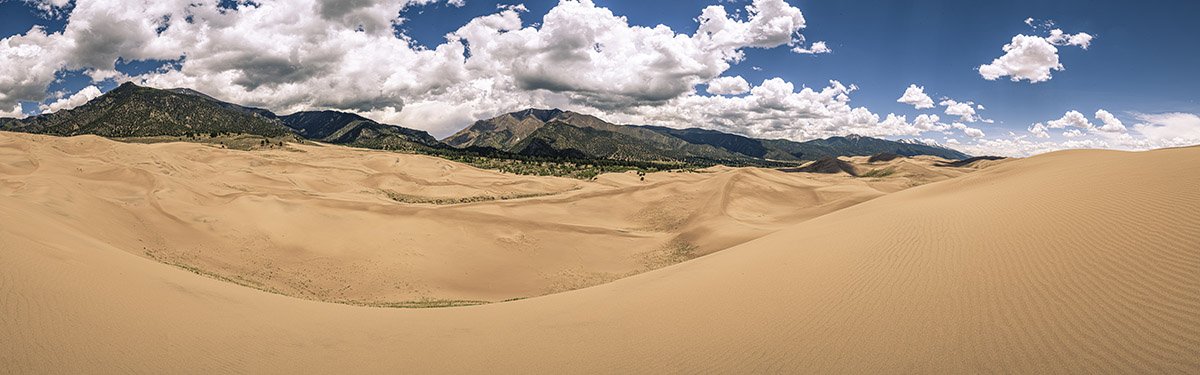
24-70mm (24mm), F/16, 1/250th sec., ISO 250
Click image to view larger
Cloud cover while shooting this type of landscape is also beneficial. “One of the things that’s so special about shooting the sand dunes is that you have this canvas that’s so barren, so you’re able to observe the sunlight and the clouds moving across it,” Paul says. “It’s much more exaggerated than, say, a darker environment; you see the nuances of the light so much more clearly.”
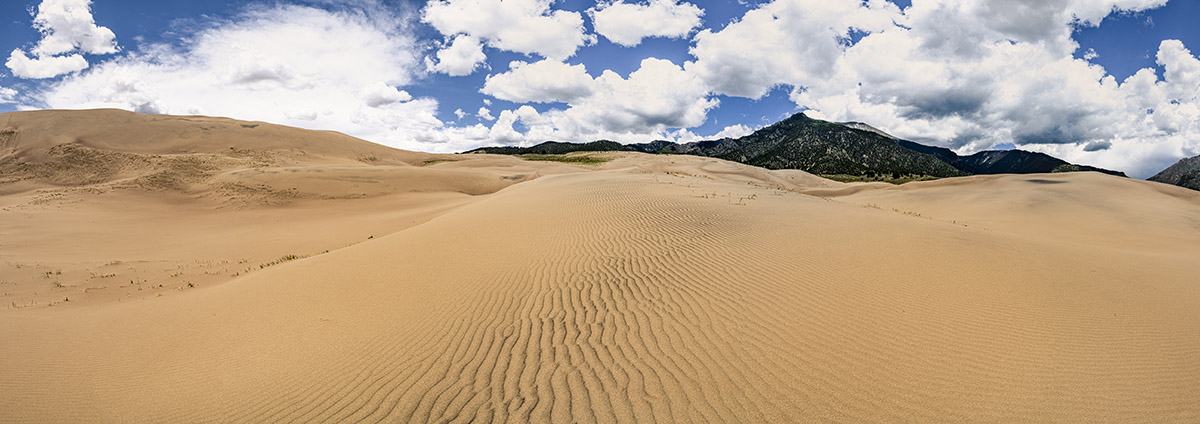
24-70mm (24mm), F/16, 1/250th sec., ISO 250
Click image to view larger
Because of the time of day in which he took these photos, Paul shot all of the panoramics here handheld. “Typically it’s best when creating panoramic photos to use a tripod, with a special panorama head that puts the nodal point of the lens at the pivot point of the tripod,” he says. “But because I was hiking midday, the dunes were incredibly bright, so I wasn’t struggling with my shutter speeds. I simply overlapped about a third of the frame for each shot, so that I could stitch the photos together in Lightroom later on.”
Paul takes an initial test shot using evaluative metering to nail his exposures. “The camera usually does a good job at getting it pretty close,” he says. “I might have to come down a half-stop to compensate for the highlights and the clouds. Even so, I know that with the latitude that my camera allows for, I could be close to clipping on either end and be able to pull a little information if needed.”

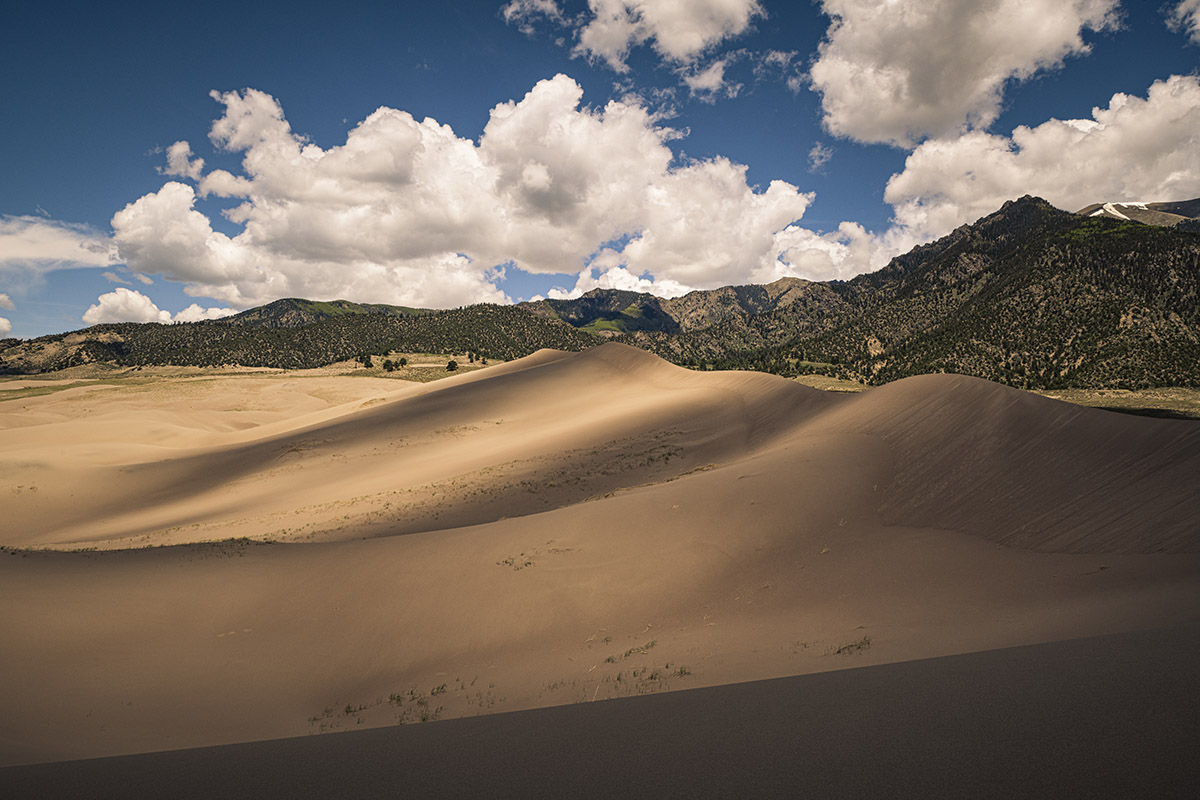
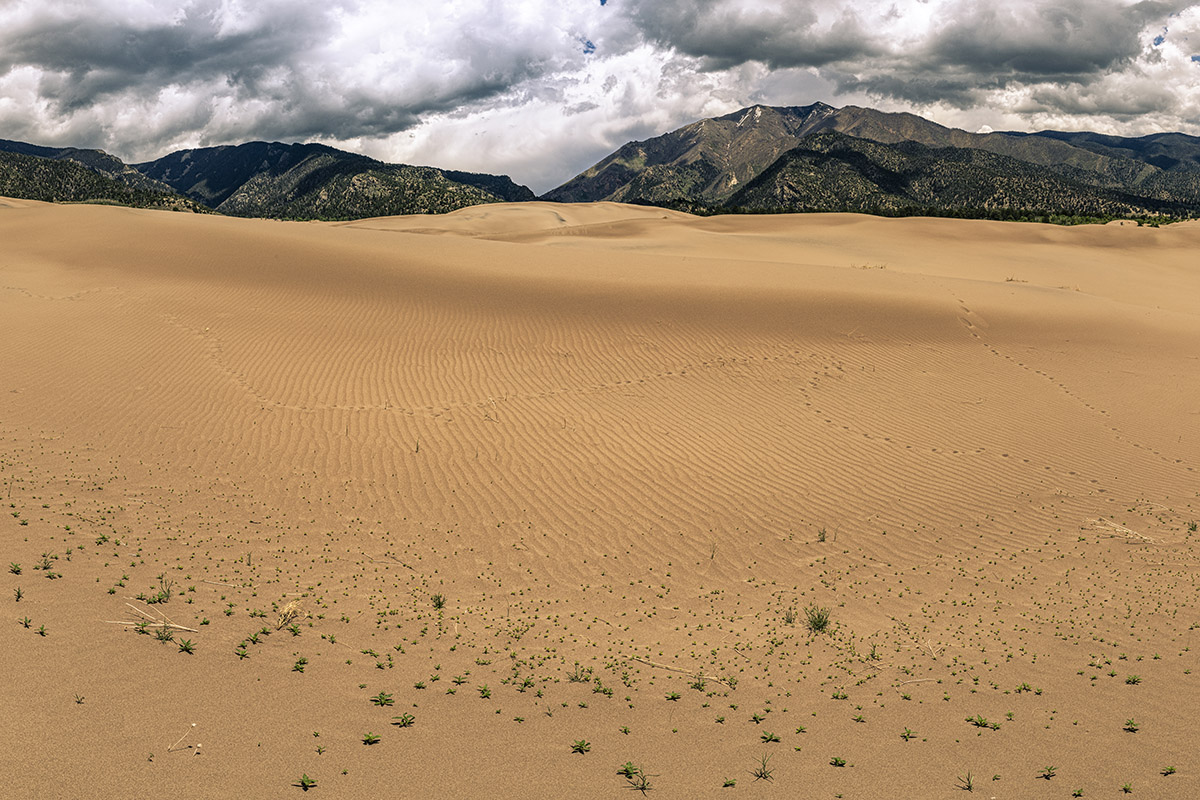
24-70mm (24mm), F/16, 1/250th sec., ISO 250
Click image to view larger
Taking the lens hood off is another tip Paul offers to ensure a perfect panoramic. “The lens hood can alter the exposure,” he says. “You can have the hood blocking out some of the sun in a frame, and then suddenly the sun appears, which can make your image look funky.”
Aperture is key to creating a successful panoramic image. “If your aperture is too low, you’ll end up with a vignette in your images,” Paul says. “Even at F/4, you’ll get somewhat of a vignetting, so when you try to stitch the images together, you’ll see that repeated pattern throughout the frame. There are compensations you can make, but it can create a lot of hassle, especially if you have a lot of open sky. So make sure you’re at F/5 or above. For this series, I wanted optimal sharpness from edge to edge, so I shot all of the images at F/14 or F/16.”
A shutter speed of 1/250th of a second ensured any movement was frozen. “I didn’t want to chance my feet settling into the sand or any other minor vibration that would create movement in the image,” Paul says. “That’s why my ISO was up a little higher, at 250, because it allowed me to maintain that F/16 aperture and 1/250th of a second shutter speed.”
With the 24-70mm, Paul focuses about a third of the way into the frame using autofocus. “There are usually plenty of elements in the foreground to put to use for focusing purposes,” he says. “Once I take one shot, I generally leave my focusing alone. My shutter button isn’t connected to my autofocus button—that’s on the back, which I work with my thumb, while the shutter button I push down with my forefinger, so those two don’t intermingle.”
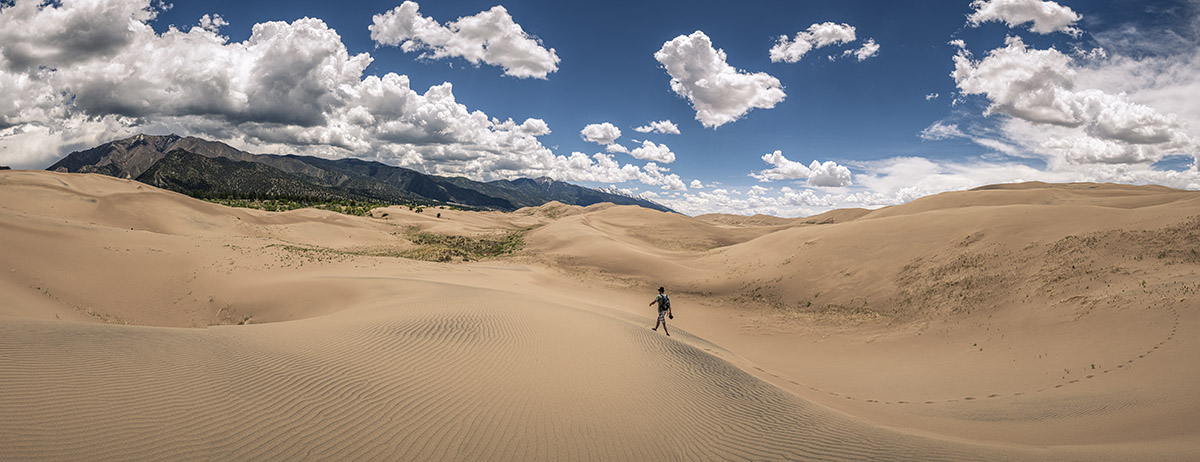
Shooting panoramics lends itself well to an environment like the sand dunes park, with lots of photographic elements to focus on, whether it’s ripples in the sand, the way the shadows play across the dunes, or pops of surprise color, such as tiny plants that occasionally burst out of the landscape. “Still, it can be overwhelming when you’re faced with such a vast scene in front of you,” Paul says. “To really capture how grandiose the landscape is, it’s important to include a few photos with a person or two in it for scale. Where your creativity comes in is how you incorporate that person into the landscape to make them seem like they’re meant to be part of the story.”
24-70mm (29mm), F/14, 1/250th sec., ISO 250
Click image to view larger
24-70mm (24mm), F/16, 1/250th sec., ISO 250
Click image to view larger
24-70mm (24mm), F/16, 1/250th sec., ISO 250
Click image to view larger
To see more of Paul Winner’s work, go to https://thepaulwinner.com or his Instagram.
More Photo Tips | Watch Videos | Learn More About Tamron Lenses | Photo Gallery