Fine Art, Avian Style
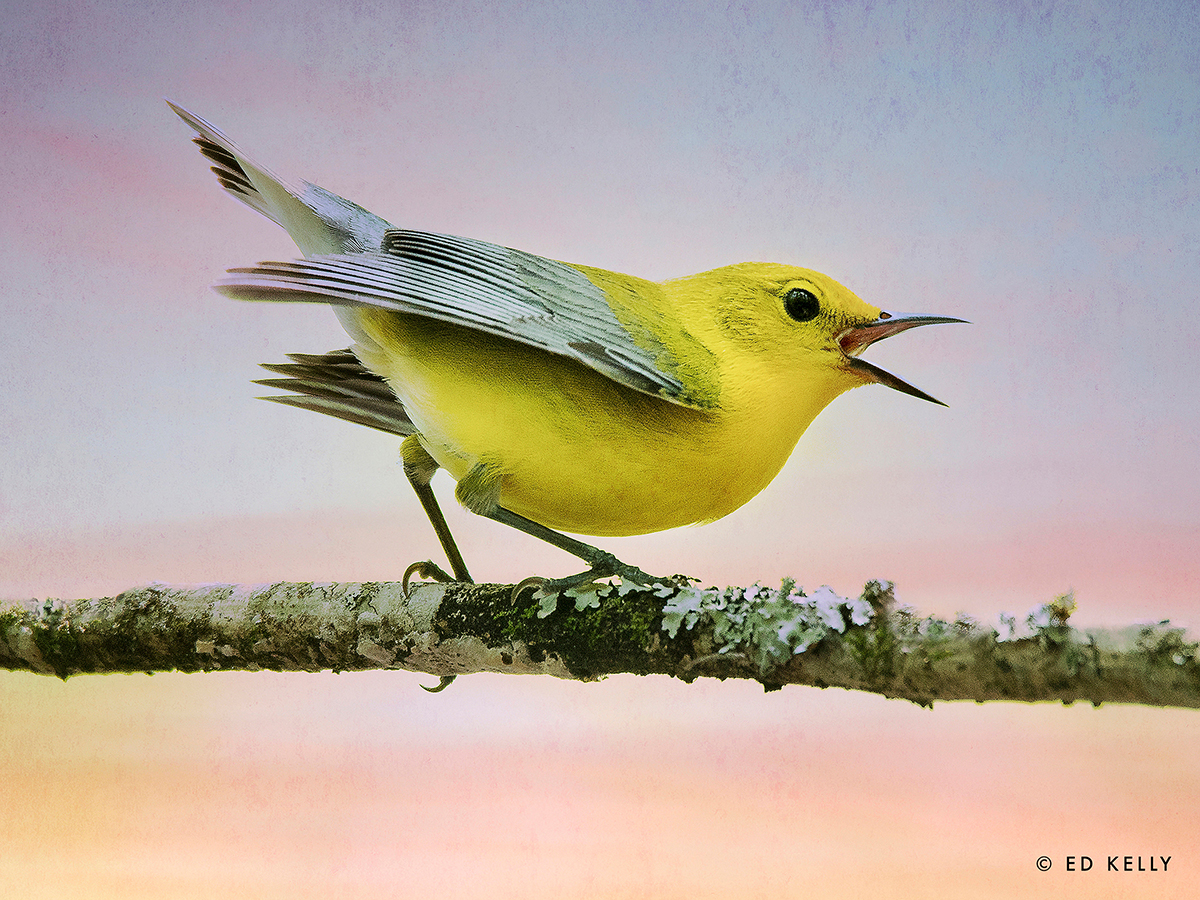
Ed Kelly doesn’t just create bird photos with his Tamron SP 150-600mm VC G2 lens—he transforms them into Audubon-worthy pieces of art.
More Photo Tips | Video Gallery | Photo Gallery | Enewsletter sign-up
By Jenn Gidman
Images by Ed Kelly
Ed Kelly had been a commercial advertising photographer for many years when he moved from New Jersey to a more nature-oriented area in South Carolina. In his new environment, Ed found himself gravitating more toward bird photography, which he continues to this day, documenting his feathered friends both around the Palmetto State and in other bird-friendly areas like Florida’s Merritt Island.
There’s a twist to Ed’s bird photography, though, involving a post-production process that turns his images into works of fine art, which he includes in his “Coastal Dream Series.” “The process is fairly straightforward in most cases,” he says. “I eliminate the background or alter it in some way, then add layers of complexity to the background and onto the main subject.”
Before the editing process can begin, Ed has to capture the photos—which he does with the Tamron SP 150-600mm VC G2 telephoto zoom lens. “The autofocus is faster and the color and contrast were enhanced over the previous 150-600 I owned,” he says. “The image stabilization offered via the Vibration Compensation (VC) technology is also very helpful, since I’m often shooting early or late in the day, when the lighting may not be optimal. With the 150-600mm, I’ve taken photos of birds handheld at 600mm at 1/15 of a second and achieved super-sharp images. I also like being able to get out of my car and start wandering the nature preserve with a lens that doesn’t weigh me down all day.”
Ed envisions how he wants the image composed before he even sets the bird in his frame. “Even though it’s not the focal point of the image, I’ll know exactly how I want the branch, or whatever else the bird is perching on, to come into the frame,” he says. “When the bird finally sets down, I just wait for it to turn so that it looks as close to the way as I saw it in my mind as possible.”
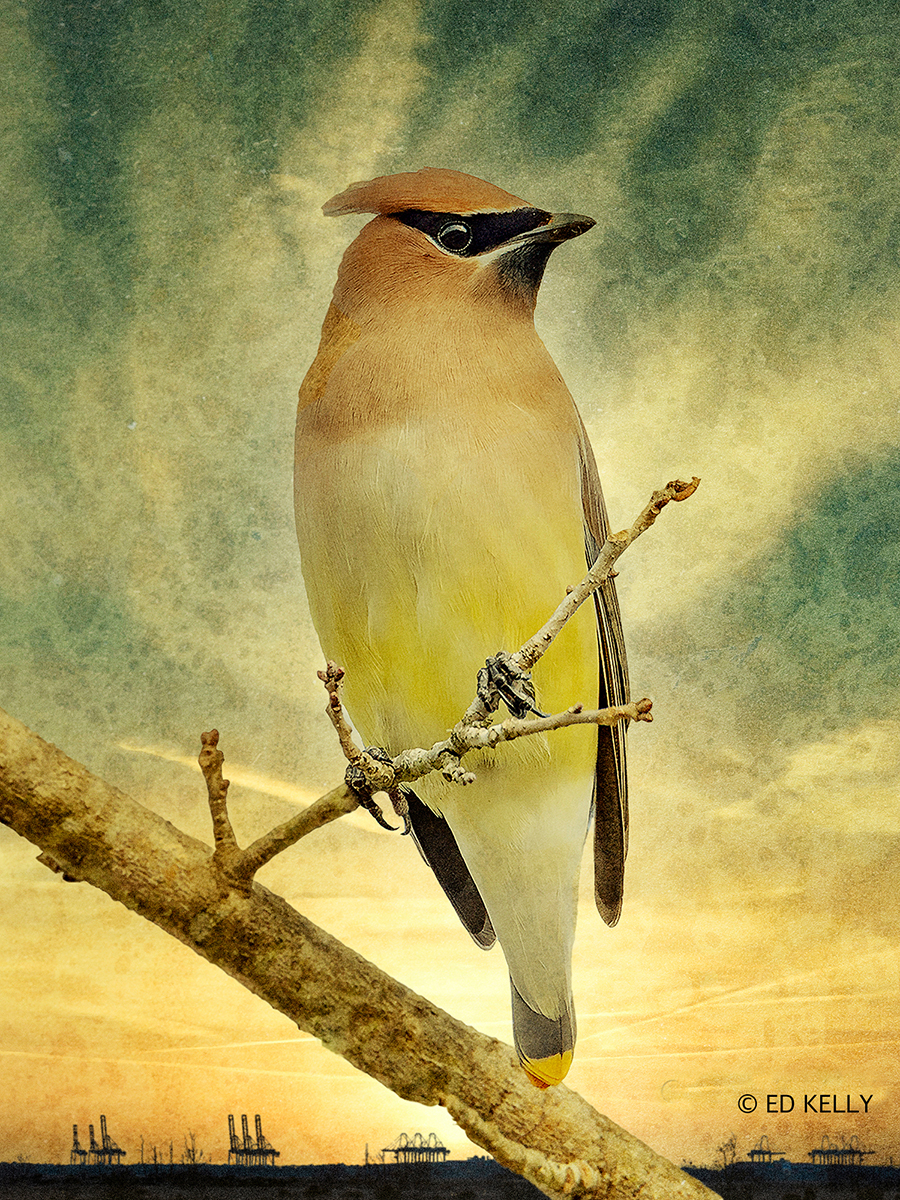
When it comes time to transform his images into fine-art photos, Ed first considers the background and how he wants to alter it in the editing process to sync with the coloring of the bird. “I consider the overall color temperature of the shot, then think about complementary colors based on the bird’s appearance,” he says. “I’ll figure out what colors in the background will make other colors in the bird pop, then adjust it accordingly.”
Next comes the overlay process, where Ed will add layer upon layer onto the main image until he achieves the texture or pattern he’s looking for. “It could be tiny specks of sand or scratches on a piece of paper placed on top of the initial image, which I then massage until it looks the way I want it to,” he says. “Or it could be two or three skies blended together. I also tend to add noise to the image at the end of the process to make it look more realistic. I want my photos to match the mood I’m trying to convey, and having an image look too clear and sharp doesn’t do it for me. I want my photos to look a little rough and grainy.”
Ed explains the process in more detail for one of his favorite images of the “Coastal Dream” series: that of a reddish egret taken on Merritt Island. “What the bird is doing here is called canopy feeding, where it spreads its wings out to cast a shadow,” he says. “That way, it can see the fish better, and the fish are attracted by the shade. I took this photo about 30 minutes after the sun had come up. Adding that cloud formation in back of the egret gave me the extra bonus of a dramatic sky.”
Enhancing the photo took Ed a few hours. “It was a somewhat challenging image because of the horizon line and the blending involved near that,” he says. “First, using Photoshop and Luminar software, I isolated the bird to add the sky. Then I blended the sky and the horizon, subtly adding three or four elements into the sky and water. I use the Eraser tool and different opacity settings to blend to my satisfaction (‘Soft Light’ in ‘Layers’ is my friend). Next I added new color balance to make the photo more harmonious. Finally, I added noise to the overall image, selectively erasing different areas at different opacities.”
“I really put the extra time into this photo, because I wanted to turn it into a dynamic image,” Ed notes. “I also wanted to draw out details like those water droplets falling from the egret’s beak after it caught that fish. I was very happy with the way the image came out. I’d love to see it blown up large in a coffeeshop somewhere.”
Even though he’ll spend hours in front of the computer screen to create his art, Ed also knows that some of his best work has emerged when he forces himself to take a break. “I start to second-guess myself after so much time staring at the monitor,” he says. “One of the best pieces of advice I’ve heard when you’re creating fine art like this is to step away. I’ll sometimes walk away from the computer for an hour or two, or maybe not come back to it until the next day. That way, I’m looking at it with a fresh eye, and perhaps seeing it in a whole new light. Sometimes you need that new perspective to bring your photo to where you really want it to go.”
To see more of Ed Kelly’s work, go to www.edkellyphotography.com.
Final image
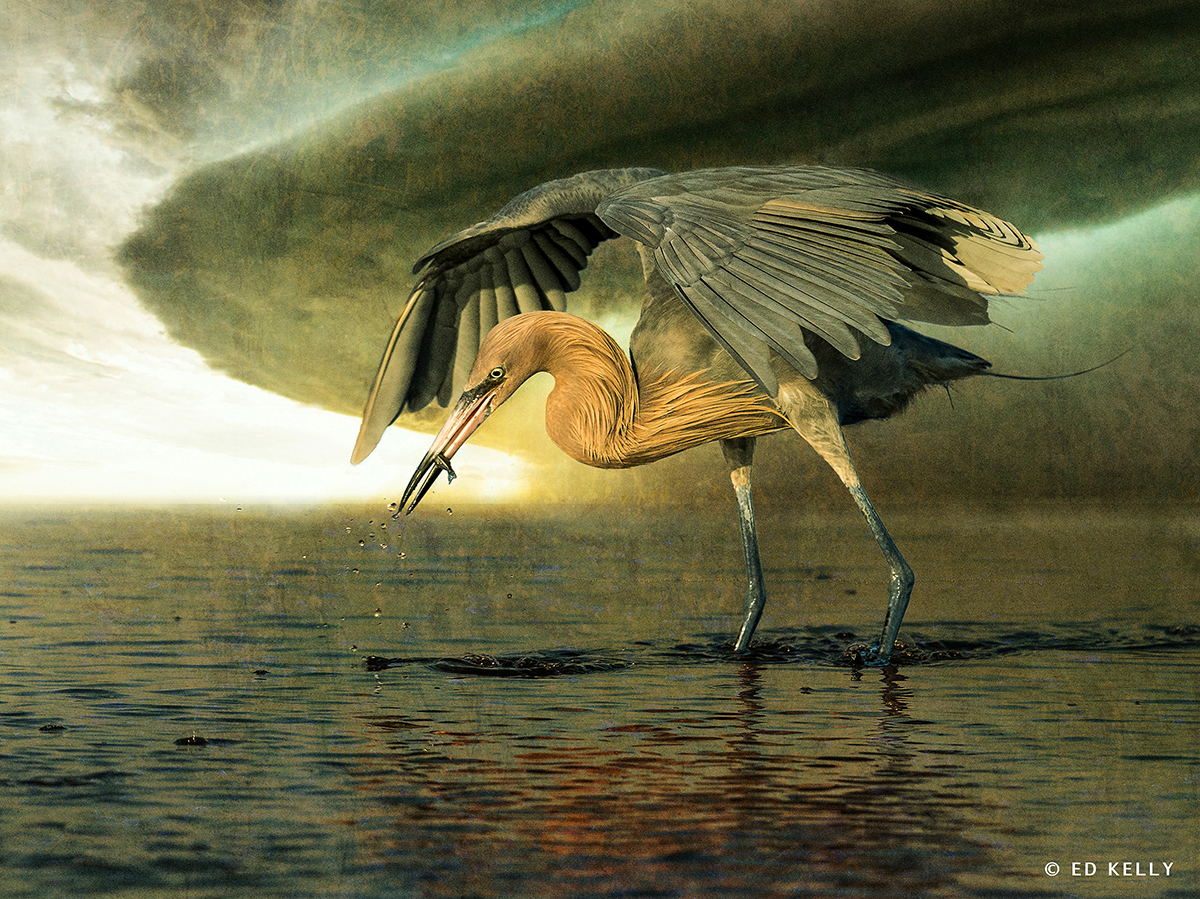
450mm, F/9, 1/1250 sec., ISO 400
Click image to view larger
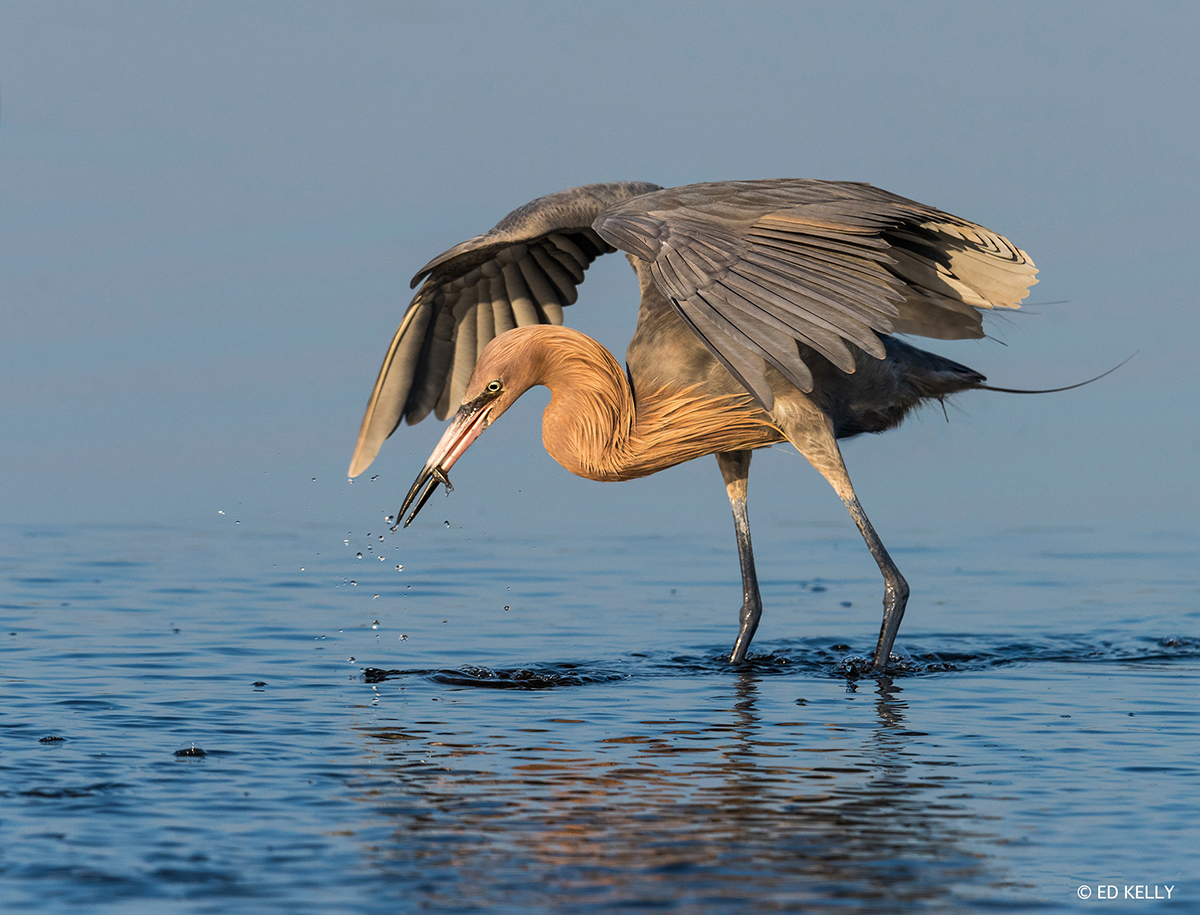
Original image
Click image to view larger
Background image

Click image to view larger
600mm, F/7.1, 1/1250 sec., ISO 2800
Click image to view larger
600mm, F/8, 1/320 sec., ISO 220
Click image to view larger

600mm, F/8, 1/250 sec., ISO 400
Click image to view larger

400mm, F/9, 1/400 sec., ISO 200
Click image to view larger
600mm, F/7.1, 1/320 sec., ISO 400
Click image to view larger
600mm, F/7.1, 1/250 sec., ISO 320
Click image to view larger
More Photo Tips | Watch Videos | Learn More About Tamron Lenses | Photo Gallery