The Rush of Discovery: Astrophotography Version
Kevin Floerke loves the surprises he finds in the night sky with his Tamron 17-28mm F2.8 and 28-200mm F2.8-5.6 lenses.
Share the article:
More Photo Tips | Video Gallery | Photo Gallery | Enewsletter sign-up
By Jenn Gidman
Images by Kevin Floerke
Falling into photography was a natural transition for Kevin Floerke, whose past work in archaeology and anthropology brought him to remote places on six continents, from the deepest jungles of the Peruvian Amazon to high-altitude ceremonial sites. “I was teaching archaeology alongside National Geographic explorer Peter Frost and other world-class photographers, and before I knew it, I was awed by how they were to able to capture the power and wonder of these incredible places we were in,” he says.
Today, the California native lives in Sedona, Arizona, the perfect spot to try his hand at astrophotography. “Sedona is an international dark sky community, meaning it’s an officially recognized location dedicated to preserving the night sky, with as little light pollution as possible,” he says. In Kevin’s camera bag for his night sky photos, along with his Sony mirrorless camera system: his Tamron 17-28mm F/2.8 Di III RXD wide-angle zoom and 28-200mm F/2.8-5.6 Di III RXD all-in-one zoom.
“I guided a very arduous trek in Peru last year, and the only lenses I brought were these two,” he says. “The versatility covered me for the entire trip, and my whole kit fit in the lower portion of a daypack. Both lenses are so compact and lightweight, yet they don’t sacrifice anything in image quality.”
KEVIN’S QUICK TIPS
Take test shots to ensure crisp photos.
Do this before you commit to stacking 30-second exposures. My Sony camera has a feature that allows you to increase monitor brightness at the touch of a button—either manually or via a “night” mode. Then I use my focus magnifier to get as close as I can on an area of the sky where there are going to be prominent stars, focusing until a star is as small as possible in the viewfinder. When I find that exact spot, I try not to change it for the rest of the shoot.
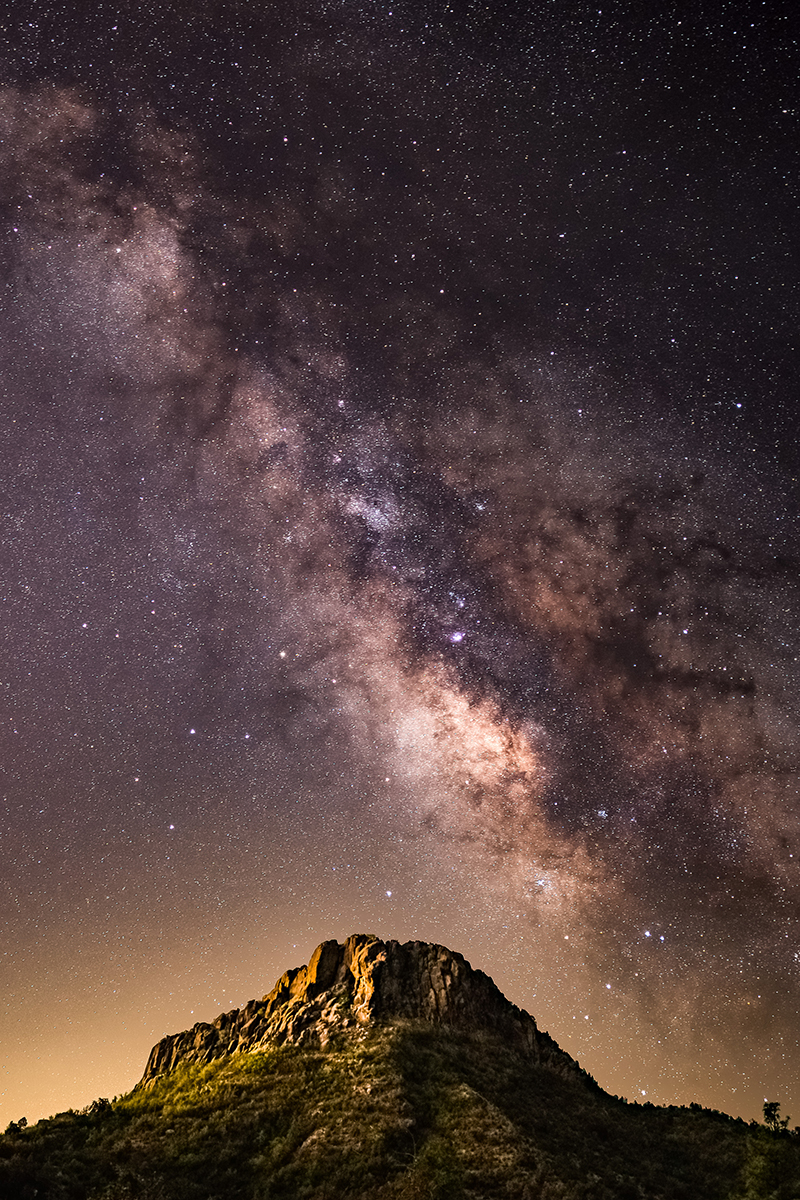
17-28mm (28mm), F/2.8, 15 sec., ISO 3200
Click image to view larger
Incorporate other elements besides the sky.
Something I learned early on: Photos of the stars with no other context are really boring. Many people have never seen the Milky Way, for example, so to make the photo have more impact, add context. By using foreground elements or other subject matter, your viewer will feel like they’re there with you.

17-28mm (17mm), F/2.8, 20 sec., ISO 5000
Click image to view larger
Tap into light painting.
I always bring a headlamp and an on-camera LED light. That allows me to adjust the level and temperature of that light so it balances well with whatever light I'm getting out of the sky or off the moon. When I shot “Mosquito Lakes by Moonlight” in the Sierra Nevada, I had a friend “paint” those lily pads with a bit of light from camera left, while another friend briefly flashed a big spotlight over the cabin on the far side of the lake. Otherwise, this photo would’ve just been a silhouette of the tree line.
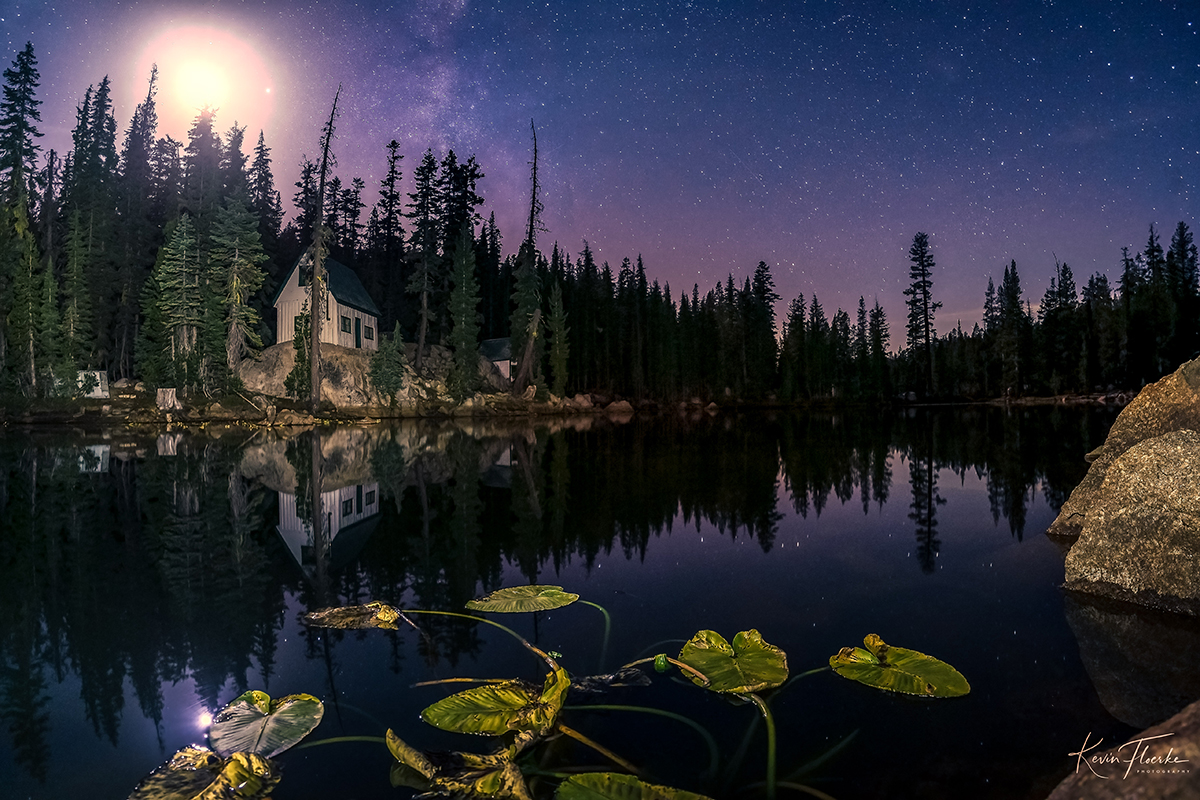
17-28mm (17mm), F/4, 20 sec., ISO 1600
Click image to view larger
Embrace unexpected light sources.
I captured the “Galactic Arch” in California’s Sierra Nevada, in one of the darkest parts of that highway corridor. I wanted a panorama showing the entire Milky Way arc, so I combined a series of single exposures. The light coming off the horizon to the left is Reno, which is another interesting aspect of astrophotography: Your camera will pick up light sources from so far away. I was actually glad to work it into my image here, though, because it balances the light of the galaxy’s center at the other end.

17-28mm (17mm), F/2.8, 20 sec., ISO 3200
Click image to view larger
Be open to airglow.
Airglow is that faint luminescence in the sky that comes about when molecules in the atmosphere radiate solar energy gathered during the day due to their exposure to sunlight. Your camera often “sees” airglow when you don’t, meaning there’s often this rush of discovery when you see what you captured.
When I took this photo of the Granite Dells at Arizona’s Watson Lake, I could see with my naked eye there was some light pollution coming off the town of Prescott Valley, behind the rocks. I was disappointed at first, because I thought I wouldn’t get a shot of the Milky Way, but as soon as I set up my camera, I could see I was going to capture something just as cool.
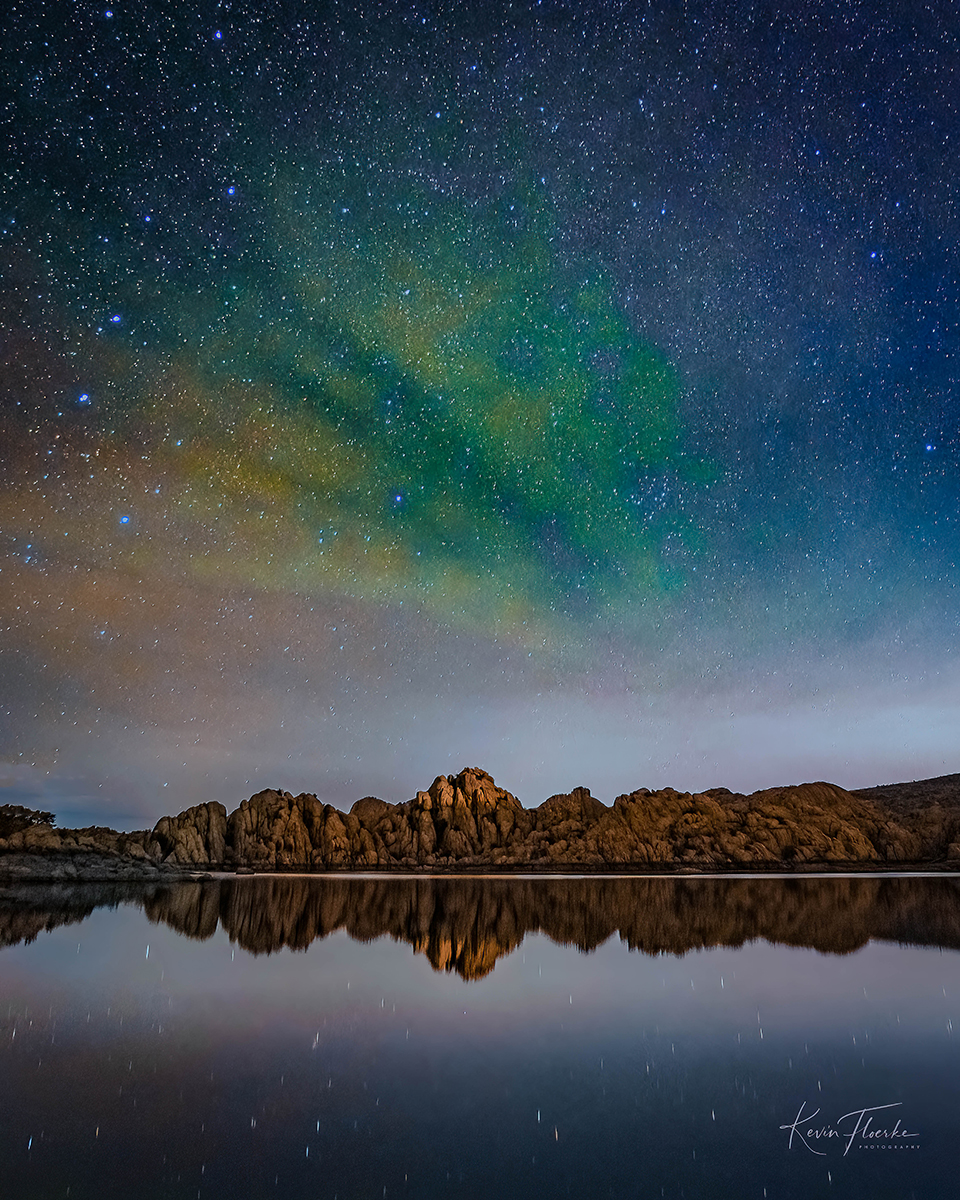
17-28mm (17mm), F/2.8, 20 sec., ISO 2000
Click image to view larger
Experiment with time lapses to create “wait a minute” images.
That’s what I did for “Monsoon Moon,” featuring the multiple lightning strikes. There was an intense storm blowing up from the south, and a full moon coming up behind the storm clouds. I decided to go as wide as I could with the 28-200, lined up that shot, and then started my time lapse. The image you see here is the compilation of all the lightning strikes I witnessed over 45 minutes.
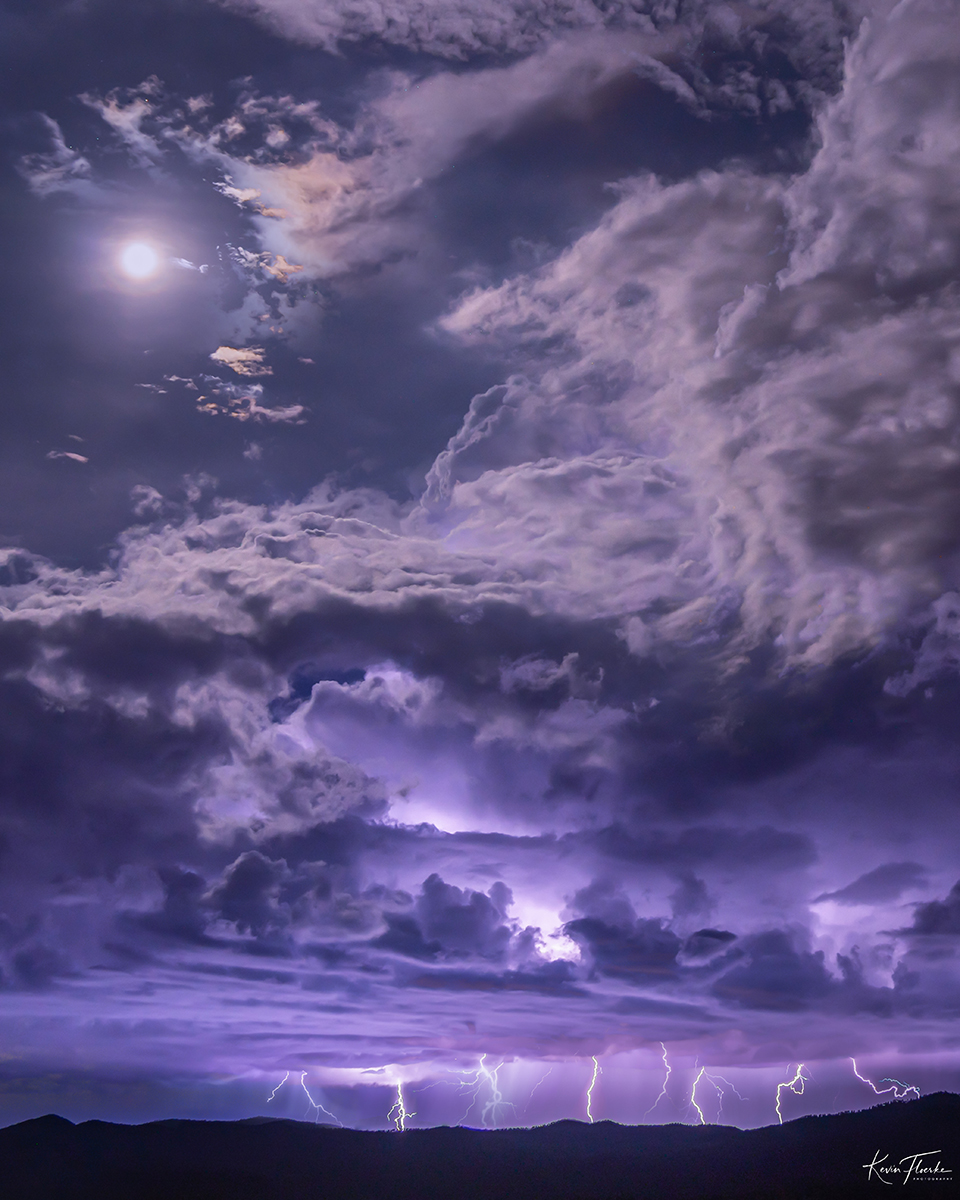
28-200mm (28mm), F/5.6, 1.0 sec., ISO 400
Click image to view larger
To see more of Kevin Floerke’s work, check out his website and Instagram. To find out more about Kevin’s September astrophotography tour in Bolivia and Chile, go here.

17-28mm (22mm), F/2.8, 25 sec., ISO 640
Click image to view larger
More Photo Tips | Watch Videos | Learn More About Tamron Lenses | Photo Gallery