Wide Angle On Track
Jay P. Morgan explores LA’s Union Station train depot with his Tamron 17-50mm lens.
Share the article:
More Photo Tips | Video Gallery | Photo Gallery | Enewsletter sign-up
By Jenn Gidman
Images by Jay P. Morgan
Slanted Lens owner Jay P. Morgan is renowned for his quirky, colorful portraits—the Southern California commercial photographer describes his style as somewhere between Norman Rockwell and a Gary Larson Far Side cartoon—but occasionally, he dons his street photographer hat and pounds the pavement in Los Angeles, on the lookout for subjects that will inspire a different part of his brain.
On a recent late-fall adventure at LA’s Union Station train depot, Jay P. put the Tamron 17-50mm F/4 Di III VXD ultra-wide-angle lens through its paces on his Sony mirrorless camera system. “The 50mm end of the lens is perfect for taking photos of people on the street, or when you want to zoom in close to capture the intricacies of smaller objects,” he says. “Meanwhile, the wide end allows you to capture more of a location’s architecture. Weighing just 16.2 ounces, the lens is light and compact. I also use this lens for video, and thanks to the BBAR (Broad-Band Anti-Reflection)-G2 coating, the 17-50mm cuts down so much on flare. The other day I was shooting directly into the sun and this lens performed so well.”
JAY P’S QUICK ARCHITECTURE PHOTOGRAPHY TIPS
Control your depth of field.
You have to be strategic about whether to emphasize a shallow depth of field to isolate your subject, or a deeper depth of field to embrace the entirety of the scene. At the Union Station depot in Los Angeles, I wanted all three of these Metrolink trains in focus, while still concentrating on the train up front, which is why I shot this image at F6.3.
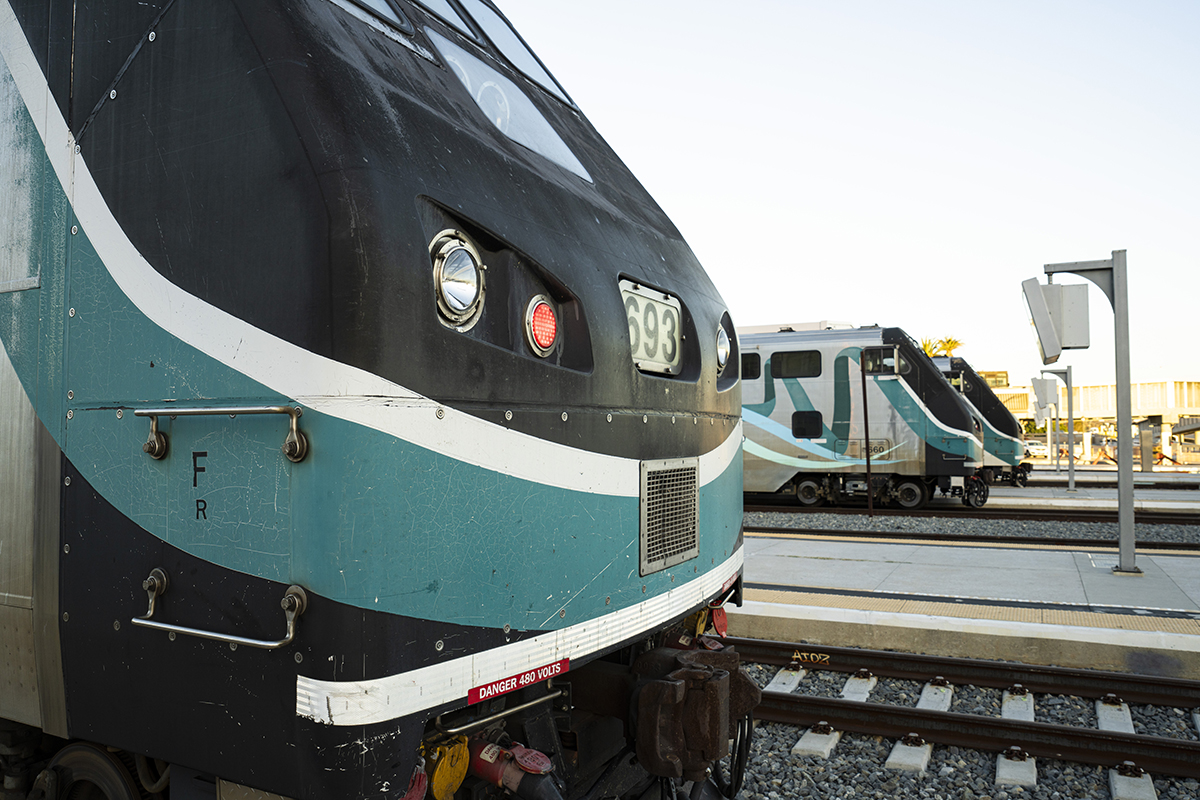
17-50mm (26mm), F6.3, 1/160 sec., ISO 200
Click image to view larger
Always look up.
It’s very easy to get caught in the eye-level zone, but it’s important to scope out all your surroundings from a variety of perspectives when seeking out subjects. When I spotted this colorful mural inside the station, I asked myself: How could I place the mural in a composition that gives me something beyond the obvious? I thought it worked so well with the dome above it—the roundness of the dome somehow brings the eye directly back to that person in the center of the mural.
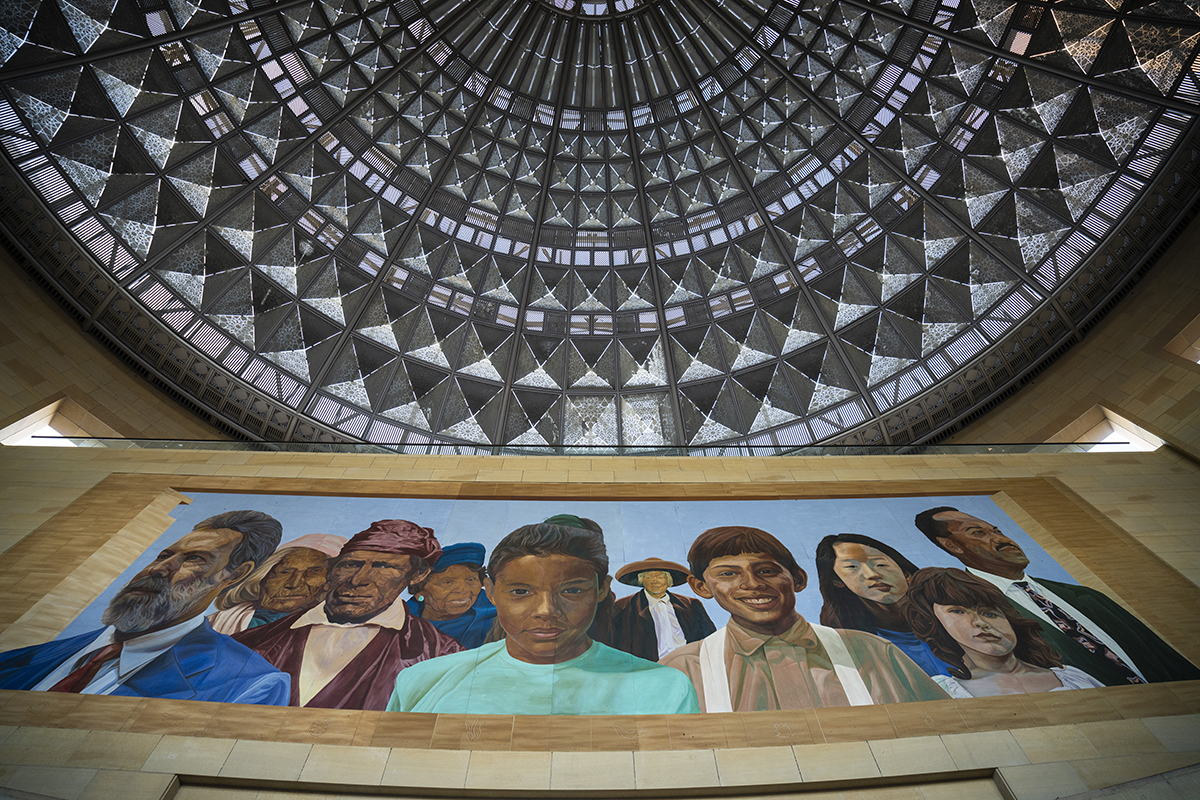
17-50mm (17mm), F4, 1/80 sec., ISO 640
Click image to view larger
I also took the “look up” perspective in my photo of the interior clock. Placing the clock in the foreground like that gives the viewer’s eyes something to latch onto and centers their attention, but there are other layers to the image, too, like the long lines of the window that push up into those beautiful ceiling tiles bathed in that warm golden light.
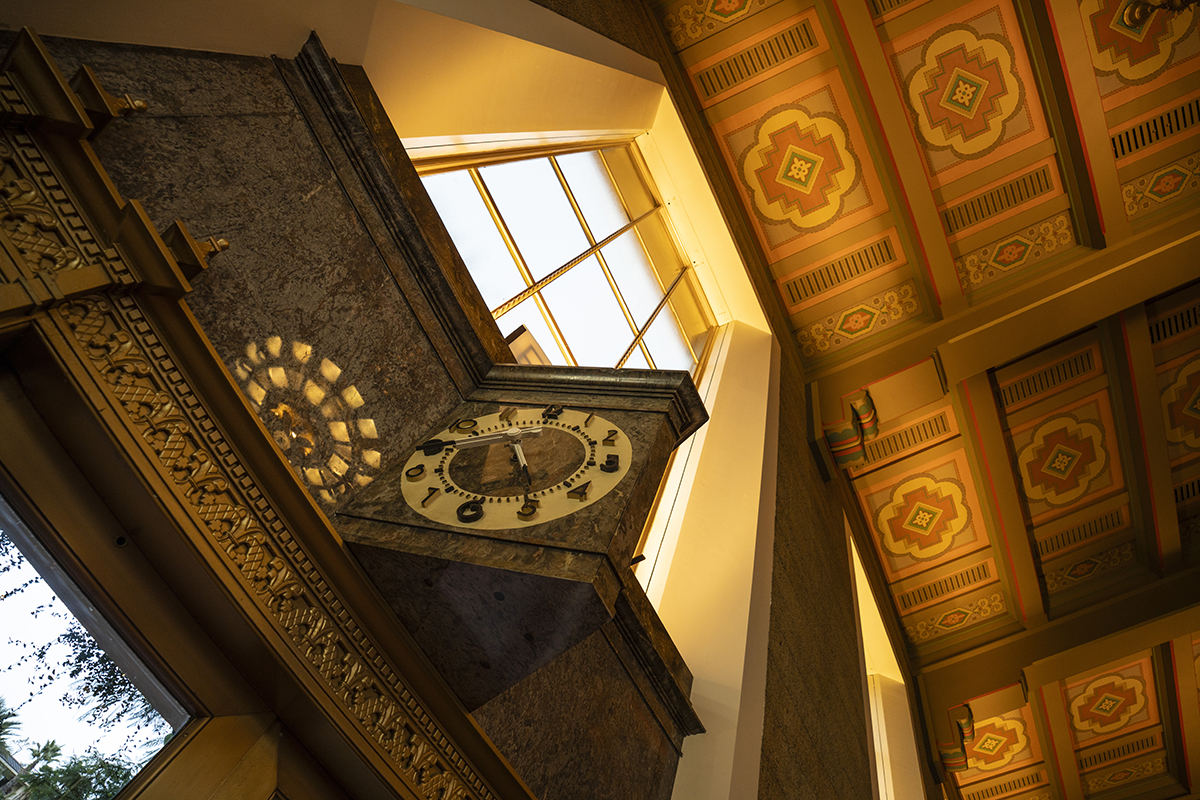
17-50mm (17mm), F4.5, 1/80 sec., ISO 500
Click image to view larger
Use the sky to complement or contrast with your subject.
When I spotted that illuminated “Union Station” sign tower outside of the Metrolink depot, it was during one of my favorite times of day: dusk, or the blue hour, when there’s not much color in the sky but it’s not yet completely black. It’s the perfect backdrop for the warm glow of the sign. The Tamron 17-50mm VC performs so well in these low-light conditions.
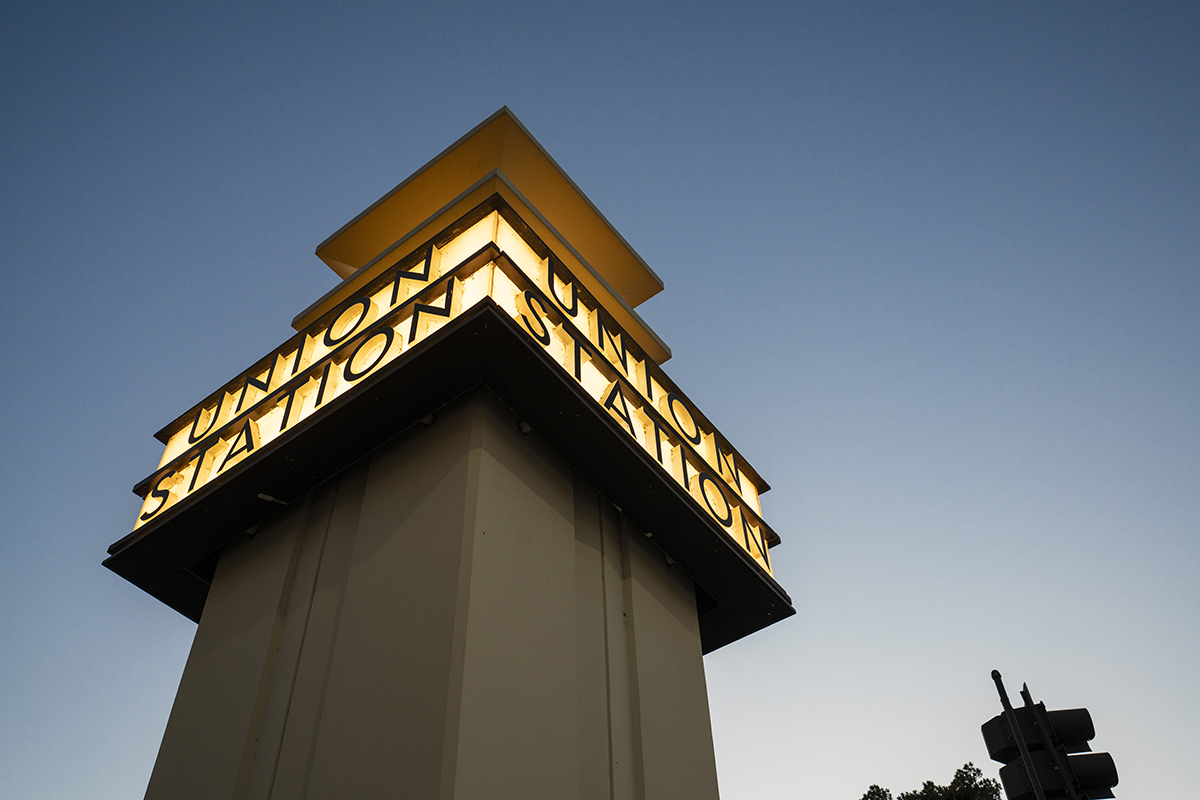
17-50mm (32mm), F7.1, 1/30 sec., ISO 400
Click image to view larger
Play around with close-ups.
Don’t forget those detail shots. In street photography, your choice of lens can significantly impact your ability to capture such images. With a minimum object distance (MOD) of 7.5 inches and maximum magnification ratio of 1:4.6 at the wide end, and an MOD of 11.8 inches and maximum magnification ratio of 1:3.8 at the 50mm end, the Tamron 17-50mm was the ideal lens for me to use when taking pictures of this sundial. It’s not that big of an object, and I was zoomed in very tight. You can see all of the intricate details present on the sundial, including a bit of graffiti.
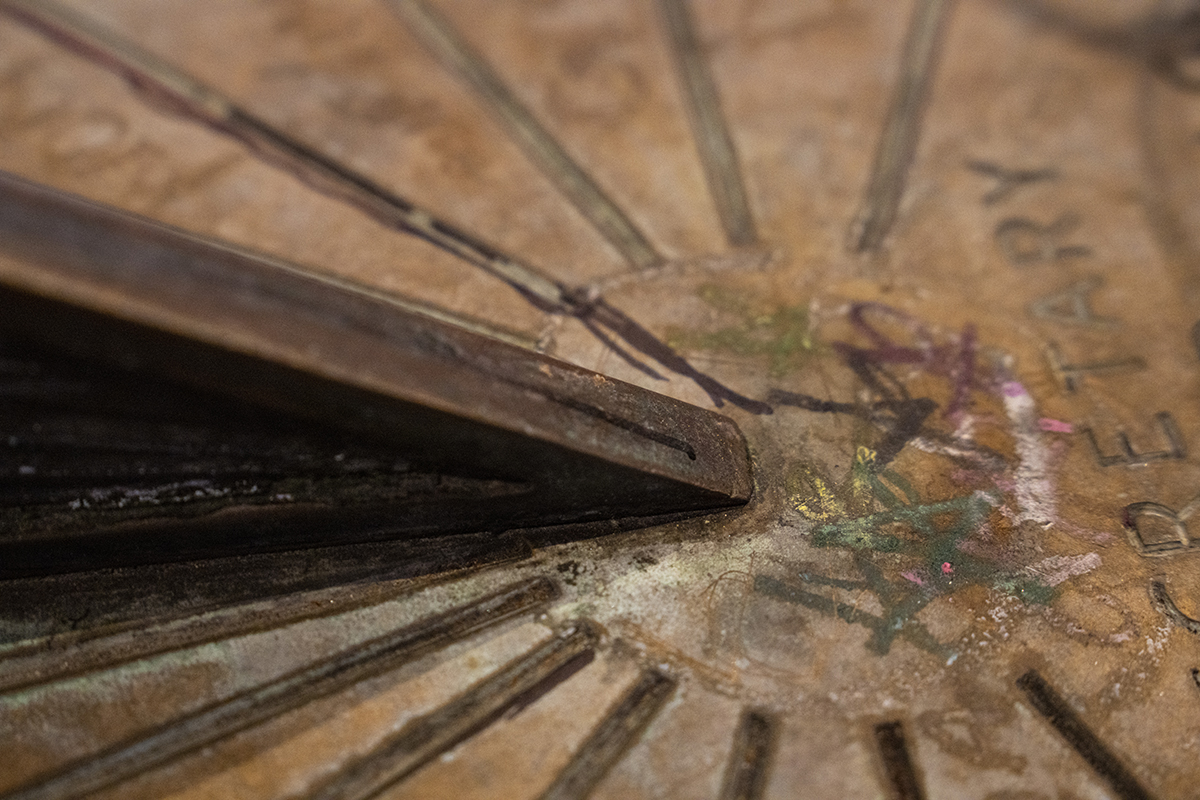
17-50mm (50mm), F5.6, 1/40 sec., ISO 4000
Click image to view larger
Tap into stitching.
If you have two or three photos taken at 50mm and stitch them together, your area of coverage may be the same as if you’d taken them at 24mm or 35mm, but your perspective will be completely different. It’s a more realistic look that I prefer, and there are so many platforms that allow for stitching—Photoshop, Lightroom, even in Camera Raw—that it’s an easily accessible tool.
To see more of Jay P. Morgan’s work, check out his website. Or, read his own review of the 17-50mm F4 lens.
Is your Tamron News subscription up to date? Click to subscribe to all editions of Tamron News featuring how-to tips, new product news, contest announcements and inspiration!
More Photo Tips | Watch Videos | Learn More About Tamron Lenses | Photo Gallery