Feathers in Focus
Ken Hubbard test-drives the new Tamron 50-300mm VC telephoto lens at a Florida alligator farm’s rookery.
Share the article:
More Photo Tips | Video Gallery | Photo Gallery | Enewsletter sign-up
By Jenn Gidman
Images by Ken Hubbard
One of Florida’s oldest attractions is the St. Augustine Alligator Farm, featuring dozens of reptilian species and a rookery, where visitors can view free-roaming birds such as roseate spoonbills, tricolored herons, great egrets, macaws, cockatoos, and more. “This isn’t a roadside tourist trap,” notes photographer Ken Hubbard, who recently visited the rookery. “It’s been around for more than a century, and it’s wild, but a controlled wild. There’s nowhere else that I’ve been to that allows you to get so close to the birds—I was just a couple of feet away from some of them from my spot on the boardwalk.”
For his avian adventures, Ken used the new Tamron 50-300mm Di III VC VXD telephoto zoom. “This lens is perfect for a controlled environment like this, where you have many opportunities for close-range observation of the birds’ behavior,” he says. “With a length of less than 6 inches and weighing just 23.5 ounces, the 50-300mm VC is easy to carry around for a day of exploration, and my images with this lens are all super sharp.”
KEN’S QUICK TIPS
Don’t let your space limit your perspective.
You’re mainly viewing birds from the confined boardwalk at the rookery, so it may initially seem like you don’t have a lot of perspectives to choose from. But the boardwalk is about 200 feet long and takes an S-shaped path, so you can move up and down the boardwalk to find those different perspectives, zooming in and out with the 50-300mm to maximize your photo opps. The birds are mostly at eye level there, so you can take pictures of them straight on, or you can shoot down at them from a couple of inches higher or crouch down for a lower perspective.
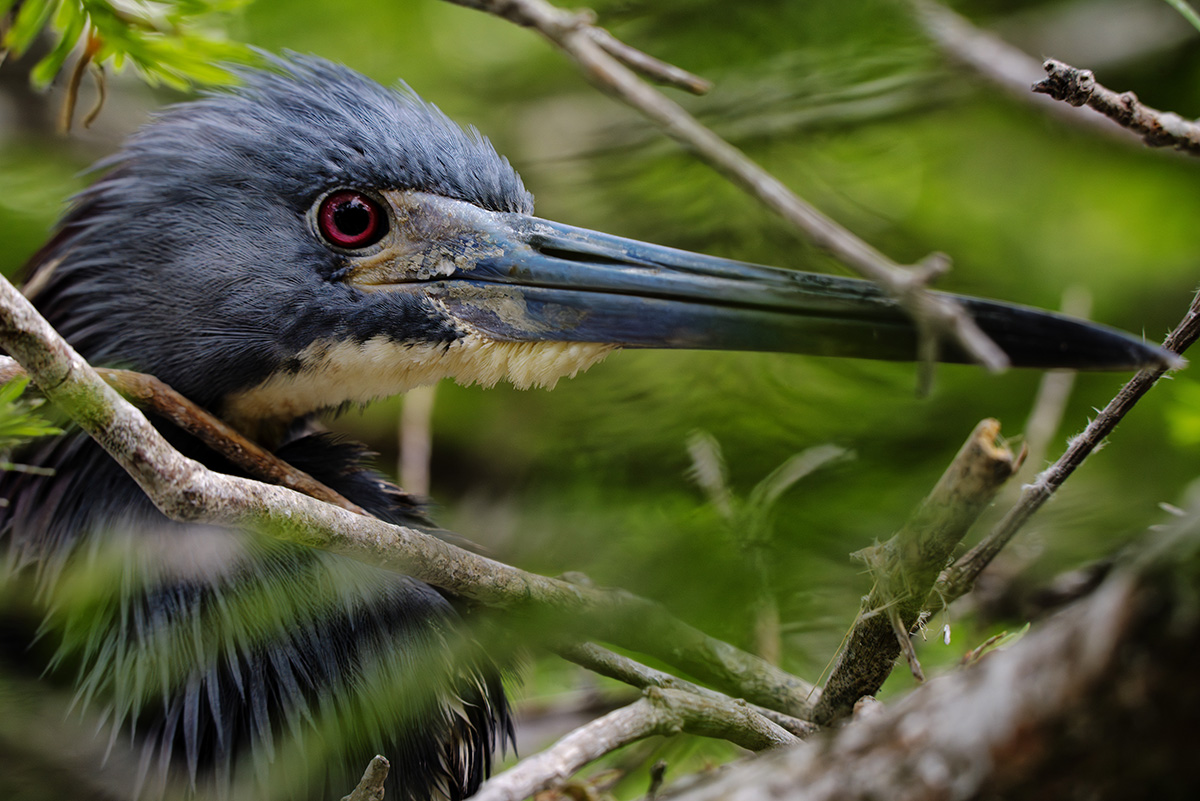
50-300mm (177mm), F11, 1/160 sec., ISO 800
Click image to view larger
Make the most of the lighting.
Florida is notorious for its volatile weather—mornings can bring bright sunshine, the afternoons overcast skies and thunderstorms. I usually seek diffused light, as it balances out your images by softening shadows and highlights and reducing the harshness that bright sun can bring. That’s why I prefer when some clouds float in, so that I can enjoy some of that diffused light.
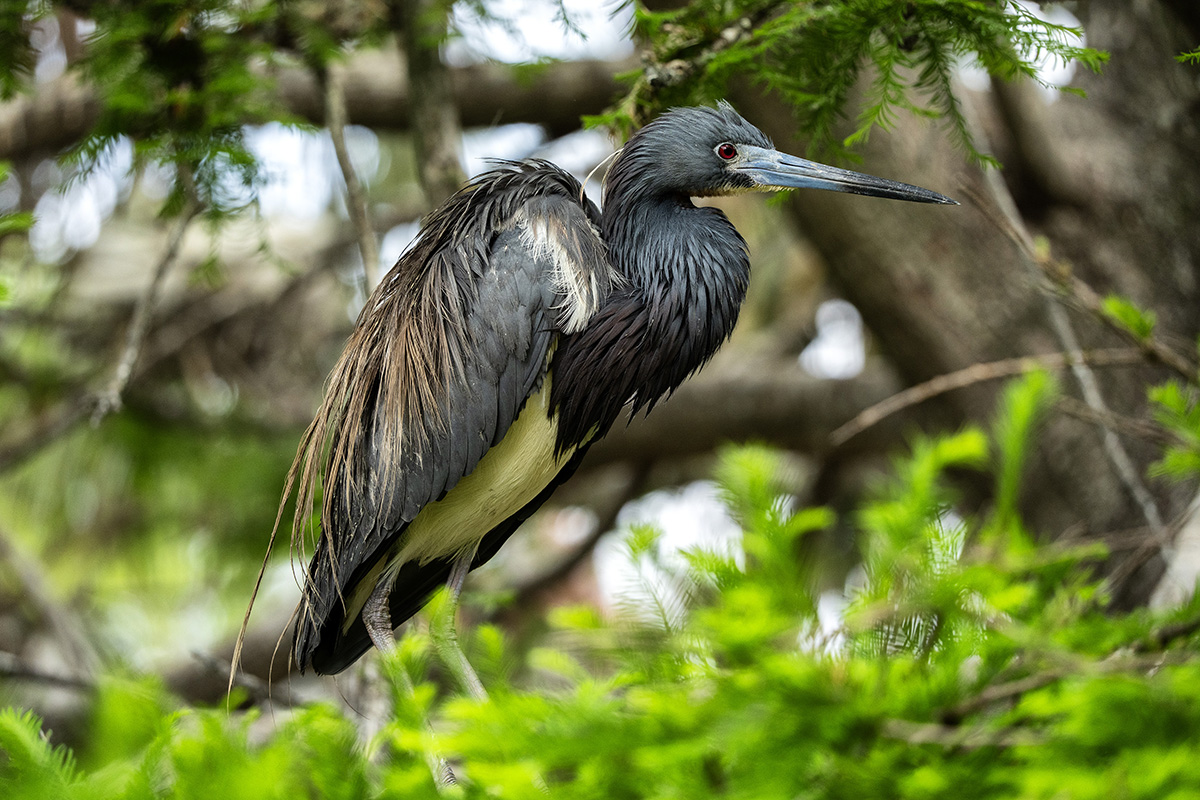
50-300mm (195mm), F6.3, 1/400 sec., ISO 800
Click image to view larger
If the sun is out, you can either take pictures with the sun behind you, hitting the bird directly, or, if you have a bird with thinner feathers like the spoonbill, you can try to shoot it backlit when it’s in flight with its wings expanded, so that its wings glow. For birds with thicker plumage, like ospreys, you won’t get that same effect.
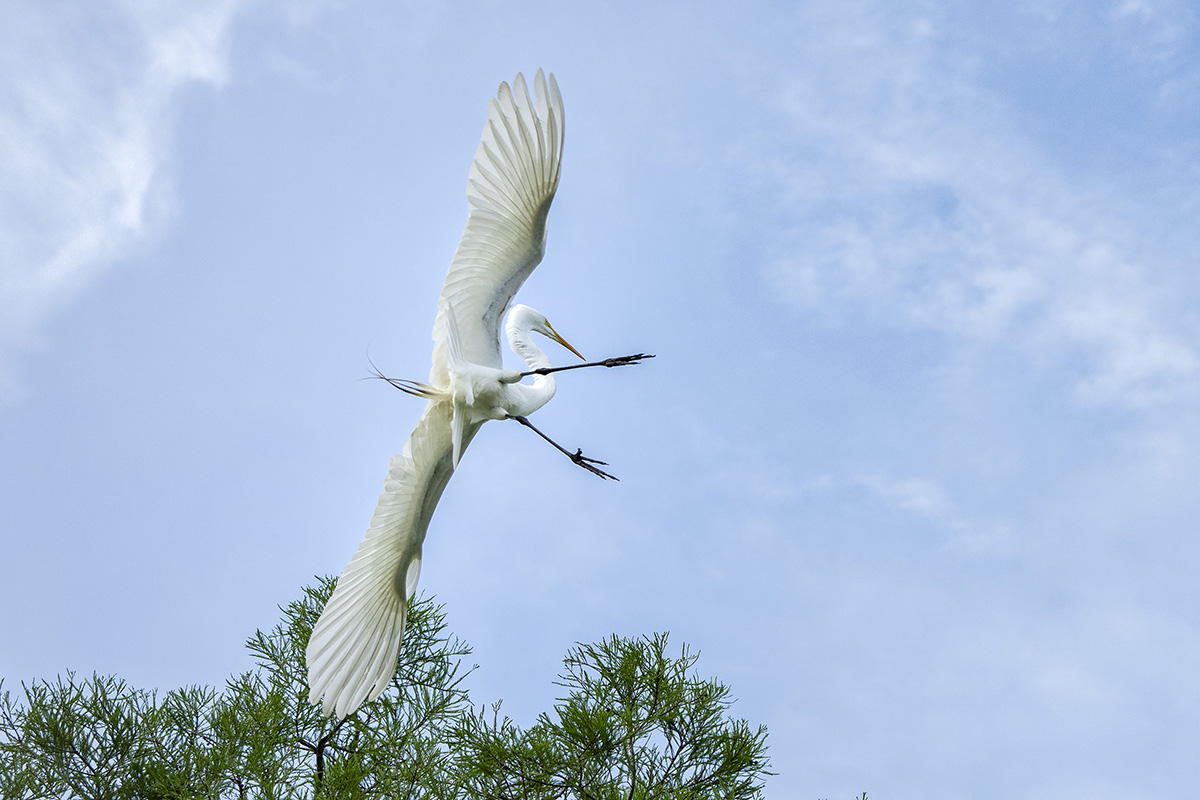
50-300mm (84mm), F6.3, 1/2500 sec., ISO 1600
Click image to view larger
Master capturing birds in motion.
Learn to be comfortable panning, and keep shooting in continuous mode as you’re doing so. In this scenario, the camera will lock on the bird and continue refocusing as it flies closer to you, then further away. And don’t stop panning once your subject flies in front of the background you want—otherwise, you’ll capture a blurry bird. Many of today’s advanced camera systems feature eye detection autofocus, so you can pick one of the bird’s eyes as your focal point.
Figure out the birds’ routines.
Pay close attention to each species’ behaviors. Birds often exhibit specific tells before heading into flight, for example, such as pooping to lighten the load. In a rookery like this one, many birds are also building nests, which involves repeat trips to gather materials. Once you observe a bird’s pattern in collecting those materials, you can strategically position yourself for the best shots.
For instance, in my photo of the tricolored heron flying with the sticks in its mouth, I sat there for two minutes watching it fly back and forth. I positioned myself near its nest and would start firing away with my camera as soon as I saw it come around the bend; I simply followed it all the way to its nest. The heron repeated this flight a good five or six times in those few minutes, giving me ample opportunity to nail the shot.
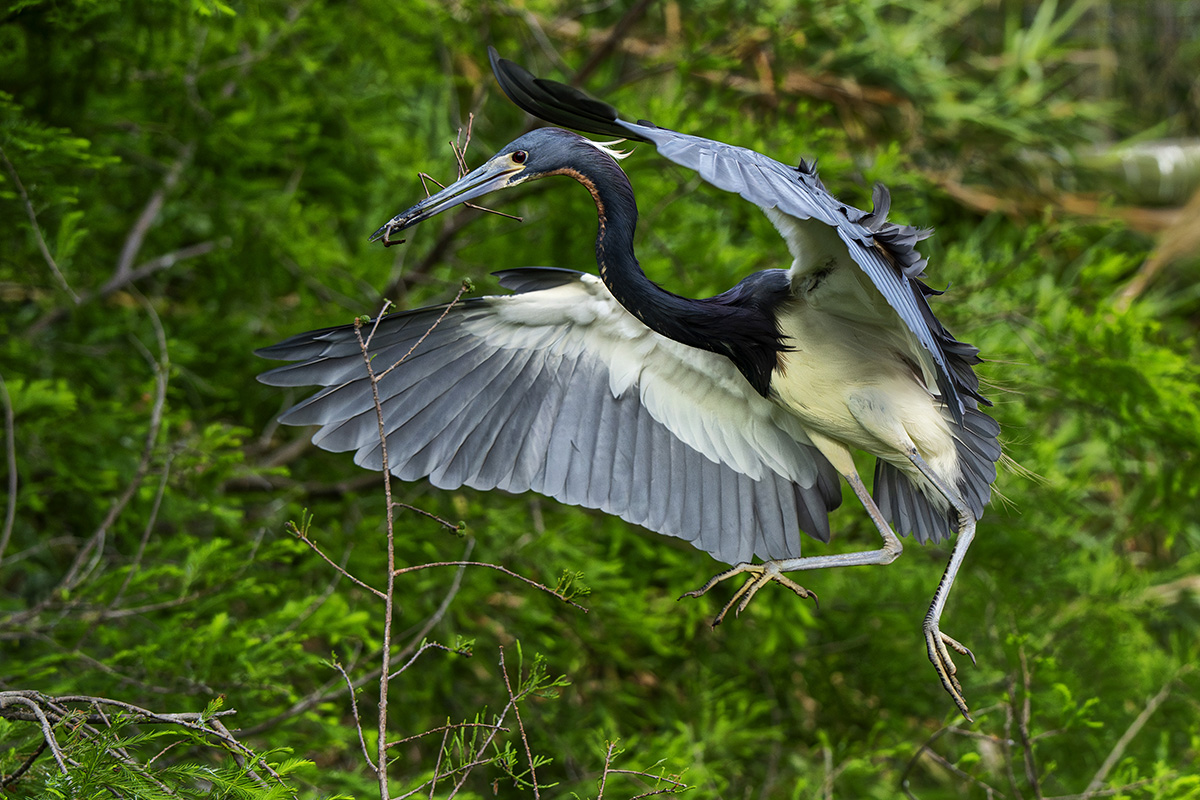
50-300mm (98mm), F6.3, 1/2500 sec., ISO 1600
Click image to view larger
Don’t truncate.
When taking pictures of birds with a telephoto like the 50-300mm VC, if you’re zoomed in on a bird that looks like it’s about to take off, zoom out just enough to give yourself some breathing room so you don’t cut off their wingspan or limbs. For instance, in my image of the spoonbill, where I’m zoomed in nice and close at 290mm, if it had been on the verge of flying away, I would’ve risked cropping off its wings and feet once it was airborne. For my photos of the tri-colored heron, I’m zoomed in to 177mm for a closeup, but I’m at 98mm for the heron photo with the sticks. Adjust your zoom thoughtfully.
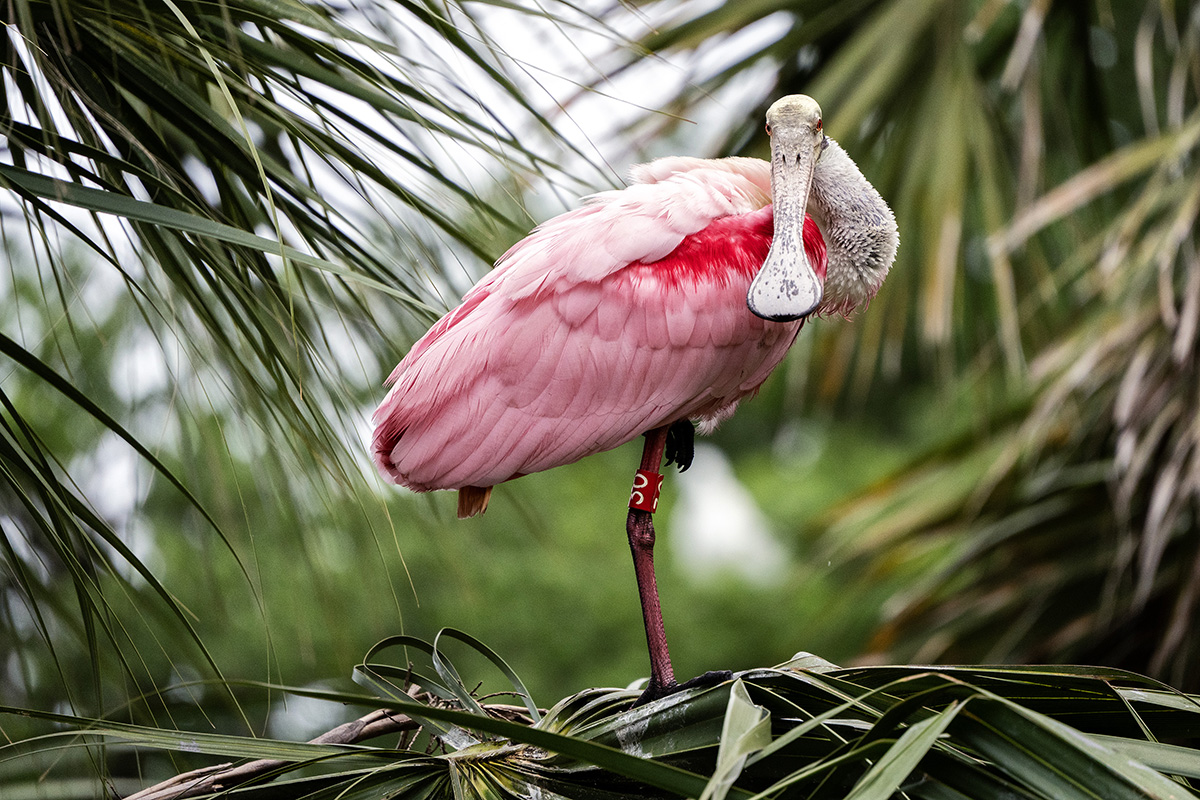
50-300mm (290mm), F6.3, 1/1000 sec., ISO 1600
Click image to view larger
To see more of Ken Hubbard’s work, check out his website and Instagram.
Is your Tamron News subscription up to date? Click to subscribe to all editions of Tamron News featuring how-to tips, new product news, contest announcements and inspiration!
More Photo Tips | Watch Videos | Learn More About Tamron Lenses | Photo Gallery